
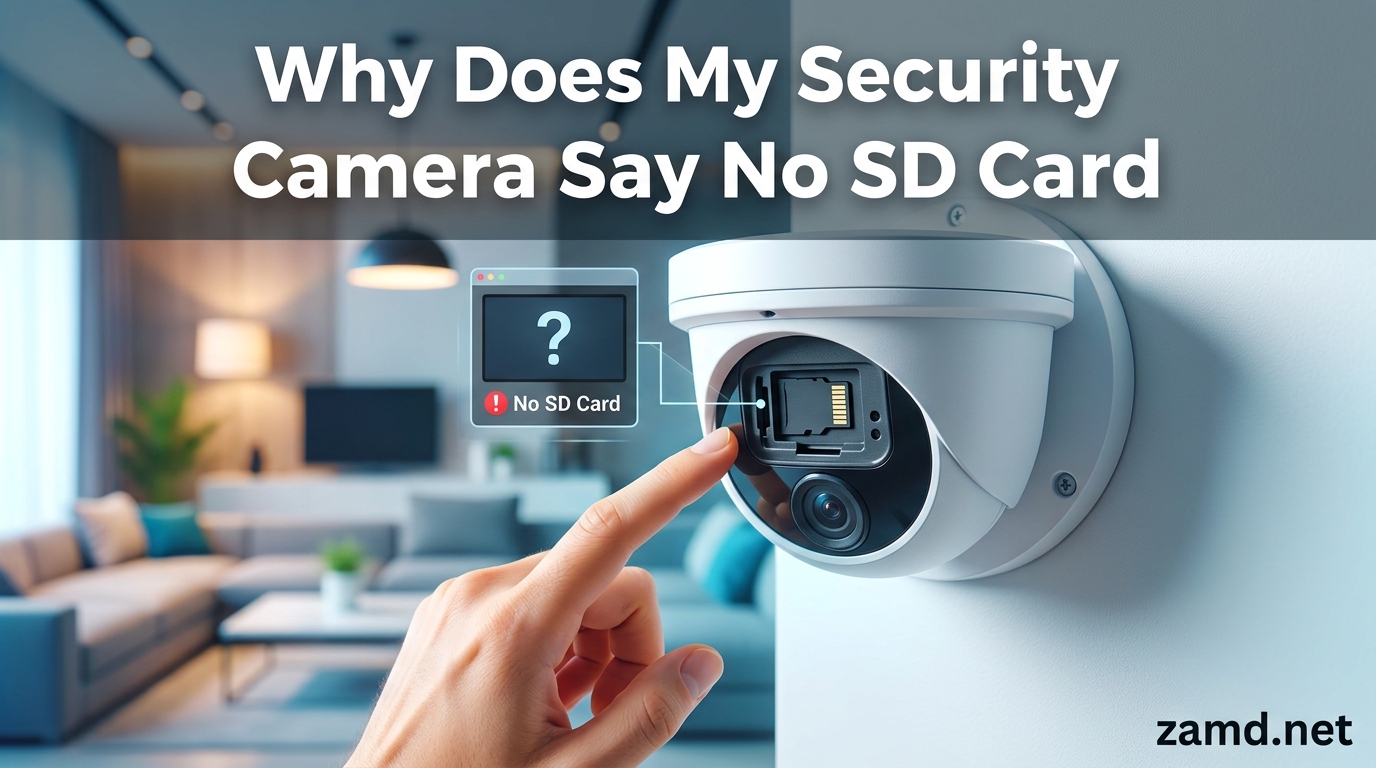
You slide a microSD card into your security camera, close the slot, and open the app. Instead of seeing your storage status, you get a message: “No SD card detected.” If you are wondering why does my security camera say no SD card with a card inserted, you are far from alone. This is one of the most reported issues across security camera forums, support pages, and community threads.
The frustration is real. You can feel the card seated in the slot. You know it works because you tested it on your computer. But the camera refuses to acknowledge it exists. Our team has tracked this exact complaint across Wyze forums, Reddit threads for Reolink and Tapo users, and official support pages from EZVIZ and Arlo. The error cuts across every brand and price point.
Here is the good news. In the vast majority of cases, the fix is simple and free. The problem usually falls into one of seven categories: physical insertion issues, card incompatibility, wrong file system format, firmware bugs, power supply problems, counterfeit cards, or a corrupted file system. Most of these take under five minutes to diagnose and resolve.
In this guide, we walk through every possible cause, starting with the quickest fixes and working toward the more advanced ones. By the end, you will know exactly how to get your camera recognizing that card and recording again.
Table of Contents
Quick Answer: Why Your Security Camera Says “No SD Card”
Your security camera says “No SD card” with a card inserted because the camera cannot establish a read connection with the card. This happens most often due to a physical seating problem, a locked write-protection switch, an incompatible card speed class, an unsupported file system format, outdated firmware, or insufficient power to the camera.
The seven most common causes, in order of how frequently they occur:
- The card is not fully seated in the slot (physical insertion issue)
- The SD card lock switch is in the locked position
- The card does not meet the camera’s speed class requirement (Class 10 or UHS-1)
- The card exceeds the camera’s maximum supported capacity
- The file system is wrong (should be FAT32 under 64GB, exFAT at 64GB and above)
- The camera firmware has a bug that breaks card detection
- The power adapter is underpowered, preventing the card slot from initializing
If you want the fastest path to a fix, start with the step-by-step troubleshooting guide below. Most users resolve this issue within the first three steps.
SD Card Compatibility: Getting the Basics Right
Compatibility is where most “No SD card” errors begin. Security cameras are pickier than phones or computers about which cards they accept. A card that works perfectly in your laptop can be completely invisible to your camera.
The reason comes down to how cameras initialize storage. When a security camera boots up, it checks the card against a specific set of requirements. If even one does not match, the camera reports the card as missing rather than incompatible. This is why the error message is so misleading.
Speed Class Ratings Explained: Class 10, UHS-1, and U3
Nearly every modern security camera requires at minimum a Class 10 or UHS-1 (also called U1) rated microSD card. Class 10 guarantees a minimum sequential write speed of 10 MB/s, which is the baseline for continuous video recording. Without this speed, the camera cannot write video files fast enough and will reject the card entirely.
UHS-1 cards (identifiable by the Roman numeral “1” stamped on the card) offer the same 10 MB/s minimum but use a faster bus interface. U3 cards go further, guaranteeing 30 MB/s minimum write speeds. If your camera supports 2K or 4K recording, check whether U3 is required. Using a Class 4 or Class 6 card in a camera that demands Class 10 is one of the most common reasons for a false “No SD card” error.
You can check the speed class by looking at the printed markings on the card itself. The number inside the “C” symbol is the Class rating. The number inside the “U” symbol is the UHS speed class. If you bought a no-name card online with no visible class marking, that is already a red flag.
Capacity Limits by Camera Brand
Every camera has a maximum supported capacity. Exceed it, and the camera may not detect the card at all. Here are the published limits for popular security camera brands in 2026:
- Wyze Cam (v3, v4, Pan v2/v3): Up to 256GB (some models support 512GB with exFAT)
- Ring (Spotlight Cam, Stick Up Cam): Does not use SD cards (uses proprietary batteries and cloud). Ring Alarm Pro supports microSD up to 1TB for local processing.
- Arlo (Pro 4, Pro 5, Ultra): Up to 32GB for Pro series. Ultra supports up to 64GB via SmartHub.
- Tapo (C200, C210, C320): Up to 512GB (C210 and newer). Older models cap at 128GB.
- Reolink (Argus series, Lumus): Up to 64GB on most battery models. Some newer models support 128GB.
- EZVIZ (C6N, C3X, C8C): Up to 256GB on most current models. Older models cap at 128GB.
- Blink (Outdoor, Indoor): Up to 256GB via Sync Module 2. Direct-to-camera varies by model.
- Eufy (eufyCam, SoloCam): Up to 128GB on most models with HomeBase support.
If you are using a 256GB card in an older Arlo Pro 2 that only supports 32GB, the camera will not detect it. Always check your specific model’s documentation. The capacity limit is tied to the file system the camera supports.
File System Requirements: FAT32 vs exFAT
File system format is the second most common compatibility failure. Security cameras typically support two file systems:
FAT32 is required for cards under 64GB. It is the universal format that virtually every camera supports. However, FAT32 has a 32GB partition limit in Windows’ built-in formatter, meaning you need a third-party tool to format a 64GB+ card as FAT32.
exFAT is required for cards 64GB and above on cameras that support it. exFAT removes the 32GB partition limit and handles large files better. However, not all cameras support exFAT. If your camera only supports FAT32 and you insert an exFAT-formatted 128GB card, the camera will say “No SD card.”
The safest approach: format the card through the camera’s own app rather than on your computer. The camera will apply the correct file system automatically. We cover this in detail in the formatting section below.
Physical Inspection: The Most Overlooked Fixes
Before diving into software troubleshooting, check the physical card and slot. A surprising number of “No SD card” errors come down to something mechanical. These fixes take seconds and cost nothing.
Check the SD Card Lock Switch
Full-size SD cards (and some microSD adapters) have a tiny plastic switch on the left edge. When this switch slides down to the “Lock” position, the card becomes read-only. Some cameras interpret a locked card as “no card present” rather than “card is locked.”
This is one of the most under-covered fixes online. Only about 25% of troubleshooting guides mention it. If you are using a microSD-to-SD adapter in a camera with a full-size slot, check that switch. Slide it up toward the contacts to unlock the card.
Standard microSD cards do not have a lock switch. But if your camera uses a full-size SD card (common on some older PoE camera models and NVR systems), this is one of the first things to verify.
Clean the Card Contacts
The gold contact pins on a microSD card can accumulate dust, oils from your fingers, and corrosion over time. Dirty contacts prevent the camera from reading the card, producing the same “No SD card” error.
To clean the contacts, use a dry microfiber cloth or a cotton swab with a small amount of isopropyl alcohol. Gently wipe the gold pins in one direction. Let the card dry completely before reinserting it. Never use water or abrasive materials.
Also inspect the card slot on the camera itself. Shine a flashlight into the slot and look for debris, bent pins, or foreign objects. A can of compressed air can dislodge dust from inside the slot. If you see bent pins inside the slot, that points to a hardware problem that may need professional repair.
Verify Proper Insertion and Orientation
It sounds obvious, but improper insertion is remarkably common. MicroSD cards only fit one way, but with some cameras the slot is recessed or angled, making it hard to tell if the card is fully seated.
You should feel a slight click or spring resistance when the card locks into place. If the card springs back out when you release it, it is not seated. Use a fingernail or a non-metallic tool to press it in until it clicks. Never force the card. If it does not slide in smoothly, you likely have the orientation wrong.
One forum user on the Wyze community reported that their card appeared inserted but was sitting at a slight angle. After removing it and carefully reinserting with proper alignment, the camera detected it immediately. Small physical adjustments make a big difference.
Step-by-Step: How to Fix “No SD Card” on Your Security Camera
Follow these seven steps in order. Each one builds on the previous, starting with the simplest fixes and progressing to more advanced solutions. Stop when your camera recognizes the card.
Step 1: Power Cycle the Camera
Before doing anything else, power cycle the camera. This clears temporary firmware glitches that can prevent card detection. Unplug the camera from its power source (or remove the battery if applicable). Wait 30 seconds. Plug it back in and allow it to fully boot.
Many users on security camera forums report that a simple power cycle resolves the issue after a power outage or after the camera was unplugged. The Wyze forum specifically documents cases where cameras lose SD card recognition after being turned off and on. A clean power cycle gives the camera’s firmware a fresh attempt at initializing the card.
If your camera is on a smart plug or scheduled power routine, try removing it from that schedule temporarily. Smart plugs that cut power abruptly can corrupt the card’s file system during a write operation, leading to detection failures.
Step 2: Remove, Inspect, and Reinsert the Card
With the camera powered off, remove the microSD card. Check the lock switch if applicable. Inspect the gold contacts for dirt or damage. Clean them if needed. Look at the card slot on the camera for debris.
Reinsert the card carefully, ensuring it clicks into place. Power the camera back on. Check the app to see if the card is now detected.
This step sounds repetitive, but it solves a significant percentage of cases. Sometimes the card shifts slightly during normal operation, especially in outdoor cameras subject to vibration or temperature changes. A clean re-seat often restores the connection.
Step 3: Format the SD Card Through the Camera App
If the card is physically fine but the camera still does not detect it, the file system may be corrupted. The camera’s own formatting tool is the best way to fix this because it applies the exact file system and partition structure the camera expects.
Open your camera’s mobile app. Navigate to Settings, then Storage or SD Card. Look for an option labeled “Format,” “Initialize,” or “Erase.” Tap it and confirm. The formatting process typically takes 10 to 60 seconds depending on card capacity.
Some cameras do not show a format option until they detect a card. If your camera cannot see the card at all, skip to Step 5 and format on a computer first. After computer formatting, reinsert and try the camera’s format option again.
One important note from forum experiences: multiple users report that reformatting through the camera app (not through a computer) is what ultimately solved their detection problem. The camera’s formatter writes specific directory structures that a computer formatter does not create.
Step 4: Update Camera Firmware and App
Outdated firmware is a well-documented cause of SD card detection failures. Camera manufacturers regularly release firmware updates that fix storage bugs, improve card compatibility, and resolve issues with specific card brands or capacities.
Check for firmware updates in your camera app under Settings, then Device Info or Firmware. If an update is available, install it. Keep the camera powered and connected to Wi-Fi during the update process. Never remove the SD card while a firmware update is in progress.
Also check that your camera app itself is up to date. App bugs can cause the app to display “No SD card” even when the camera hardware recognizes the card perfectly. One Wyze forum user found that simply restarting the Wyze app (not the camera) resolved the SD card detection issue. The app had a cached error state that a restart cleared.
If you recently updated firmware and the SD card stopped working afterward, check the manufacturer’s support page. Some firmware updates have introduced regressions that break compatibility with certain cards. Rolling back to the previous firmware version may be necessary.
Step 5: Test the SD Card on a Computer
If the camera still cannot detect the card, test it on a computer. This isolates whether the problem is the card or the camera. Insert the microSD card into a card reader connected to your computer.
If the computer recognizes the card, the card itself is functional. The problem lies with the camera’s card slot, firmware, or compatibility. In this case, try formatting the card on the computer to FAT32 (for cards under 64GB) or exFAT (for 64GB and above), then reinsert it into the camera.
If the computer does not recognize the card either, the card is likely damaged or counterfeit. Try a different card reader to rule out a reader problem. If the card still does not appear on any computer, it needs to be replaced.
To format on Windows: open File Explorer, right-click the SD card drive, select Format, choose FAT32 or exFAT, and click Start. To format on Mac: open Disk Utility, select the card, click Erase, choose MS-DOS (FAT) for FAT32 or ExFAT, and confirm.
Step 6: Try a Different SD Card
If you have ruled out physical issues, formatted the card, updated firmware, and the card works on a computer but not the camera, try a completely different card. Use one that you know meets the camera’s specifications (correct speed class and within the capacity limit).
If the second card works, the original card has a compatibility issue or internal fault that the camera cannot handle. Some cards pass computer tests but fail camera-specific write tests due to slower sustained write speeds or controller chip incompatibilities.
If the second card also fails, the problem is likely with the camera hardware. The SD card slot may have damaged pins, a faulty controller, or a loose internal connection. At this point, a factory reset is worth trying before contacting support.
Step 7: Factory Reset the Camera
A factory reset restores the camera to its original software state. This clears corrupted configuration files, resets storage settings, and eliminates deep firmware bugs that standard updates cannot fix.
The reset process varies by brand but typically involves holding a small reset button (often inside a pinhole) for 10 to 15 seconds while the camera is powered on. Check your camera’s manual for exact instructions.
After the reset, you will need to set up the camera again through the app as if it were new. Insert the SD card before completing setup. The camera will attempt to initialize the card during the fresh setup process, which can resolve detection issues that persisted through normal operation.
Note that factory reset erases all camera settings but does not erase footage on the SD card. However, we recommend backing up any important footage before resetting.
How to Properly Format an SD Card for Security Cameras
Formatting is the single most effective fix for SD card detection problems. But doing it wrong can make things worse. Here is the correct way to format a card for security camera use.
Formatting Through the Camera App (Recommended)
Always try formatting through the camera app first. The camera’s built-in formatter creates the exact partition table, file system, and folder structure the camera expects. Computer formatting may create a structure that the camera does not recognize.
The process is straightforward. Open the app, go to camera Settings, find Storage or SD Card settings, and select Format or Initialize. Confirm the warning prompt. Wait for the process to complete without interrupting power.
For Wyze cameras, the option is under Settings, then Advanced, then Storage. For Reolink, it is under Settings, then Recording, then SD Card. For EZVIZ, look under Settings, then Storage Status, then Format. Tapo users find it under Settings, then Storage.
If the format option is grayed out or not available, the camera is not detecting the card at all. You will need to format on a computer first, then use the camera’s format option afterward.
Formatting on Windows and Mac
When formatting on a computer, use the correct file system for your card size. For cards 32GB and under, format as FAT32. For cards 64GB and above, format as exFAT (if your camera supports it) or FAT32 (using a third-party tool that bypasses Windows’ 32GB limit).
On Windows: For FAT32 cards 32GB and under, use the built-in formatter. Right-click the drive, select Format, choose FAT32, and start. For cards larger than 32GB that need FAT32, use a free tool like Rufus or the GUIFormat utility. Windows’ built-in formatter only offers exFAT or NTFS for cards above 32GB, which will not work if your camera requires FAT32.
On Mac: Open Disk Utility. Select the SD card. Click Erase. Choose MS-DOS (FAT) for FAT32 or ExFAT. Mac’s Disk Utility can format FAT32 on any size card, which makes it easier than Windows for larger cards.
After computer formatting, reinsert the card into the camera and format it again through the app. This two-step process ensures the card has the correct file system from the computer and the correct folder structure from the camera.
When Formatting Fails
Sometimes the format option itself fails. The camera may show “Format failed” or get stuck on “Formatting” indefinitely. This typically means the card has bad sectors, a worn-out controller, or a counterfeit chip that reports more capacity than it actually has.
If the camera format fails, try formatting on a computer using the full format option (not quick format). A full format scans for bad sectors and marks them as unusable. If the computer format also fails or takes an extremely long time, the card is physically degraded and needs replacement.
SD cards have a finite number of write cycles. In a security camera doing continuous 24/7 recording, a standard card can wear out in as little as three to six months. If you are replacing cards frequently, switch to a high endurance card (covered below).
Advanced Causes: Power Supply, App Bugs, and Counterfeit Cards
If you have worked through all seven troubleshooting steps and the camera still shows “No SD card,” the cause may be less obvious. These advanced issues are rarely covered in standard troubleshooting guides but account for a meaningful percentage of unresolved cases.
Power Supply Issues: The Hidden Culprit
This is the most overlooked cause of SD card detection failures. Security cameras require stable voltage to power the SD card slot controller. If the power adapter is underpowered or delivers fluctuating voltage, the card slot may not initialize properly.
Multiple Wyze forum users traced their SD card detection problems directly to their power supply. The Wyze Pan camera, for example, requires a 2A (2-amp) power adapter. Some users were using the 1A adapter from the Wyze Cam V2, which does not provide enough power for the Pan model’s motorized base and SD card slot simultaneously. When they switched to the correct 2A adapter, the SD card was immediately detected.
If your camera is powered by a USB cable, check that the adapter provides the correct amperage. Most cameras specify their power requirements on the bottom or back of the device. Using a phone charger instead of the manufacturer’s adapter is a common mistake. Phone chargers often deliver lower amperage than security cameras need.
Also avoid daisy-chaining power strips or using very long USB extension cables. Voltage drops over distance, and a camera at the end of a 15-foot USB cable may not receive enough power to drive the SD card slot reliably.
For battery-powered cameras, low battery can cause similar issues. The camera may deprioritize the SD card slot to conserve power. Charge the battery fully and test again.
App Bugs vs Hardware Failure: How to Tell
One of the most confusing aspects of this error is distinguishing between an app bug and a hardware failure. We have seen cases where the camera app shows “No SD card” but the camera is actually recording fine. Other times, the app is correct and the camera genuinely cannot read the card.
To tell the difference, check for recent recordings. If you can view playback footage from the last few hours, the card is working and the app is displaying a cached or buggy error. Restart the app (force-close and reopen). If that does not help, uninstall and reinstall the app.
If there are no recent recordings and the timeline is empty, the camera is genuinely not writing to the card. This points to a hardware or compatibility issue, not an app bug.
Another tell: if the “No SD card” message appears and disappears randomly, it is likely an app or firmware bug. Hardware failures are consistent. The card either works or it does not. Intermittent detection usually means a software problem.
One Xiaomi Mi Home 360 user reported that their card worked for a few hours, then stopped being detected, then came back. This pattern is classic firmware instability. A firmware update or factory reset typically resolves it.
Counterfeit and Fake SD Cards
Counterfeit SD cards are a massive problem on online marketplaces. These cards report a fake capacity to the device but actually contain a much smaller memory chip. For example, a card labeled 256GB might only have 8GB of real storage with a hacked controller that reports 256GB.
The card appears to work initially. But once the actual storage fills up (after 8GB in this example), the controller starts overwriting existing data or corrupting files. The camera eventually cannot read the file system and reports “No SD card.”
If you bought a suspiciously cheap high-capacity card from a third-party seller, this could be your problem. Signs of a counterfeit card include: significantly lower price than retail, generic or misspelled brand name, packaging with poor print quality, or the card reporting slightly different capacity than the label states.
To test for a fake card, use the free tool H2testw (Windows) or F3 (Mac/Linux). These tools write data to the full reported capacity and then read it back. If the read fails at a certain point, the card is counterfeit and the real capacity is whatever amount passed the test.
The fix for a counterfeit card is simple: replace it with a genuine card from a reputable retailer. Stick to established brands like SanDisk, Samsung, Kingston, or Lexar purchased directly from the manufacturer or an authorized dealer.
Temperature and Environmental Factors
Extreme temperatures affect SD card performance and detection. This is a real issue for outdoor security cameras that most online guides overlook.
MicroSD cards have operating temperature ranges, typically 0 to 70 degrees Celsius (32 to 158 degrees Fahrenheit) for standard cards. High endurance and industrial cards extend this range to -25 to 85 degrees Celsius (-13 to 185 degrees Fahrenheit). In hot climates where cameras sit in direct sunlight, card temperatures can exceed the rated maximum, causing intermittent detection failures.
Cold weather causes a different problem. At very low temperatures, the flash memory controller slows down and may fail to respond within the camera’s initialization timeout window. The camera gives up waiting and reports “No SD card.”
If your camera is in an exposed location and detection issues correlate with weather changes, try repositioning the camera to avoid direct sunlight. For cold-weather installations, use a high endurance or industrial-rated card with a wider temperature range.
High Endurance vs Standard SD Cards: Why It Matters
If you keep replacing SD cards every few months, the issue may not be the camera. It may be the type of card you are using. Standard microSD cards are designed for occasional use: taking photos, storing documents, or transferring files. Security cameras do something entirely different.
What Makes High Endurance Cards Different
Security cameras write video footage continuously, 24 hours a day, 7 days a week. This means the card is constantly being written to and overwritten. Standard cards are not built for this. They use TLC (Triple-Level Cell) flash memory rated for approximately 500 to 1,000 write cycles per cell. At 24/7 recording rates, standard cards can wear out in 3 to 6 months.
High endurance cards are specifically engineered for continuous write workloads. They use higher-quality NAND flash with better wear-leveling algorithms, stronger error correction, and firmware optimized for sustained writes. Manufacturers like SanDisk (High Endurance line), Samsung (PRO Endurance), and Kingston (Canvas Select Plus) rate these cards for thousands of hours of continuous recording.
For example, the Samsung PRO Endurance card is rated for up to 140,000 hours (about 16 years) of continuous video recording. A standard Samsung EVO card under the same workload would fail within months.
If your camera keeps losing SD card detection after a few months of use, the card has simply worn out. Switch to a high endurance card and the problem will likely disappear. The SanDisk High Endurance and Samsung PRO Endurance lines are the most recommended by security camera communities.
When to Replace Your SD Card
Even high endurance cards eventually wear out. Signs that your card needs replacement include: increasing frequency of “No SD card” errors, corrupted or unplayable video files, gaps in recording timelines, format operations that take increasingly long, or the card being detected intermittently.
As a general guideline, replace standard cards every 3 to 6 months in cameras with continuous recording. Replace high endurance cards every 12 to 24 months depending on the write workload. Cameras with motion-detection-only recording (not continuous) put far less stress on the card and can last longer.
If you are buying a replacement, check the camera manufacturer’s recommended card list. Brands like Reolink and EZVIZ publish compatibility lists on their support pages. Wyze and Tapo communities maintain crowd-sourced lists of cards confirmed to work reliably.
Recovering Footage from a Corrupted SD Card
Before you format or replace a problematic SD card, you may want to recover any footage stored on it. Video recordings of events (break-ins, package thefts, accidents) can be important and irreplaceable.
First, insert the card into a computer card reader. If the computer recognizes it, copy any visible files to your hard drive immediately. Even if some files are corrupted, others may still be intact.
If the computer cannot read the file system, use data recovery software. Free options include Recuva (Windows) and PhotoRec (cross-platform). Paid options like EaseUS Data Recovery Wizard and Disk Drill offer more advanced recovery features and higher success rates. These tools scan the raw data on the card and reconstruct video files that the file system has lost track of.
Important: do not write any new data to the card before attempting recovery. Every new write reduces the chance of recovering old footage. If the recovery software offers to create an image of the card first, do that. Then run the recovery on the image file.
If the card is physically damaged or the recovery software cannot read it, professional data recovery services are an option. These services can be expensive, so weigh the value of the footage against the cost before proceeding.
Frequently Asked Questions
Why does my camera keep saying no SD card?
Your camera keeps saying no SD card because of one of seven common causes: the card is not fully seated, the lock switch is engaged, the card is not Class 10 or UHS-1 rated, the capacity exceeds the camera’s limit, the file system is wrong, the firmware is outdated, or the power supply is insufficient. Start by removing and reinserting the card, then check compatibility and format through the camera app.
What SD card for Tapo C210?
The Tapo C210 supports microSD cards up to 512GB. Use a Class 10 or UHS-1 rated card for reliable recording. High endurance cards from SanDisk, Samsung, or Kingston are recommended for continuous recording. Format the card through the Tapo app before first use.
How to activate SD card on camera?
To activate an SD card on your security camera, power off the camera, insert the microSD card until it clicks, power the camera back on, open the camera app, navigate to Settings then Storage, and tap Initialize or Format. The card will be recognized and ready for recording after formatting completes.
Why is my SD card not working in my security camera?
Your SD card may not work in your security camera if it is not Class 10 or UHS-1 rated, exceeds the camera’s capacity limit, uses the wrong file system, is physically damaged or corrupted, has the lock switch engaged, or the camera firmware is outdated. Format the card through the camera app and update firmware to resolve most issues.
Can a security camera work without an SD card?
A security camera can work without an SD card if it supports cloud storage, but it will not have local recording capability. Without an SD card, you may still get live view and motion alerts (depending on the camera), but recorded video will only be available through a cloud subscription if the camera supports one.
How long do SD cards last in security cameras?
Standard SD cards last 3 to 6 months in security cameras with continuous 24/7 recording. High endurance cards last 12 to 24 months or longer. Cameras with motion-detection-only recording put less stress on cards, extending their lifespan. Replace the card when you notice frequent detection errors or recording gaps.
Getting Your Camera Back to Recording
Understanding why does my security camera say no SD card with a card inserted comes down to seven core causes. Most are simple to fix: reseat the card, check the lock switch, verify compatibility, format through the app, and update firmware. For persistent issues, investigate the power supply, test for counterfeit cards, and consider switching to a high endurance card.
The key takeaway is to start with the easiest fixes before assuming hardware failure. A power cycle and card re-seat resolve more cases than any other single step. Only after exhausting all troubleshooting steps should you consider replacing the card or contacting the camera manufacturer for warranty service.
If you are still stuck after working through all seven steps, reach out to your camera brand’s support team. Have your camera model number, firmware version, and SD card brand and capacity ready. This information helps them identify whether the issue is a known bug with a specific firmware version or a hardware defect covered under warranty.