
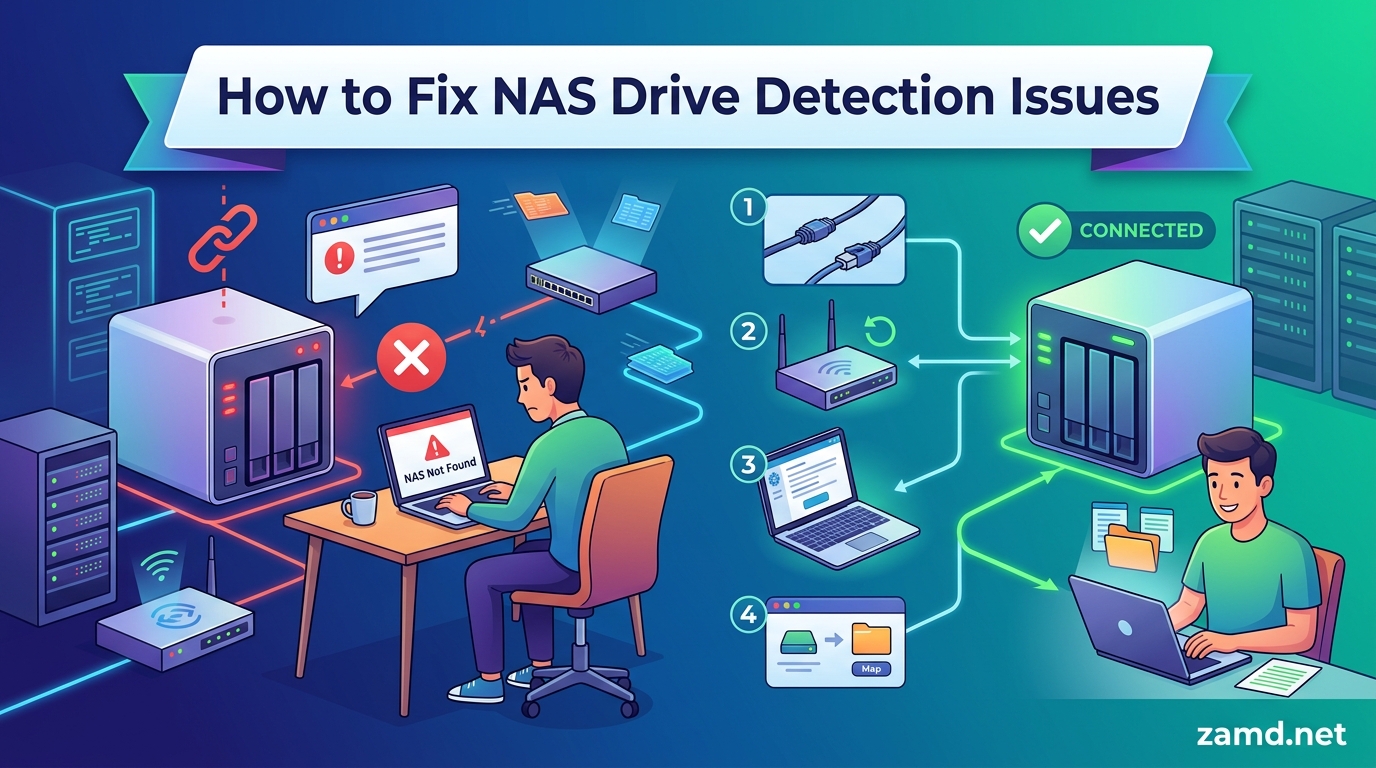
You just installed a brand-new hard drive into your NAS, closed the bay, and waited for it to show up in your storage manager. Nothing appeared. The drive status reads empty, the LED stays dark, and your new drive might as well not exist. If you are dealing with this right now, you are far from alone — this is one of the most common NAS issues users report across Synology, QNAP, TrueNAS, and Asustor communities.
The good news is that learning how to fix a NAS that won’t detect a newly installed drive is usually straightforward. In most cases, the problem comes down to one of seven causes: drive incompatibility, improper physical seating, insufficient power, leftover partitions or wrong format on the drive, outdated firmware, network discovery issues, or the SATA 3.3V PWDIS pin that silently blocks newer drives.
I have spent years helping users troubleshoot NAS drive detection issues across forums like r/synology, r/truenas, and the TrueNAS community boards. What I have learned is that most detection failures are fixable at home without special tools, and the vast majority can be resolved in under 30 minutes once you know where to look. This guide walks through every troubleshooting step in order, starting with the quickest fixes and moving toward more advanced diagnostics.
Whether you are setting up a NAS for the first time, adding storage capacity, or replacing a failed drive in an existing RAID array, the steps below will help you isolate and resolve the problem. I will cover cross-brand solutions so this works regardless of whether you run Synology DSM, QNAP QTS, TrueNAS, or another platform.
One important note before we start: if your NAS contains critical data and you are replacing a drive in a RAID setup, do not attempt risky recovery steps without a backup. RAID is not a backup. If data integrity is at stake, consider professional data recovery before proceeding with advanced troubleshooting.
Table of Contents
Quick Diagnosis: Identify the Problem in 5 Minutes
Before diving into detailed troubleshooting, let me help you narrow down the likely cause based on what you are seeing. Most NAS drive detection problems produce specific symptoms that point directly to the root issue.
Ask yourself these diagnostic questions:
- Is the drive LED completely off? This usually means a power issue, the drive is not seated properly, or the drive itself is dead.
- Is the drive LED blinking but the drive does not appear in the dashboard? This suggests a format or partition conflict, or a firmware incompatibility.
- Does the NAS beep or show an error message? Error codes are your fastest path to a specific diagnosis. Check your NAS manufacturer’s error code reference.
- Was the drive previously used in another computer or NAS? Leftover partitions are one of the top causes of detection failure.
- Did you recently have a power outage? Power events can corrupt RAID configurations and make drives appear missing even when the hardware is fine.
- Is the drive brand new from the factory? Some new drives come pre-formatted with NTFS or have hidden diagnostic partitions that NAS operating systems reject.
Based on your answers, here is a quick reference to guide you to the right section:
- LED off, no sounds from the drive: Go to Step 2 (Physical Connections) and Step 3 (Power Supply)
- LED on but drive invisible in software: Go to Step 1 (Compatibility) and Step 4 (Format and Health)
- Drive was previously used: Go directly to Step 4 (Format and Health) for partition cleaning
- New WD Red or Seagate drive not detected: Go to Step 7 (PWDIS issue)
- All drives missing after power outage: Go to Step 5 (Firmware) then Step 7 (Advanced)
- Drive appears in one bay but not another: Go to “Isolating the Problem: Drive or NAS Bay” section
Spend five minutes on this diagnosis before you start opening things up. It will save you time and help you avoid unnecessary steps.
Step 1: Verify Drive Compatibility With Your NAS
Drive incompatibility is the number one reason a NAS won’t detect a newly installed drive, and it is also the most preventable. Not all hard drives work with all NAS systems, even when they physically fit the bay.
Every NAS manufacturer maintains a compatibility list of tested drives. Here is where to find them:
- Synology: Visit the Synology compatibility list at their official website and search by your NAS model number
- QNAP: Check the QNAP compatibility list, searchable by NAS model and drive manufacturer
- TrueNAS: While TrueNAS does not maintain a strict list, the community forums document which drives work reliably
- Asustor: Asustor provides a compatibility lookup tool on their support page
If your drive is not on the compatibility list, that does not guarantee it will not work. But it does mean the NAS manufacturer has not tested it, and detection issues are significantly more likely.
NAS Drives vs Desktop Drives: Does It Matter?
Yes, it matters a lot. NAS-specific drives (like WD Red Plus, Seagate IronWolf, or Toshiba N300) are engineered for 24/7 operation with vibration compensation for multi-bay enclosures. Desktop drives (like WD Blue or Seagate Barracuda) can work in a NAS but are more prone to reliability issues and may have firmware differences that affect detection.
More critically for detection purposes, some desktop drives and certain NAS drive variants use different power management profiles. This brings us to the PWDIS issue, which I cover in detail in Step 7. For now, know that if you installed a WD Red Plus or similar drive with the newer SATA 3.3 power specification, detection can fail silently due to a pin conflict with your NAS power delivery.
Check Capacity Limits
Older NAS models have maximum drive capacity limits. A NAS manufactured in 2016 might only support drives up to 8TB or 12TB per bay. Installing a 20TB drive in a NAS that caps at 12TB will result in the drive being completely undetected or showing as an unrecognized capacity.
Check your NAS model specifications on the manufacturer’s website for the maximum supported drive size. Also verify whether the limit applies per bay or to total aggregate storage, since these can differ.
Step 2: Check Physical Connections and Drive Seating
It sounds obvious, but improper physical installation causes a surprising number of detection failures. I have seen drives that appeared fully inserted but were actually sitting at a slight angle, preventing the SATA connectors from making proper contact.
Proper Drive Insertion Technique
Power down your NAS completely before reseating the drive. Remove the drive from the bay and inspect both the drive connectors and the bay connectors. Look for bent pins, debris, or any visible damage.
When reinserting, push the drive in firmly until you feel the SATA connectors seat with a gentle click. On tray-style bays, make sure the drive is flush with the back of the tray and that the tray slides all the way into the NAS without resistance.
If the tray does not slide in smoothly, do not force it. Resistance usually means the drive is misaligned inside the tray or a screw is protruding and catching on the bay rails.
Inspect SATA and Power Cables
For NAS models with internal cabling rather than hot-swap trays, the SATA data and power cables can work loose over time or arrive loose from the factory. Check both ends of each cable.
A Reddit user from the Synology community shared a real-world example: they spent hours troubleshooting detection only to discover that the SATA connector on their new drive was slightly bent from shipping. They straightened the connector manually, reinserted the drive, and it was detected immediately. Physical inspection matters.
Hot-Swap vs Cold Install
Some NAS models support hot-swapping, meaning you can insert and remove drives while the NAS is running. Others require a full shutdown before adding drives. Check your NAS documentation to confirm which method your model supports.
For hot-swap capable NAS units, try removing the drive while the NAS is powered on, waiting ten seconds, and reinserting it. This can trigger a fresh detection cycle that resolves the issue. If your NAS does not support hot-swap, always shut down fully before removing or inserting drives.
Step 3: Confirm Your Power Supply Is Adequate
Insufficient power delivery is an underrated cause of NAS drive detection failures. When a NAS does not deliver enough power to a drive, the drive may spin up briefly and then stop, or it may never spin up at all. Either way, the NAS reports the bay as empty.
The Power Adapter Mix-Up
One of the most common power-related issues is surprisingly simple: users accidentally swap the NAS power adapter with a router power adapter during cable cleanup. Many NAS units and network routers use similar barrel connectors, but they deliver different voltages and amperages.
Using a router power adapter on a NAS typically delivers enough power to boot the NAS interface but not enough to spin up a mechanical hard drive. The result is a NAS that appears to work but shows all drive bays as empty.
Check the label on your power adapter. It should match the voltage and amperage specifications printed on the NAS unit or in the documentation. The connector size also matters — a barrel plug that fits but is slightly too small or too large can cause intermittent power delivery.
Power LED Indicators
Check the power LED on the back of your NAS. On Synology models, a solid green power LED indicates normal power delivery. If the LED is off, blinking, or showing a different color, your power supply may be faulty.
Also check the individual drive LEDs on the front panel. Each bay has its own LED that lights up when the drive is receiving power and communicating with the NAS controller. A dark drive LED with a power LED issue confirms a power delivery problem.
Multi-Drive Power Draw
If you are adding a second or third drive to a NAS that previously had only one drive, the power supply may be reaching its limit. Drives draw the most power during spin-up — often 20 to 25 watts each for 3.5-inch mechanical drives. A power supply designed for a 2-bay NAS with modest drives may struggle with two high-capacity, high-power drives spinning up simultaneously.
Some NAS systems stagger drive spin-up to manage this. Check whether your NAS has this feature enabled in the power management settings. If not, try installing one drive at a time, letting each one spin up and be detected before adding the next.
Step 4: Inspect Drive Health and Format Status
This step addresses one of the most frequently overlooked causes of NAS drive detection failure: the drive itself may have incompatible formatting, leftover partitions, or hidden health issues that prevent the NAS from recognizing it.
The NTFS Pre-Format Problem
Many new hard drives ship from the factory pre-formatted with NTFS, which is a Windows filesystem. NAS operating systems like Synology DSM and TrueNAS do not use NTFS — they expect ext4, Btrfs, ZFS, or an unformatted drive. Some NAS systems will silently ignore an NTFS-formatted drive rather than displaying an error.
A Reddit user in the Synology community reported this exact issue: their brand-new drive would not detect until they connected it to a computer via a USB enclosure, reformatted it, and then reinstalled it in the NAS. This is a quick fix that resolves a significant percentage of detection failures.
Cleaning the Partition Table Before Installation
If the drive was previously used in a PC, another NAS, or an external enclosure, it likely has existing partitions. NAS operating systems generally expect to manage partitions themselves, and pre-existing partition tables can block detection.
To clean a partition table on Windows, use the diskpart command line tool:
- Open Command Prompt as Administrator
- Type
diskpartand press Enter - Type
list diskto identify your drive by its size - Type
select disk X(replace X with your drive number) - Type
cleanto remove all partitions - Type
exitto close diskpart
On macOS or Linux, you can use dd to wipe the partition table: sudo dd if=/dev/zero of=/dev/sdX bs=512 count=1 (replace sdX with your drive identifier). Be extremely careful to select the correct drive, as this permanently erases all data.
After cleaning the partition table, reinstall the drive in your NAS. A blank, unformatted drive is what most NAS systems expect to find.
Check Drive Health Before Installation
One step that no existing guide covers is verifying drive health before you ever install it in the NAS. A drive can be brand new from the factory and still be defective. Retailers estimate that 1 to 2 percent of new hard drives arrive dead on arrival.
Before installing any new drive in your NAS, connect it to a computer using a USB-to-SATA adapter or an external enclosure. Run a quick health check using CrystalDiskInfo (Windows), smartmontools (Linux), or DriveDx (macOS). These tools read the drive’s SMART data and flag any immediate issues.
If the drive shows reallocated sectors, pending sectors, or fails to report SMART data at all on a direct connection, return it under warranty. Do not waste time troubleshooting your NAS for a drive that is defective out of the box.
Step 5: Update NAS Firmware and Check BIOS Settings
Outdated NAS firmware is a well-documented cause of drive detection problems. Manufacturers regularly release DSM, QTS, and TrueNAS updates that add support for newer drive models, fix SATA controller bugs, and improve storage management reliability.
Update NAS Firmware First
Before spending time on deeper troubleshooting, check for firmware updates. On Synology, go to Control Panel > Update and Restore. On QNAP, check the myQNAPcloud or Control Panel > Firmware Update. On TrueNAS, go to System Settings > Update.
A real-world example from the Spiceworks community illustrates how powerful firmware updates can be: a user with a Thecus N89000 NAS had all drives disappear from a RAID 5 array after a power outage. They spent significant time troubleshooting the drives individually, only to discover that a firmware upgrade restored the entire RAID configuration and all drives were detected again. The drives and hardware were fine — the NAS firmware had simply become confused.
DSM and OS Version Compatibility
If you are running an older version of your NAS operating system, it may not have drivers for newer drive models. For example, Synology DSM 6.x may not recognize certain drives that were released after DSM 7.x became standard. Upgrading to the latest OS version ensures maximum drive compatibility.
One caution: if you are running a very old NAS that cannot be upgraded to the latest firmware, the drive compatibility pool becomes limited. In this case, the compatibility list for your specific NAS model and firmware version is your best resource.
BIOS and SATA Controller Settings (For Custom NAS Builds)
If you are running TrueNAS on custom hardware rather than a pre-built NAS, BIOS settings become critical for drive detection. The most common issue is the SATA controller mode being set to RAID instead of AHCI.
TrueNAS and FreeNAS require AHCI mode for proper drive detection. RAID mode can hide individual drives from the operating system, making them invisible during installation or pool creation. Enter your BIOS or UEFI settings, locate the SATA configuration, and switch it to AHCI mode.
For users running TrueNAS on repurposed server hardware, also check that the SATA controller is not set to Intel RST (Rapid Storage Technology) mode, which has the same effect as RAID mode in hiding drives.
Step 6: Use NAS Discovery Tools to Locate the Drive
Sometimes the drive is actually detected by the NAS hardware but is not showing up in the interface you are checking. NAS discovery tools can help you find drives that are invisible in the standard web dashboard.
Network Visibility vs Physical Detection
Before diving into tools, it is important to clarify a common confusion: a drive not being detected by the NAS operating system is different from the NAS itself not being visible on your network. These are two separate problems that require different solutions.
If your NAS does not appear on your network at all, the issue is with network discovery, DHCP assignment, or the NAS network configuration. The drive detection steps in this guide are irrelevant until the NAS itself is accessible.
If your NAS is accessible through its web interface or desktop app but the new drive does not appear in the storage manager, then you have a drive detection issue and the tools below can help.
Brand-Specific Discovery Tools
Each major NAS brand offers its own discovery and management tools:
- Synology: Use find.synology.com in a web browser on the same network to locate your NAS. For deeper diagnostics, download Synology Assistant (desktop app) or DS Finder (mobile app). Synology Assistant can show drive-level details that the web dashboard sometimes does not display during initial setup.
- QNAP: Use Qfinder Pro to locate your NAS on the network and access the Storage and Snapshots Manager for drive details.
- TrueNAS: The TrueNAS web interface is your primary tool. Go to Storage > Disks to see all detected drives at the hardware level, even if they have not been assigned to a storage pool.
- Asustor: Use ADM Assistant to discover and connect to your NAS, then check Storage Manager for drive details.
In TrueNAS specifically, the Disks page shows every drive the operating system can see at the hardware level. If a drive appears here but not in your storage pools, it has been detected but not configured. If it does not appear here at all, the problem is at the hardware or firmware level.
Direct IP Access
Sometimes network discovery protocols fail even when the NAS is functioning correctly. Try accessing your NAS directly by IP address in a web browser rather than relying on hostname or discovery tools. If you do not know the IP address, check your router’s DHCP client list or use a network scanning tool like Advanced IP Scanner.
Step 7: Advanced Troubleshooting (PWDIS, SATA Mode, and More)
If none of the previous steps resolved the issue, the problem may involve a more technical root cause. The two most common advanced issues are the SATA 3.3V PWDIS pin conflict and SATA controller mode mismatches.
The PWDIS / 3.3V Standby Pin Issue
This is the single most overlooked cause of NAS drive detection failure, and no major troubleshooting guide covers it properly. If you have a newer hard drive (particularly WD Red Plus, WD Red Pro, or certain Seagate drives manufactured after 2018) that simply will not spin up or be detected in your NAS, the PWDIS feature may be the culprit.
PWDIS stands for Power Disable. It is a feature defined in the SATA 3.3 specification that allows a host system to remotely power cycle a drive using the 3.3V pin on the SATA power connector. This feature was designed for data center environments where administrators need to remotely reset individual drives.
The problem is that many older power supplies and some NAS backplanes feed 3.3V power to the SATA connector on pins that PWDIS-enabled drives use as a standby signal. When the drive receives 3.3V on these pins, it interprets this as a power-disable command and refuses to spin up. The drive is perfectly functional — it just thinks it has been told to stay off.
How to Fix the PWDIS Issue
There are two common solutions for the PWDIS problem, both documented extensively in the TrueNAS community forums:
Solution 1: Kapton tape over pins 1-3. The most popular fix is to cover the first three pins on the SATA power connector with a small strip of Kapton tape (polyimide tape, which is heat resistant and electrically insulating). This blocks the 3.3V signal from reaching the drive while allowing the 5V and 12V power lines to function normally.
One TrueNAS forum user documented their experience: WD Red Plus drives would not be detected at all in their system. After applying Kapton tape over pins 1, 2, and 3 on the SATA power connector, all drives were immediately detected and have run flawlessly since.
Solution 2: Use a Molex-to-SATA power adapter. Molex power connectors from older power supplies do not have a 3.3V line at all. Using a Molex-to-SATA adapter eliminates the 3.3V signal entirely, which resolves the PWDIS conflict. A TrueNAS user confirmed this fix: after switching to a Molex-to-SATA power cable, their previously invisible drives worked perfectly.
Be aware that cheap Molex-to-SATA adapters have a known fire safety risk due to poorly crimped connections. If you go this route, use a high-quality adapter from a reputable manufacturer, not the cheapest option available.
SATA Controller Mode Conflicts
In custom NAS builds (especially TrueNAS on repurposed hardware), the SATA controller mode can prevent drive detection entirely. I covered AHCI vs RAID mode in Step 5, but there are additional controller-level issues to check.
If you are using a PCIe SATA controller card or an HBA (Host Bus Adapter) in IT mode, verify that the card’s firmware properly supports your drives. Some LSI HBA cards need specific firmware versions (like IT mode firmware P20 or P21) to pass drives through to TrueNAS correctly.
For TrueNAS users, the lsblk command in the shell is invaluable. Running lsblk lists all block devices the operating system can see at the kernel level. If lsblk shows the drive but the TrueNAS web interface does not, the issue is in the TrueNAS middleware. If lsblk does not show the drive, the issue is at the hardware, BIOS, or controller level.
RAID Configuration Recovery After Power Outages
If your drives disappeared after a power outage rather than during a new installation, the RAID configuration itself may be corrupted rather than the drives being undetected. In this scenario, the NAS may see the drives but report the RAID array as degraded or missing.
Do not initialize or format drives in this situation. Attempt a RAID rescan or import through your NAS storage manager first. If that fails, a firmware update (as described in Step 5) can sometimes restore the RAID configuration. If you are still unable to recover the array and the data is important, stop immediately and consult a professional data recovery service.
Isolating the Problem: Is It the Drive or the NAS Bay?
If you have worked through the steps above and the drive still is not detected, you need to determine whether the problem is the drive itself or the NAS bay it is installed in. This is a critical diagnostic step that no existing troubleshooting guide covers, and it can save you from returning a perfectly good drive or replacing a perfectly good NAS.
The Swap Test
The swap test is simple but effective. If your NAS has multiple drive bays, move the undetected drive to a different bay. If it is suddenly detected, the original bay has a hardware problem — likely a faulty SATA connector, a damaged backplane contact, or a dead SATA port on the NAS motherboard.
Conversely, if you move a known-working drive into the bay where the new drive was undetected and that known-working drive also fails to appear, you have confirmed the bay is the problem, not the drive.
The USB Enclosure Test
Connect the undetected drive to a computer using a USB-to-SATA adapter or external enclosure. If the computer recognizes the drive, the drive is functional and the problem is in the NAS. If the computer also fails to detect the drive, the drive is defective.
This test is worth doing before any advanced troubleshooting. A user in the QNAP community shared that they spent hours trying to fix their NAS, only to discover through a USB enclosure test that the drive was fine but a specific SATA port on the NAS was dead. They switched to a different bay and everything worked immediately.
What the Results Tell You
- Drive works in another bay: The original NAS bay needs repair or the NAS motherboard has a faulty SATA channel.
- Drive works in USB enclosure but not in any NAS bay: Compatibility issue, PWDIS conflict, or NAS firmware limitation.
- Drive does not work anywhere: The drive is defective. Return it under warranty.
- Known-good drive also fails in the same bay: The NAS bay or SATA port is faulty. Contact NAS manufacturer support.
When to Contact Support or Consider Data Recovery
Most NAS drive detection problems are solvable using the steps in this guide. However, there are situations where you should stop troubleshooting and seek professional help.
Contact NAS manufacturer support if you have confirmed through swap testing that a NAS bay or SATA port is faulty. Most NAS manufacturers offer warranty service for hardware defects, and some will replace the entire unit if a SATA channel fails within the warranty period.
Contact the drive manufacturer for an RMA (Return Merchandise Authorization) if the drive is under warranty and fails detection in every environment, including direct computer connection. Most NAS-grade drives come with 3 to 5 year warranties.
Consider professional data recovery if the drive contains important data and you suspect a physical or electronic failure. Signs that indicate you should not attempt further DIY recovery include clicking or grinding noises from the drive, a burning smell from the NAS power supply area, or a drive that was working and suddenly disappeared with no configuration changes.
Data recovery services like Ontrack, DriveSavers, and Secure Data Recovery specialize in retrieving data from failed drives. They are not cheap — recovery typically starts at several hundred dollars — but they can often recover data from drives that appear completely dead to consumer-level tools.
Prevention: How to Avoid Detection Issues in the Future
Once you have resolved your current detection issue, a few proactive habits can prevent the same problem from happening with your next drive installation.
Always Check the Compatibility List First
Before purchasing any drive for your NAS, look up your exact NAS model on the manufacturer’s compatibility list. This takes two minutes and eliminates the most common cause of detection problems before you ever open the packaging.
If a drive you want is not on the list, search the NAS community forums for your model to see if other users have successfully used it. Unlisted does not mean unsupported, but it does mean you are accepting some risk.
Clean New Drives Before Installation
Make it a habit to connect every new drive to a computer first and run diskpart clean or the equivalent partition wipe. This removes any factory formatting, hidden diagnostic partitions, or NTFS pre-formatting that could interfere with NAS detection. The process takes under five minutes and eliminates an entire category of detection problems.
While the drive is connected to the computer, run a quick SMART health check. Catching a dead-on-arrival drive before installation saves significant troubleshooting time.
Keep Firmware Updated
Check for NAS firmware updates monthly. Manufacturers release updates that add support for new drive models, fix storage management bugs, and improve drive detection reliability. Running outdated firmware is a preventable risk factor for detection issues.
Set up automatic update notifications if your NAS supports them. For critical production NAS systems, test firmware updates on a maintenance schedule rather than installing them immediately upon release.
Use a UPS for Power Protection
Power outages are a leading cause of RAID configuration corruption and drive detection failures. An uninterruptible power supply (UPS) provides clean, regulated power and gives your NAS time to shut down gracefully during an outage.
Most NAS systems support USB communication with UPS units, enabling automatic shutdown when battery power runs low. This feature has saved countless RAID arrays from corruption during unexpected power events. A basic UPS costs between $60 and $100, which is a small fraction of what your NAS and drives cost.
Label Your Power Adapters
Label your NAS power adapter clearly and keep it separate from other similar-looking adapters. The router-vs-NAS power adapter mix-up is one of the most embarrassing and easily preventable causes of drive detection failure. A simple label eliminates the risk.
FAQ’s
Why is my newly installed hard drive not showing up?
Your newly installed hard drive may not show up due to drive incompatibility with your NAS, improper physical seating, insufficient power, leftover partitions or NTFS formatting on the drive, outdated NAS firmware, or the SATA 3.3V PWDIS pin conflict on newer drives. Check the compatibility list for your NAS model, clean the partition table using diskpart, verify power delivery, and ensure the drive is firmly seated in the bay.
Why is my NAS drive not showing up on my network?
If your NAS itself is not visible on your network, the issue is network discovery or configuration, not drive detection. Ensure your NAS is on the same subnet as your computer, check your router’s DHCP client list for the NAS IP address, try accessing the NAS directly by IP in a browser, or use a discovery tool like Synology Assistant or Qfinder Pro. A missing network drive in a functioning NAS is a separate issue from a physically undetected drive.
How to fix undetectable HDD?
To fix an undetectable HDD, start by checking the drive compatibility list for your device, then verify physical connections and power supply. Clean any existing partitions using diskpart on Windows or dd on Linux. Update your NAS firmware to the latest version. For newer WD Red or Seagate drives, check for the PWDIS 3.3V pin conflict and apply Kapton tape over SATA power pins 1-3 if needed. Test the drive in a USB enclosure to confirm it is functional.
How to fix hard drive not being detected?
Fix a hard drive not being detected by following these steps in order: verify compatibility with your system, reseat the drive firmly in the bay, confirm adequate power delivery, clean the partition table, update system firmware, check BIOS SATA mode (set to AHCI not RAID), and use the PWDIS Kapton tape fix for newer drives. If the drive remains undetected in all bays and enclosures, the drive itself may be defective and should be returned under warranty.
Conclusion
Learning how to fix a NAS that won’t detect a newly installed drive comes down to a systematic process: check compatibility, verify physical connections, confirm power delivery, clean the partition table, update firmware, use discovery tools, and address advanced issues like the PWDIS pin conflict. The vast majority of detection failures are caused by one of these seven issues, and most can be resolved in under 30 minutes.
If you are still stuck after working through every step, use the swap test to determine whether the problem is the drive or the NAS bay. A USB enclosure test will quickly tell you if the drive itself is functional. And if the drive is confirmed defective, return it under warranty rather than spending more time on a hardware failure no amount of software troubleshooting can fix.
For future installations, build the habit of checking compatibility lists, cleaning partitions, and running SMART checks before you ever open the NAS bay. A few minutes of preparation prevents most detection problems before they start.