
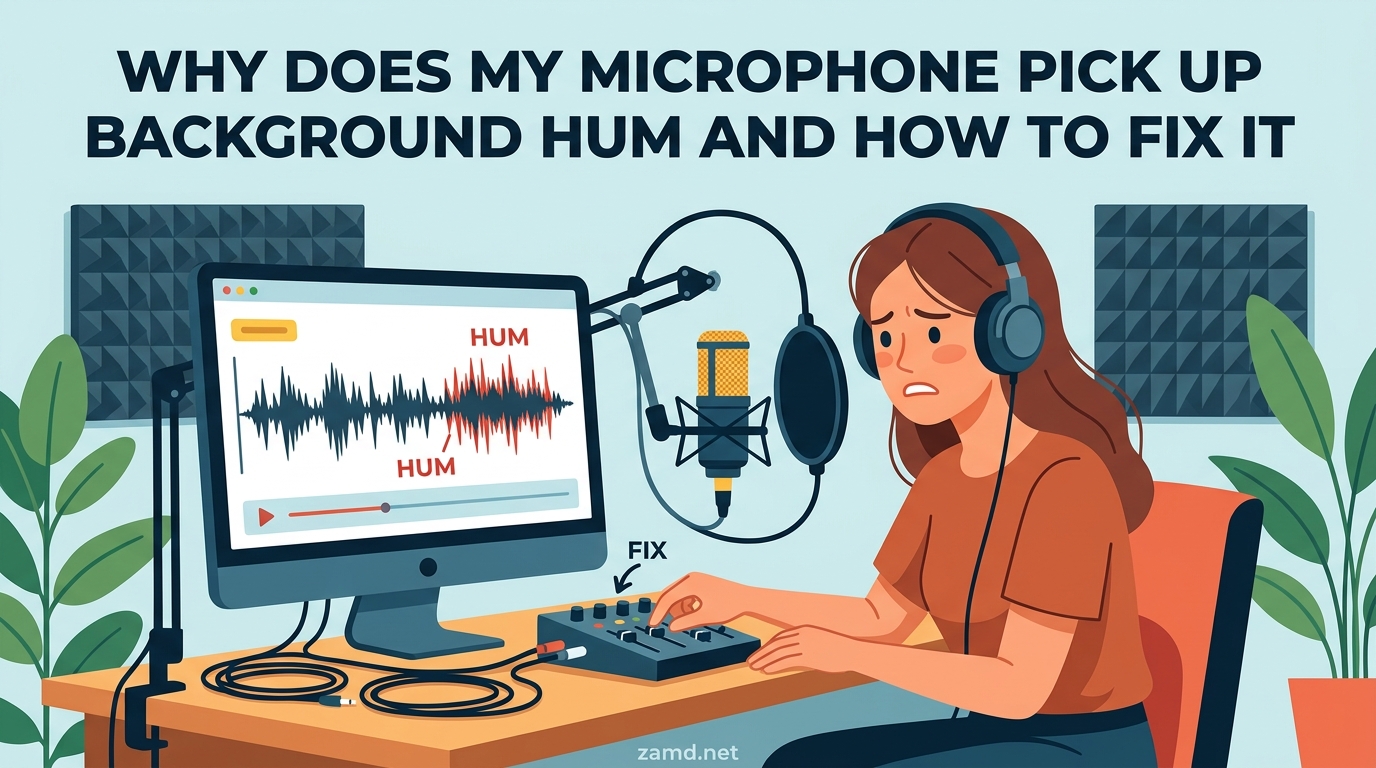
Microphone background hum happens because microphones convert sound waves into electrical signals, and any sound within the pickup range gets captured. This includes electrical interference, ground loops, fan noise, and keyboard clicks. The hum you hear is your microphone faithfully doing its job, picking up everything its sensitivity allows.
If you have ever recorded a podcast, streamed on Twitch, or joined a video call only to hear an annoying buzz or hum in your audio, you are not alone. Thousands of podcasters, streamers, and remote workers deal with this every day. The good news is that almost every case of microphone background hum is fixable once you identify the source.
I have spent years troubleshooting audio issues across home studios, gaming setups, and professional recording environments. In this guide, I will walk you through exactly why your microphone picks up background hum and give you step-by-step fixes for every common scenario, from electrical ground loops to Discord settings gone wrong.
Table of Contents
Why Does My Microphone Pick Up Background Hum?
Your microphone picks up background hum because it is designed to capture sound, and it cannot tell the difference between your voice and unwanted noise. Every sound wave that enters the microphone’s pickup pattern gets converted into an electrical signal and amplified. That includes the hum from your computer fan, the buzz from fluorescent lights, and the low rumble of air conditioning.
As one Reddit user on r/audio put it perfectly: “It’s an environment problem. A microphone is going to pick up any sound that is within its pickup area.” This is the core truth behind microphone background hum. Your mic is not broken. Your room is just noisier than you realize.
The sensitivity of your microphone plays a huge role here. Condenser microphones are highly sensitive and pick up a wider frequency range, making them more prone to capturing background noise. Dynamic microphones are less sensitive and naturally reject more ambient sound. If you are using a condenser mic in an untreated room, background hum is almost guaranteed.
Gain staging amplifies the problem. When you crank up your microphone gain to hear your voice better, you are also amplifying every background sound the mic picks up. High gain settings turn a barely noticeable fan hum into a loud, constant drone in your recording. This is why proper gain staging is the single most mentioned quick fix across audio forums.
Types of Microphone Background Noise
Not all background noise is the same. Understanding which type you are dealing with helps you choose the right fix. There are three main categories of microphone background noise, each with distinct causes and solutions.
Impulse Noise
Impulse noise comes from sharp, sudden sounds like keyboard clicks, mouse taps, desk bumps, and footsteps. These are short bursts of sound that hit the microphone quickly and disappear. If your recording has random clicking or thumping sounds, you are dealing with impulse noise.
A shock mount is the best defense against impulse noise transmitted through your desk. Mechanical vibrations from typing travel up the mic stand and hit the diaphragm. A shock mount isolates the microphone from these vibrations, eliminating most thumps and bumps. A noise gate can also help by cutting off the audio signal when you are not speaking.
Broadband Noise
Broadband noise is a continuous hiss or rushing sound spread across many frequencies. The most common sources are your computer fan, air conditioning, heating systems, and the inherent noise floor of budget audio interfaces. This type of noise blends into the background of your recording and is often described as static or hiss.
As a Reddit user on r/obs pointed out: “Try to minimise noise like traffic, AC, refrigerators, PC fan, etc. It all adds up, and the mic will pick up stuff you don’t realize.” Broadband noise is sneaky because your brain tunes it out while you are in the room, but your microphone captures every bit of it.
Narrowband Noise
Narrowband noise is a constant hum or buzz at a specific frequency, usually 50Hz or 60Hz depending on where you live. This is almost always electrical in origin. A ground loop, poorly shielded cable, or proximity to power lines and electronic devices causes this type of interference. If you hear a low, steady hum that never changes, you are dealing with narrowband electrical noise.
A high-pass filter (also called a low-cut filter) can remove narrowband hum by cutting off frequencies below 80Hz or 100Hz. Most audio interfaces, mixing software, and even some microphones have this feature built in. For stubborn electrical hum, you may need to address the root cause with a ground loop isolator or by fixing your cable setup.
Fixing Electrical Hum and Ground Loops
Electrical hum is the most frustrating type of microphone background noise because it feels like something is wrong with your equipment. The good news is that electrical hum almost always comes from fixable connection or grounding issues, not from the microphone itself.
How to Identify a Ground Loop
A ground loop occurs when your audio equipment connects to multiple ground paths with slightly different electrical potentials. This creates a small current that flows through your audio cable, producing a 50Hz or 60Hz hum. The telltale sign is a constant, low-pitched buzz that does not change when you move or speak.
To test for a ground loop, disconnect everything from your audio setup except the microphone and your computer. If the hum disappears, reconnect devices one at a time until the hum returns. The last device you plugged in is creating the ground loop. Common culprits include powered speakers, external monitors, and devices sharing a power strip with your audio interface.
Step-by-Step Ground Loop Fixes
Once you have identified a ground loop, here is how to eliminate it:
1. Plug all your audio equipment into the same power outlet or power strip. This ensures they share the same ground reference and prevents voltage differences.
2. Use balanced XLR cables instead of unbalanced TS or RCA cables. Balanced cables have built-in noise rejection that cancels out electromagnetic interference. This is one of the biggest advantages of XLR microphones over USB mics.
3. Try a different cable. As one Gearspace forum user noted, buzzing “usually indicates a bad cable or lack of ground.” A damaged shield inside your cable lets interference through. Swap cables to rule this out.
4. Add a ground loop isolator between your audio interface and powered speakers. These inexpensive devices break the ground loop while passing the audio signal cleanly.
5. Enable the high-pass filter on your audio interface or in your recording software. Set it to 80Hz to cut the 50Hz or 60Hz hum frequency without affecting your voice.
USB vs XLR: Which Picks Up More Noise?
No competitor guide I found addresses this directly, so let me break it down. USB microphones have their preamp and analog-to-digital converter built into the mic body. This means the delicate analog signal travels almost no distance before being digitized, which reduces electrical interference. However, USB mics connect directly to your computer, which can introduce digital noise and ground loop issues through the USB cable.
XLR microphones send an analog signal through a balanced cable to an external audio interface. The balanced cable rejects interference, but the longer signal path and external preamp add complexity. In practice, a well-set-up XLR system is quieter than a USB mic, but a poorly set-up XLR system can introduce more noise. For beginners, a quality USB microphone is often the cleaner, simpler choice.
How to Set the Right Gain to Reduce Microphone Hum
Gain is the single most important setting for controlling microphone background hum. Gain controls how much the microphone signal gets amplified before it reaches your software. Set it too high, and you amplify every bit of background noise along with your voice. Set it too low, and your voice becomes quiet and muddy.
The goal is to find the sweet spot where your voice is clear and loud enough without bringing up the noise floor. Here is how to set gain properly on both Windows and Mac.
Gain Settings on Windows 11
1. Right-click the speaker icon in your taskbar and select Sound Settings.
2. Scroll to the Input section and click on your microphone under Choose a device for speaking or recording.
3. Adjust the Input volume slider. Start at 50 and test your voice. You want your voice to peak around 70 to 80 percent on the input meter.
4. Click Device properties, then click Additional device properties to open the old control panel.
5. Go to the Levels tab and fine-tune the microphone level. Uncheck any audio enhancements, as these can introduce their own noise.
6. In the Enhancements tab, check Disable all enhancements. Windows audio enhancements often add processing noise that sounds like hum or static.
Gain Settings on Mac
1. Open System Settings and navigate to Sound, then click Input.
2. Select your microphone from the list of input devices.
3. Adjust the Input volume slider. Start at 50 percent and speak at your normal volume.
4. For USB microphones, most have a physical gain knob on the mic itself. Use the physical knob for primary adjustment and leave the Mac software slider at 100 percent.
5. For XLR microphones, set the gain knob on your audio interface. Aim for the level meter to hit yellow when you speak loudly, never red.
Why High Gain Amplifies Background Noise
Think of gain like turning up the sensitivity of a security camera. At a low setting, it only captures what is right in front of it. At maximum sensitivity, it picks up every shadow and movement in the entire room. Your microphone works the same way. Every decibel of gain you add brings the noise floor up by the same amount. If your room has a 40dB noise floor and you set your gain to amplify the signal by 50dB, that background noise is now clearly audible in your recording.
The fix is simple: move the microphone closer to your mouth and lower the gain. If your mic is 2 inches from your mouth instead of 12 inches, your voice is significantly louder relative to the background noise. This means you need less gain, which means less background hum gets amplified.
Microphone Placement Techniques That Cut Background Noise
Where you place your microphone matters as much as what kind of microphone you use. Proper placement can eliminate 60 to 70 percent of background noise before you ever touch a software setting.
The 3 to 1 Rule
The 3 to 1 rule is a classic audio engineering principle for microphone placement. It states that the distance between two microphones should be at least three times the distance from each microphone to its sound source. For a single microphone setup, the principle applies differently: keep your microphone close to your mouth and far from any noise source. If your mic is 4 inches from your mouth, it should be at least 12 inches from any background noise source like a fan or speaker.
Polar Pattern Positioning
Every microphone has a polar pattern that determines which directions it picks up sound from. The most common pattern for voice recording is cardioid, which picks up sound from the front and rejects sound from the back. Position your microphone so the noise source (fan, window, keyboard) is behind the microphone, in the rejection zone. This simple repositioning can dramatically reduce background hum without any settings changes.
Boom Arm Benefits
A boom arm lets you position your microphone exactly where you need it while keeping it off your desk. This does two things: it reduces desk vibration transfer and lets you get the mic closer to your mouth. Getting the mic closer means lower gain settings, which means less background noise. A boom arm also lets you angle the microphone so the rear rejection zone points at your computer fan or other noise sources.
Using a Noise Gate to Silence Background Hum
A noise gate is a software tool that mutes or reduces your microphone signal when you are not speaking. It works like an automatic mute button that opens when your voice hits a certain volume and closes when you stop talking. For streamers, podcasters, and gamers, a noise gate is one of the most effective tools for eliminating background hum during silent moments.
What Is a Noise Gate?
A noise gate has four main settings: threshold, attack, hold, and release. The threshold is the volume level at which the gate opens. Below the threshold, the gate stays closed and mutes the signal. Attack time controls how fast the gate opens when you start speaking. Hold time keeps the gate open for a set duration after you stop. Release time controls how fast the gate closes. Getting these settings right is the difference between clean audio and choppy, unnatural speech.
How to Configure a Noise Gate
1. Set the threshold just above your background noise level. Speak normally and watch the input meter. Note where your background noise peaks, then set the threshold 3 to 5dB above that level.
2. Set the attack time to 1 to 5 milliseconds. This is fast enough to open instantly when you speak but avoids clicking artifacts.
3. Set the hold time to 100 to 200 milliseconds. This prevents the gate from closing between words and syllables.
4. Set the release time to 100 to 300 milliseconds. A gradual close sounds more natural and avoids abrupt cutoffs.
5. Test with actual speech. Say a few sentences with pauses between them and listen back. If words get cut off, lower the threshold slightly or increase the hold time.
Platform-Specific Noise Gate Setup
In Discord, go to User Settings, then Voice and Video. Scroll to Input Mode and select Voice Activity. Adjust the Input Sensitivity slider so it sits just above your background noise level. Toggle on Krisp Noise Suppression for an additional layer of AI-based noise filtering that works alongside your manual settings.
In OBS, click the gear icon next to your microphone in the Audio Mixer. Select Filters, then add a Noise Gate filter. Enter the settings above. Add a second filter called RNNoise for AI-powered noise suppression that handles continuous background hum exceptionally well.
Platform-Specific Fixes: Discord, OBS, and Windows 11
Different platforms handle microphone audio differently, and a fix that works in one app might not work in another. Here is how to tackle microphone background hum on the three platforms people struggle with most.
Discord Noise Suppression Settings
Discord has built-in noise suppression that does a surprisingly good job of removing background hum. Open User Settings, go to Voice and Video, and scroll to the Noise Suppression section. Enable Krisp Noise Suppression, which uses machine learning to separate your voice from background noise. For best results, also enable Echo Cancellation and set your Input Sensitivity to automatic. If Discord still picks up background noise, try lowering your microphone gain in Windows Sound Settings, since Discord processes whatever signal your operating system sends it.
One common Discord issue is the platform boosting your microphone signal automatically. In Voice and Video settings, uncheck Automatically determine input sensitivity and manually set the slider. This prevents Discord from cranking up the gain during quiet moments, which amplifies background hum.
OBS Noise Gate and Filters
OBS gives you the most control over your microphone audio of any streaming platform. The key is building a filter chain that addresses each type of noise. Click the gear icon next to your mic in the Audio Mixer and select Filters. Add these filters in order: a Noise Gate to handle silence, RNNoise for continuous background hum, and a Limiter to prevent clipping. This combination handles impulse noise, broadband noise, and narrowband noise all at once.
For electrical hum specifically, add an EQ filter and apply a high-pass filter at 80Hz. This cuts the 50Hz or 60Hz electrical frequency without affecting your voice. If you still hear hum, try a notch filter set to exactly 60Hz (or 50Hz in Europe) to surgically remove the hum frequency.
Windows 11 Microphone Settings
Windows 11 has several settings that can cause or worsen microphone background hum. Open Settings, go to System, then Sound, then click your microphone under Input. First, disable all audio enhancements. Windows enhancements like Bass Boost and Loudness Equalization add processing that can introduce noise. Second, check the microphone format under Advanced. Set it to 48000Hz, 16-bit or 24-bit. Higher bit depths can actually increase the noise floor on budget interfaces.
Also check your microphone privacy settings. Go to Settings, Privacy and Security, then Microphone. Make sure only the apps you trust have microphone access. Background apps with mic permissions can cause interference and unexpected audio routing issues that sound like hum or static.
Hardware Accessories That Reduce Microphone Hum
Software fixes are powerful, but the right hardware can prevent background noise from ever reaching your microphone. Here are the accessories that make the biggest difference.
Pop Filter
A pop filter is a circular mesh screen placed between your mouth and the microphone. Its primary job is stopping plosives, the bursts of air from P and B sounds that hit the mic diaphragm. But a pop filter also slightly reduces airflow noise from fans and air conditioning. It is an inexpensive accessory that improves overall audio quality.
Shock Mount
A shock mount suspends your microphone in elastic bands or rubber isolators, decoupling it from the mic stand or boom arm. This eliminates mechanical vibrations that travel through your desk when you type, tap, or bump the surface. If your recordings have random thumps and bumps, a shock mount is the fix. Most condenser microphones come with a shock mount included, while dynamic microphones may need a separate suspension mount.
Windscreen
A windscreen is a foam cover that fits over the microphone head. It is designed to reduce wind noise for outdoor recording, but it also helps indoors by softening airflow from fans and breathing. For streamers with a nearby computer fan, a windscreen can noticeably reduce that low-frequency rumble.
Condenser vs Dynamic: Which Is Quieter?
This is one of the most debated topics on audio forums, so let me give you a clear comparison based on my experience with both types in noisy environments.
Condenser Microphones: Highly sensitive, wide frequency response, captures detail and nuance. Ideal for treated studio environments. In an untreated room, a condenser will pick up your fan, your keyboard, your neighbor’s dog, and the hum from your refrigerator. Most USB microphones are condensers, which is why new streamers often struggle with background noise.
Dynamic Microphones: Less sensitive, narrower pickup pattern, naturally rejects ambient sound. Ideal for untreated rooms, gaming setups, and streaming. A dynamic mic requires you to speak closer, but it ignores most background noise. This is why radio stations and podcasters in untreated spaces overwhelmingly use dynamic microphones.
If you are recording in a room that is not soundproofed, a dynamic microphone will almost always give you cleaner audio than a condenser. Switching from a condenser to a dynamic mic is the single biggest upgrade you can make for reducing background hum.
Quick Fixes for Microphone Buzzing Right Now
If you need to fix microphone buzzing immediately, before a stream or call, work through this checklist in order:
1. Lower your gain. Move the mic closer to your mouth and reduce the gain knob or software level by 25 percent.
2. Mute your microphone when not speaking. This prevents background hum from reaching your audience during silent moments.
3. Turn off all Windows audio enhancements in your microphone properties.
4. Plug your microphone and speakers into the same power strip to eliminate ground loops.
5. Move your microphone away from your computer monitor and power cables.
6. Switch from a condenser to a dynamic microphone if you have one available.
7. Enable Krisp noise suppression in Discord or RNNoise in OBS for instant AI noise removal.
8. Close windows and turn off fans and air conditioning during important recordings.
These eight steps take less than five minutes and will resolve most buzzing and hum issues on the spot.
FAQs
How do I stop my mic from picking up background noise?
To stop your mic from picking up background noise, lower the gain, move the microphone closer to your mouth (2 to 4 inches), enable a noise gate in your software, and switch to a dynamic microphone if possible. Also turn off audio enhancements in Windows and use noise suppression features in Discord or OBS.
Why is my mic making a humming sound in the background?
A humming sound usually means electrical interference or a ground loop. Your microphone or audio cable is picking up the 50Hz or 60Hz frequency from nearby power sources. Check for damaged cables, plug all equipment into the same power outlet, and enable a high-pass filter at 80Hz to remove the hum.
How to get rid of microphone hum?
To get rid of microphone hum, first identify the type. For electrical hum, use balanced XLR cables, a ground loop isolator, and a high-pass filter. For environmental hum, lower your gain, use a noise gate, and move the mic closer to your mouth. For persistent hum, switch from a condenser to a dynamic microphone.
What causes microphone hum?
Microphone hum is caused by three main things: electrical interference from ground loops or unshielded cables (narrowband hum at 50 or 60Hz), ambient room noise like fans and air conditioning amplified by high gain (broadband noise), and mechanical vibrations from typing or desk bumps (impulse noise).
How to fix your mic from buzzing?
To fix a buzzing microphone, check your cable for damage, plug all audio gear into the same power strip to eliminate ground loops, disable Windows audio enhancements, lower your gain setting, and add a noise gate filter in OBS or Discord. If the buzz persists, try a different USB port or replace the cable.
How to remove background static noise from mic?
Background static is usually broadband noise from your computer fan or audio interface noise floor. Remove it by lowering gain, moving the mic closer to your mouth, enabling RNNoise in OBS or Krisp in Discord, and using a high-pass filter. Upgrading from a budget USB mic to an XLR setup with a quality audio interface also reduces static.
What is the 3 to 1 rule for micing?
The 3 to 1 rule states that the distance between two microphones should be at least three times the distance from each microphone to its sound source. For single-mic setups, the principle means keeping your microphone close to your mouth and far from noise sources. If your mic is 4 inches from your mouth, keep noise sources at least 12 inches away.
Conclusion
Microphone background hum is not a sign that your equipment is broken. It is your microphone doing exactly what it was designed to do: capturing sound in its environment. The fix always comes down to managing what enters that pickup zone and how much that signal gets amplified.
Start with the basics: lower your gain, move the mic closer, and position noise sources behind the microphone’s rejection zone. Add a noise gate for clean silence between words. If you hear electrical hum, check your cables and grounding setup. For persistent noise in an untreated room, seriously consider switching from a condenser to a dynamic microphone.
Understanding why your microphone picks up background hum is the first step. Now you have the tools and the step-by-step process to fix it, no matter what platform you are recording on or what type of noise is plaguing your audio.