
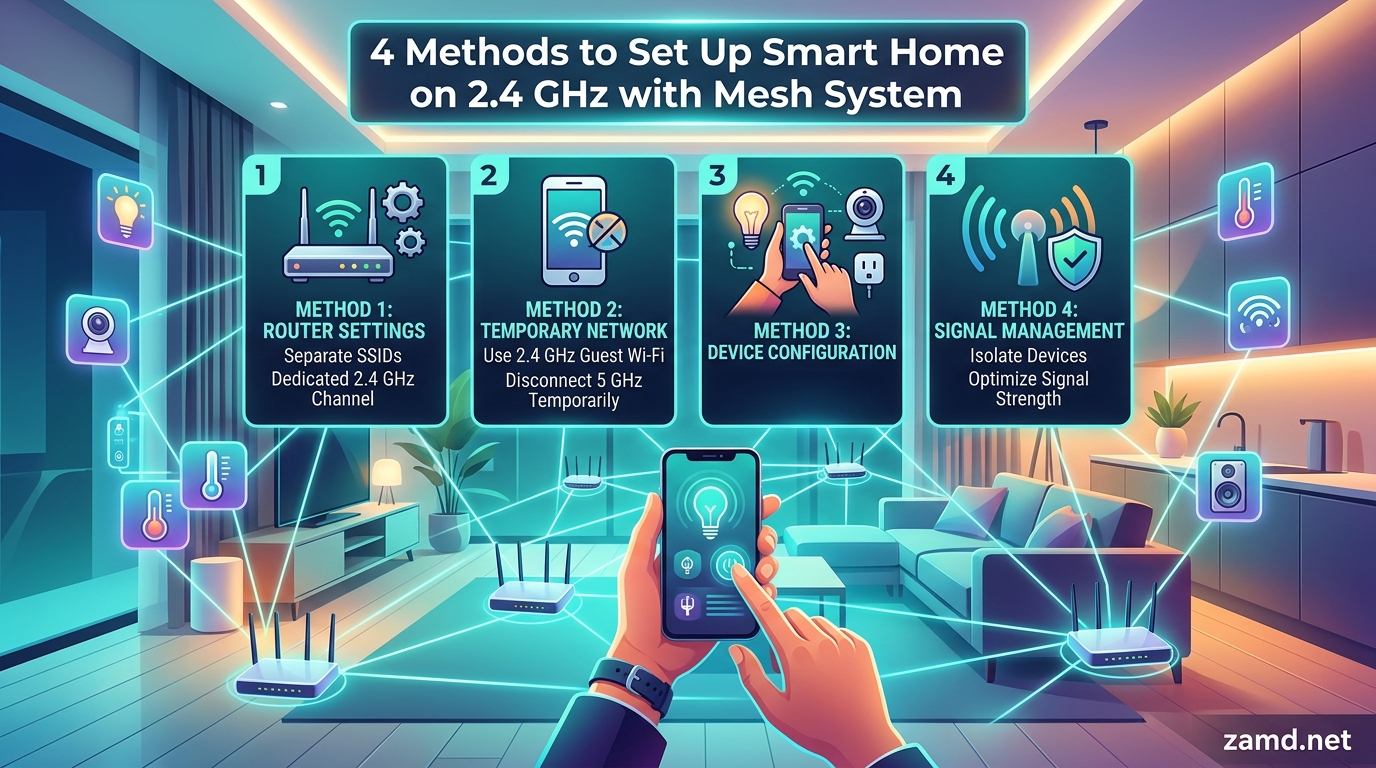
You bought a shiny new smart bulb, security camera, or smart plug, opened the app, and hit a wall: the device refuses to connect because your mesh WiFi system will not hand it a clean 2.4 GHz signal. Learning how to set up a smart home device on a 2.4 GHz network when you have a mesh system comes down to four proven methods that force your phone and your device onto the slower but longer-range 2.4 GHz band long enough to complete setup.
Mesh systems like Google WiFi, Eero, and Netgear Orbi combine 2.4 GHz and 5 GHz into a single network name (SSID) and use a feature called band steering to shuffle devices between bands. This is great for laptops and phones. It is a nightmare for the millions of budget smart home devices that only speak 2.4 GHz.
In this guide I walk through why this conflict happens, the four methods that actually work (ranked easiest to hardest), brand-specific instructions for every major mesh system including ISP gateways from Verizon Fios and AT&T, and how to fix the most frustrating failures including the dreaded disappearing SSID problem.
Table of Contents
Why Smart Home Devices Need 2.4 GHz (and Why Mesh Breaks This)
Over 80 percent of budget smart home devices including smart bulbs, smart plugs, doorbell cameras, motion sensors, and thermostats only support 2.4 GHz WiFi. Manufacturers choose 2.4 GHz because the radio components are cheaper, the chips draw less power, and the signal punches through walls far better than 5 GHz.
The trade-off is speed. A 2.4 GHz network maxes out around 600 Mbps in ideal conditions while 5 GHz can push past 1,300 Mbps. For a smart bulb that sends a few kilobytes of “turn on” data, speed is irrelevant. Range and reliability are everything, and that is exactly what 2.4 GHz delivers.
The problem is that mesh WiFi systems were designed for streaming 4K video and fast downloads, not for cheap IoT chips. Mesh routers actively push every device toward 5 GHz using band steering, which brings us to the core conflict.
What Is Band Steering and Why It Ruins Smart Device Setup
Band steering is a software feature inside your mesh router that watches every device connect and silently decides which frequency band to assign. When your phone joins the network, the mesh system checks signal strength and device capability, then routes the connection to 5 GHz for maximum speed if possible.
Here is where it breaks down. Smart device setup apps on your phone need to talk directly to the smart device during pairing. The device broadcasts its own temporary WiFi signal, your phone connects to it, and the app sends your WiFi credentials so the device can join your network. If your phone is sitting on 5 GHz but the smart device can only understand 2.4 GHz, the credentials get handed over on the wrong band and the pairing fails silently.
Mesh systems make this worse because they hide the band selection from you entirely. On a Google WiFi or Eero system there is no setting that says “put my phone on 2.4 GHz.” You get one SSID and the router decides everything behind the scenes.
2.4 GHz vs 5 GHz at a Glance
Understanding the difference between these two bands helps you understand why every method in this guide works the way it does.
| Characteristic | 2.4 GHz | 5 GHz |
|---|---|---|
| Typical range indoors | 150 feet through walls | 50 feet, struggles with walls |
| Max theoretical speed | ~600 Mbps | ~1,300 Mbps |
| Wall penetration | Strong | Weak |
| Smart device support | Nearly universal | Rare on budget devices |
| Interference level | High (neighbors, microwaves, Bluetooth) | Lower |
| Battery drain on IoT | Low | Higher |
That range difference is not just trivia. It is the entire reason Method 3 in this guide works. Because 5 GHz signal degrades fast over distance and through walls, walking far enough from your router physically forces your phone onto 2.4 GHz whether the mesh system likes it or not.
Method 1: Use an Old Phone or Tablet That Only Supports 2.4 GHz
This is the easiest method and the one I recommend trying first. Older phones and tablets manufactured before 2014 typically only have 2.4 GHz WiFi radios. When you run the smart device setup app on one of these devices, the phone is already on 2.4 GHz, so the pairing process works perfectly without any router changes.
Dig through your drawer for an old iPhone 4S, iPhone 5, Samsung Galaxy S3 or S4, original iPad, or any budget Android tablet from a few years ago. Even some newer ultra-budget tablets only ship with 2.4 GHz WiFi to cut costs.
Steps for Method 1
1. Charge the old device and connect it to your mesh WiFi network using your normal password.
2. Confirm it is actually on 2.4 GHz by checking WiFi details in settings. On Android, tap your network name and look at the frequency field. On older iOS there is no built-in indicator, but if the device only has a 2.4 GHz radio you are guaranteed to be on the right band.
3. Download the smart device companion app on the old device and run the setup process normally.
4. Once the device pairs successfully, it remembers your WiFi credentials. You can now control it from your main phone because the smart device communicates through the cloud, not through your phone directly.
The beauty of this method is that it requires zero changes to your router. The downside is that not everyone has an old device lying around. If you do, this is a 5-minute fix.
Method 2: Temporarily Separate or Rename Your 5 GHz Band
If your router or mesh system allows it, splitting your combined SSID into two separate network names gives you direct control over which band each device uses. You create one SSID for 2.4 GHz and another for 5 GHz, then connect your phone to the 2.4 GHz network during setup.
This method works on many standalone routers (Netgear Nighthawk, ASUS routers, most ISP gateways) but is limited or impossible on Google WiFi and Eero, which do not expose band separation in their apps. See the brand-specific section below to find out if your system supports this.
Steps for Method 2 on a Standard Router
1. Open a web browser on a computer connected to your network and type your router’s IP address into the address bar. Common addresses are 192.168.1.1, 192.168.0.1, or 10.0.0.1.
2. Log in with your admin username and password. If you never changed these, check the sticker on the bottom of your router for defaults.
3. Navigate to the Wireless or WiFi Settings section. Look for an option labeled “Wireless Bands,” “SSID Configuration,” or “Band Steering.”
4. Turn off band steering or smart connect. This unlocks the ability to name each band separately.
5. Rename the 5 GHz SSID to something distinct. For example, if your current network is called “SmithHome,” name the 2.4 GHz network “SmithHome” and the 5 GHz network “SmithHome_5G.”
6. Save changes and wait for your router to reboot, which usually takes 1 to 2 minutes.
7. On your phone, connect to the 2.4 GHz SSID (the one without “_5G” in the name).
8. Open your smart device app and run the setup. The device now sees only the 2.4 GHz network and pairs cleanly.
9. After setup is complete, you can either keep the bands separated permanently or go back and re-enable band steering. The smart device will continue working on 2.4 GHz regardless because it remembers the SSID and password, not the band.
How to Verify Your Phone Is on 2.4 GHz
On Android: Go to Settings, then WiFi, then tap the gear icon next to your connected network. Look for the “Frequency” field. It will say either 2.4 GHz or 5 GHz.
On iPhone: Apple does not show the band directly in WiFi settings. The most reliable workaround is to use a WiFi analyzer app like “AirPort Utility” (made by Apple but requires enabling the WiFi scanner in settings) or any third-party WiFi analyzer. Alternatively, if you used Method 2 and only connected to a clearly named 2.4 GHz SSID, you can trust the connection.
Method 3: Walk Far Enough Away to Force 2.4 GHz
This method sounds silly but it works because of basic physics. The 5 GHz signal from your mesh router degrades rapidly over distance and especially through walls. The 2.4 GHz signal travels much farther. If you walk far enough away from your router, your phone will lose the 5 GHz connection entirely but maintain a 2.4 GHz connection, and the mesh system will have no choice but to keep your phone on 2.4 GHz.
Steps for Method 3
1. Start near your router and begin the smart device setup process in the app.
2. When the app asks you to confirm your WiFi network, start walking away from your nearest mesh node.
3. Walk to the farthest room in your house, ideally with one or two walls between you and the router. For a typical 2,000 square foot home, this usually means going to the opposite corner.
4. Go outside if you need to. Many users report success by stepping into their backyard or garage.
5. The app should now complete setup because your phone is locked onto 2.4 GHz. Walk back inside once the device is paired.
This method is free and requires no configuration changes, but it is less reliable in small apartments where the 5 GHz signal reaches every corner. If your home is compact, skip to Method 4.
Method 4: Create a 2.4 GHz Phone Hotspot to Trick the Setup
This is the most reliable workaround and the one I have used personally with stubborn devices like Wyze cameras and Govee smart bulbs on Google WiFi mesh. The trick is to create a phone hotspot running at 2.4 GHz, connect your smart device to that hotspot during setup, then switch the device to your real WiFi network afterward.
The smart device setup app sends your WiFi credentials to the device. If you give it your hotspot name and password first, the device connects to the hotspot. Then you change the hotspot name and password to match your real mesh network name and password, and the device seamlessly hops over.
Steps for Method 4 on iPhone
1. Go to Settings, then Personal Hotspot on your iPhone and turn it on.
2. Tap “Wi-Fi Password” and set the hotspot password to exactly match your home mesh WiFi password.
3. Go back to Settings, then General, then About, then tap Name. Change your iPhone’s name to exactly match your home WiFi network name (SSID). This is critical because the iPhone hotspot broadcasts using the phone’s name as the SSID.
4. Open the smart device app and start setup. When prompted for your WiFi network, the app will see your hotspot (which looks identical to your real network) and send those credentials to the smart device.
5. The device connects to your hotspot. Let it finish pairing.
6. Now turn off the hotspot and change your iPhone name back to normal.
7. The smart device boots up, looks for your network name, finds the real mesh network (same SSID, same password), and connects to it on 2.4 GHz automatically because that is the only band it understands.
Steps for Method 4 on Android
1. Go to Settings, then Network and Internet, then Hotspot and Tethering, then Wi-Fi Hotspot.
2. Tap “Hotspot Name” and type your exact home WiFi network name.
3. Set the hotspot password to exactly match your home WiFi password.
4. On some Android phones, look for a “AP Band” or “Frequency Band” setting in the hotspot configuration and set it to 2.4 GHz. Most Android hotspots default to 2.4 GHz already, but Samsung and Pixel phones with newer software may offer a 5 GHz option that you need to avoid.
5. Turn on the hotspot and run the smart device setup app.
6. Once the device pairs, turn off the hotspot. The device finds your real mesh network and connects on 2.4 GHz.
One important note: iPhone personal hotspots sometimes broadcast on 5 GHz on newer models running iOS 13 and later. If Method 4 fails on an iPhone, the hotspot may be on 5 GHz. Try using an Android phone for the hotspot instead, or toggle the “Maximize Compatibility” option under Personal Hotspot settings on iPhone 12 and newer, which forces the hotspot to 2.4 GHz.
Mesh-System-Specific Instructions: Which Method Works for Your Setup
Not every method works on every mesh system. Some brands lock down band separation entirely, while others make it easy. Here is a quick-reference table to tell you which method to try based on the mesh system you own.
Quick Reference: Best Method by Mesh System
| Mesh System | Allows Band Separation? | Best Method | Notes |
|---|---|---|---|
| Google WiFi / Nest WiFi | No | Method 4 (Hotspot) | No manual band control in app; hotspot trick is most reliable |
| Amazon Eero | No | Method 4 (Hotspot) or Method 1 | Eero does not expose band separation; old device also works well |
| Netgear Orbi | Yes (via web interface) | Method 2 (Separate Bands) | Advanced wireless settings let you uncheck 5 GHz SSID broadcast |
| TP-Link Deco | Limited | Method 4 (Hotspot) or Method 3 | Some Deco models allow guest network at 2.4 GHz; disable fast roaming to help |
| Linksys Velop | Yes (via web interface) | Method 2 (Separate Bands) | Advanced settings allow SSID split |
| ASUS ZenWiFi | Yes | Method 2 (Separate Bands) | Disable Smart Connect in ASUS admin to split bands |
| Xfinity xFi Gateway | Yes (via Xfinity app) | Method 2 (Separate Bands) | Use Xfinity app admin to rename 5 GHz band |
| Spectrum Router | Yes (via web interface) | Method 2 (Separate Bands) | Standard router admin at 192.168.1.1 |
| Verizon Fios Gateway | Yes (via My Fios app or web) | Method 2 (Separate Bands) | Disable “Self-Organizing Network” to split bands |
| AT&T Gateway | Limited | Method 4 (Hotspot) | AT&T Smart Home Manager offers limited band control; hotspot most reliable |
Google WiFi and Nest WiFi Specific Notes
Google WiFi and Nest WiFi are the most common source of frustration for smart home setup. Google’s mesh system offers zero manual band control in either the Google Home app or the older Google WiFi app. There is no setting to disable band steering, no option to split SSIDs, and the guest network workaround that some blogs recommend frequently fails because the guest network on Google WiFi still uses band steering.
I have personally wasted hours trying guest networks on Google WiFi with Govee bulbs and Wyze cameras. It rarely works. Go straight to Method 4 (hotspot trick) and save yourself the headache. If you set up smart devices frequently, consider adding a dedicated 2.4 GHz access point or a cheap range extender configured as an access point with its own 2.4 GHz SSID.
Eero Specific Notes
Amazon Eero takes a similar approach to Google WiFi. The Eero app does not expose band separation, and Eero’s band steering is aggressive. The old device method (Method 1) works particularly well with Eero because Eero handles legacy 2.4 GHz devices gracefully once they are paired. The hotspot method (Method 4) is your backup.
One Eero-specific tip: if you have Eero Pro units which are tri-band, you can connect a dedicated 2.4 GHz access point to one of the Eero Ethernet ports. This gives you a permanent 2.4 GHz network for smart devices without fighting Eero’s band steering.
Netgear Orbi Specific Notes
Netgear Orbi is one of the more friendly mesh systems for smart home devices because the Orbi web interface (accessed by typing orbilogin.com or the router IP into a browser) exposes the advanced wireless settings you need. Navigate to the Advanced tab, then Advanced Settings, then Wireless Settings. Here you can uncheck “Broadcast SSID on 5 GHz Channel” temporarily, which hides your 5 GHz network and forces everything onto 2.4 GHz for setup. Re-check the box afterward.
TP-Link Deco Specific Notes
TP-Link Deco has a partial workaround. In the Deco app, go to More, then WiFi, and look for the option to disable “Fast Roaming.” Disabling fast roaming can help stubborn 2.4 GHz devices connect because they no longer get bounced between bands during the handshake. The Deco guest network sometimes operates on 2.4 GHz only, but this varies by firmware version.
Verizon Fios Gateway Specific Notes
Verizon Fios routers (model numbers like G3100, G1100) support band separation but hide it behind a feature called “Self-Organizing Network” or SON. Open the My Fios app or browse to myfiosgateway.com, log in, and disable SON in the advanced wireless settings. Once disabled, you can rename the 5 GHz band separately and use Method 2 directly.
AT&T Gateway Specific Notes
AT&T gateways (models like BGW210, NVG599) are notoriously locked down. The AT&T Smart Home Manager app offers limited controls and does not expose a clean band split on most firmware versions. The hotspot method (Method 4) is the most reliable path for AT&T customers. If you are technically inclined, you can put the AT&T gateway in IP Passthrough mode and connect your own router that supports band separation.
Xfinity and Spectrum ISP Gateways
Both Xfinity (via the Xfinity app or admin at 10.0.0.1) and Spectrum (via admin at 192.168.1.1) allow you to rename the 5 GHz band separately. The steps are straightforward: log in, find the WiFi settings, and change the 5 GHz SSID to something distinct. This unlocks Method 2 directly. These ISP gateways are actually easier to work with than Google WiFi or Eero for smart home setup.
Smart Device Categories: What Actually Needs 2.4 GHz
If you are shopping for smart home devices or trying to figure out which of your existing gadgets need special setup, here is a breakdown by category.
| Device Category | Typical 2.4 GHz Only? | Examples |
|---|---|---|
| Smart bulbs | Yes (most) | Wyze Bulb, Govee, Sengled, Kasa |
| Smart plugs | Yes (most) | TP-Link Kasa, Wyze Plug, Gosund |
| Security cameras | Yes (budget models) | Wyze Cam, Ring (some), Blink |
| Video doorbells | Yes (most) | Ring, Wyze Doorbell, Eufy |
| Motion sensors | Mixed (many use Zigbee) | Aqara, SmartThings sensors |
| Smart thermostats | Often | Ecobee, Nest (older models) |
| Smart switches | Often | Treatlife, Tuya-based switches |
| Robot vacuums | Mixed | Roborock, Eufy, Wyze |
Notice that some categories like motion sensors often skip WiFi entirely and use Zigbee or Z-Wave protocols. If you are tired of fighting 2.4 GHz issues, switching to Zigbee-based devices paired through a hub like Samsung SmartThings or a generic Zigbee USB dongle eliminates the problem because Zigbee operates on its own frequency completely separate from your WiFi bands.
Thread and Matter: The Long-Term Fix
If you are planning your smart home for the future, the Thread protocol and the Matter smart home standard are worth knowing about. Thread is a low-power mesh networking protocol that runs on 802.15.4 radio (separate from WiFi entirely). Matter is a universal compatibility layer that lets devices work across Apple Home, Google Home, and Amazon Alexa regardless of manufacturer.
Thread-based smart devices do not need your 2.4 GHz WiFi at all. They communicate through a Thread Border Router (like an Apple TV 4K, HomePod mini, or Google Nest Hub 2nd gen) and form their own mesh network. This completely sidesteps the band steering problem.
Adoption is growing in 2026. More manufacturers are shipping Matter-compatible devices that fall back to Thread first and WiFi only as a backup. If you are starting fresh or replacing problematic devices, look for the Matter logo on the box and prefer Thread networking over WiFi.
Why Your 2.4 GHz SSID Keeps Disappearing
One of the most common complaints on Reddit and community forums is the mysterious disappearing 2.4 GHz SSID. You see your network name, then it vanishes, then it comes back. This problem is particularly frustrating because it makes smart device setup feel impossible.
There are three main causes. First, channel hopping. Some routers automatically switch 2.4 GHz channels to avoid interference, and during the switch the SSID briefly drops from the broadcast list. Second, DFS (Dynamic Frequency Selection) channels on some 5 GHz setups can cause the router to temporarily suspend broadcasting when it detects radar signals from airports or weather stations, which can cascade into mesh node reconnections. Third, physical interference from other electronics near your router.
One forum user discovered that moving a NAS device and wireless surround sound speakers away from their mesh router reduced 2.4 GHz SSID dropouts significantly. Other devices that commonly interfere with 2.4 GHz include microwaves, baby monitors, Bluetooth speakers, and USB 3.0 devices and cables.
To fix a disappearing SSID, try these steps in order. Move electronic devices at least 3 feet away from your main mesh node. In your router admin panel, manually lock the 2.4 GHz channel to 1, 6, or 11 (these are the non-overlapping channels) instead of leaving it on auto. Check for router firmware updates, as manufacturers sometimes fix channel hopping bugs in newer releases. If the problem persists, a WiFi analyzer app can show you which channels your neighbors are saturating so you can pick the least crowded one.
Troubleshooting: When Devices Still Will Not Connect
If you tried one of the four methods above and your smart device still refuses to connect, run through this checklist before giving up.
1. Confirm your phone is actually on 2.4 GHz during setup. Use the Android WiFi details method or a WiFi analyzer app. If your phone jumped back to 5 GHz mid-setup, start over.
2. Move closer to the smart device during pairing. Bluetooth-based discovery (used by some devices to initiate setup) has a range of about 30 feet and hates walls.
3. Check for typos in your WiFi password. This sounds obvious, but smart device apps often fail silently on incorrect passwords rather than telling you.
4. Restart the smart device. Most smart plugs and bulbs have a physical reset button or a power-cycle sequence (usually toggle power 3 to 5 times) that clears the previous pairing attempt.
5. Force-close and reopen the smart device app. Some apps cache a failed setup state and will not retry properly until force-closed.
6. Restart your phone. This clears any stale network state from a failed hotspot or band switch.
7. Update the smart device app. Manufacturers occasionally push setup flow fixes in app updates.
8. If the device connected but keeps dropping offline afterward, the issue is likely 2.4 GHz channel congestion from neighbors. Lock your router to a specific channel using a WiFi analyzer to find the least crowded option.
Permanent Solutions for Frequent Smart Device Setup
If you add smart devices regularly, the workaround methods get tedious fast. Here are two permanent fixes that eliminate the 2.4 GHz headache for good.
The first option is adding a dedicated 2.4 GHz access point. Buy a cheap WiFi router or range extender, configure it as an access point (not a range extender, which repeats signal and adds latency), set its SSID to something like “SmithHome_IoT,” and connect all your smart devices to it. This access point broadcasts only 2.4 GHz and never touches band steering. Plug it into one of your mesh nodes via Ethernet.
The second option is migrating to Zigbee, Z-Wave, or Thread devices with a hub. A Samsung SmartThings Hub, Home Assistant server, or Apple HomePod mini (for Thread) lets you run sensors, switches, and bulbs on their own protocols. They never touch your WiFi network at all. This is the approach I recommend for anyone building a smart home with more than 10 devices.
Frequently Asked Questions
How do I set up smart devices on a 2.4 GHz connection?
To set up smart devices on a 2.4 GHz connection, force your phone onto the 2.4 GHz band during setup using one of four methods: use an old 2.4 GHz-only device for setup, temporarily separate your WiFi bands in router settings, walk far from the router so 5 GHz drops out, or create a 2.4 GHz phone hotspot that mimics your home network name and password.
Can I create separate 2.4 GHz and 5 GHz SSIDs on my Nighthawk?
Yes. Log into your Nighthawk admin panel (usually routerlogin.net or 192.168.1.1), go to Wireless Settings, and disable Smart Connect. This unlocks the ability to name your 2.4 GHz and 5 GHz networks separately. Connect your phone to the 2.4 GHz SSID during smart device setup, then re-enable Smart Connect afterward if desired.
Is mesh WiFi 2.4 or 5 GHz?
Mesh WiFi uses both 2.4 GHz and 5 GHz simultaneously. Mesh systems combine both bands into a single network name and use band steering to automatically assign each device to the best frequency. This is why 2.4 GHz-only smart devices struggle to connect during setup on mesh systems like Google WiFi and Eero.
Can I use mesh WiFi with an existing router?
Yes, you can use a mesh system with an existing router by putting your mesh in Access Point mode and connecting it to your router via Ethernet. This can actually help with 2.4 GHz device setup because your original router may support band separation that the mesh system does not. Configure your original router with a separate 2.4 GHz SSID and use it for smart devices while the mesh handles everything else.
Why does my 2.4 GHz SSID keep disappearing on my mesh network?
Your 2.4 GHz SSID may disappear due to channel hopping (the router auto-switching channels), DFS channel conflicts from nearby radar, or physical interference from electronics near the router. To fix it, lock the 2.4 GHz channel to 1, 6, or 11 in router settings, move interfering devices away from the router, and update your router firmware.
Why won’t my smart device stay connected after setup?
Smart devices that keep dropping offline usually suffer from 2.4 GHz channel congestion caused by neighboring WiFi networks. Use a WiFi analyzer app to find the least crowded channel (1, 6, or 11), then lock your router to that channel in the admin settings. Also ensure the device is within reasonable range of a mesh node.
Do I need to keep my phone on 2.4 GHz after the smart device is set up?
No. Once a smart device pairs with your WiFi network, it stores the SSID and password and connects independently. You can switch your phone back to 5 GHz or let band steering resume. The smart device communicates through the cloud or your local network and does not require your phone to be on the same band.
Conclusion
Figuring out how to set up a smart home device on a 2.4 GHz network when you have a mesh system is one of the most common pain points in home automation, but it is entirely solvable. The four methods in this guide cover every scenario: grab an old phone for instant success, split your bands on routers that allow it, walk away to force 2.4 GHz on tight mesh systems, or use the hotspot trick for stubborn setups on Google WiFi and Eero.
Start with the method that matches your mesh system using the quick reference table. If one fails, move to the next. For anyone building a smart home with more than a handful of devices, seriously consider switching to Zigbee, Z-Wave, or Thread-based hardware to avoid this problem permanently. Your future self will thank you every time you add a new device without a 30-minute WiFi dance.