
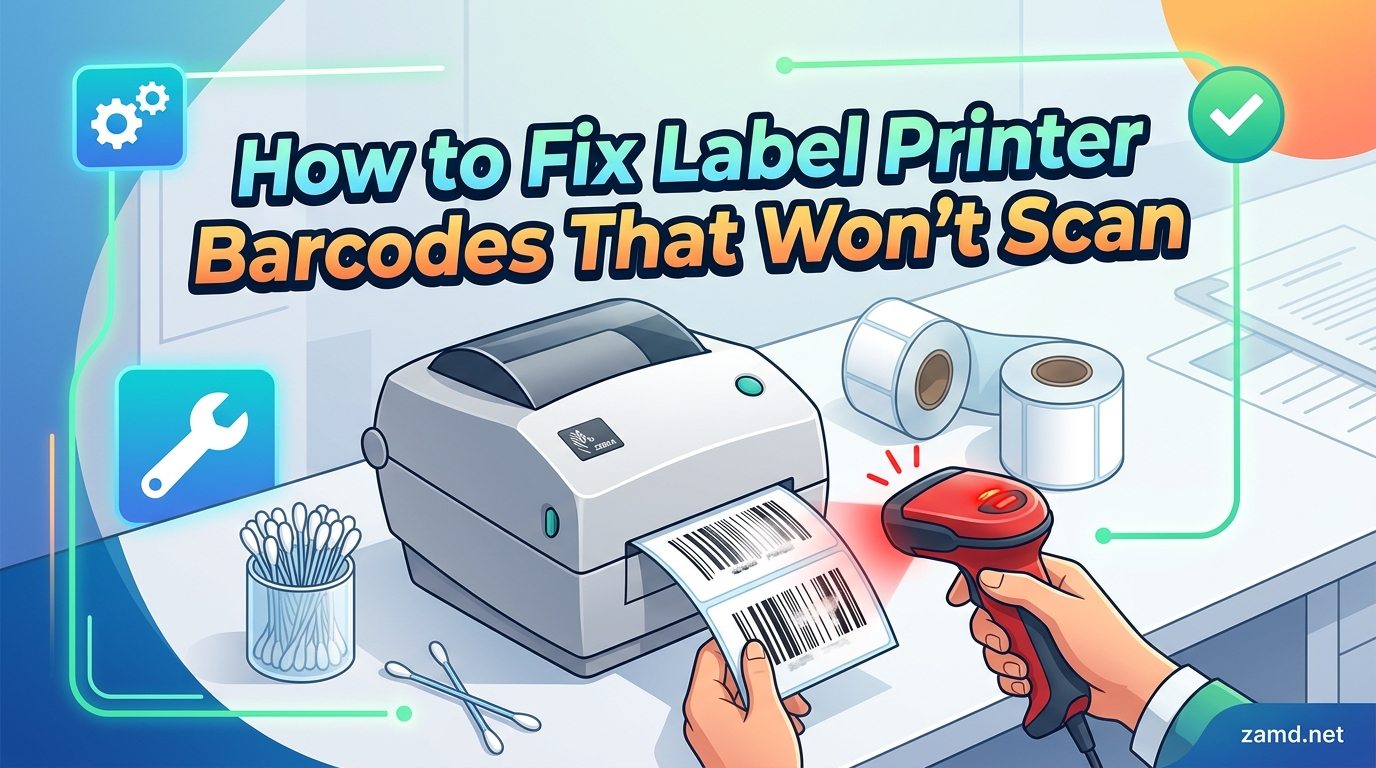
You print a batch of shipping labels, walk them over to the scanner, and nothing happens. The scanner beeps, the red line sweeps across the label, but the barcode just will not read. If you have ever stood in a warehouse aisle staring at a stack of labels that refuse to scan, you already know how frustrating this problem gets.
Learning how to fix label printer barcodes that won’t scan starts with understanding that every scan failure has a root cause. The issue almost always falls into one of three categories: print quality, scanner configuration, or environmental factors. Once you know which category your problem lives in, the fix becomes straightforward.
Our team has spent years working with thermal label printers in warehouse, retail, and fulfillment environments. We have seen every type of scan failure imaginable, from faded barcodes on cold storage labels to Zebra printers spitting out solid black bars due to encoding conflicts. This guide walks you through every common cause and gives you specific, tested steps to get your barcodes scanning again.
Table of Contents
Quick Fix Summary: 5 Steps to Try Right Now
If you need an immediate answer for how to fix label printer barcodes that won’t scan, start with these five steps before diving into deeper troubleshooting:
- Inspect the label visually. Look for faded bars, blurry edges, smudging, or blank gaps in the barcode. If the print looks weak, clean the printhead and check your ribbon or thermal settings.
- Verify scanner symbology settings. Make sure your scanner has the correct barcode type enabled. Code 128, UPC, Code 39, and GS1-128 each need to be turned on in the scanner configuration.
- Check the quiet zone. Ensure there are at least 10 times the X-dimension (the narrowest bar width) of blank space on both the left and right sides of the barcode. For a 10-mil X-dimension, that means at least 100 mils of clear margin.
- Adjust your scanning angle. Hold the scanner at a 10 to 15 degree angle rather than perfectly perpendicular. This reduces glare bouncing off glossy label stock back into the scanner sensor.
- Confirm print resolution. Barcodes printed below 203 DPI often fail. If you are printing small or dense barcodes, switch to 300 DPI or higher for crisp, scannable edges.
These five checks resolve the majority of barcode scanning problems on the spot. If your issue persists, the detailed sections below will help you identify the specific cause and apply the right fix.
What Causes Barcode Scan Failures: The Three Root Causes
Every barcode scan failure traces back to one of three root cause categories. Understanding which category your problem falls into saves you hours of trial-and-error debugging.
The first category is print quality. This covers anything wrong with how the barcode was physically printed, including low DPI resolution, faded thermal output, dirty printheads, wrong ribbon formulation, or calibration issues. If your barcode looks bad to the human eye, it will look even worse to a scanner.
The second category is scanner configuration. The barcode might be printed perfectly, but the scanner cannot decode it because the wrong symbology is enabled, firmware is outdated, or auto-discrimination settings are interfering. A scanner that beeps but does not scan almost always points to a configuration problem.
The third category is environmental and physical factors. This includes scanning angle, lighting glare, label damage from moisture or abrasion, temperature extremes, and even label placement on curved or transparent surfaces. These issues are easy to overlook because the barcode itself looks fine.
Throughout the rest of this guide, we address each category in detail with specific fixes you can apply today.
Print Quality Issues: Getting Crisp, Scannable Barcodes
Print quality is the single most common reason barcodes fail to scan. When bars are fuzzy, faded, or inconsistent, scanners cannot distinguish the light and dark patterns they need to decode the data.
Thermal Transfer vs Direct Thermal: Which Is Right for Barcodes?
Thermal transfer printing uses a heated ribbon to melt ink onto the label surface. This produces durable, smudge-proof barcodes that resist heat, moisture, and chemicals. For warehouse scanning, shipping labels, and outdoor labeling, thermal transfer with a resin or wax-resin ribbon is the gold standard.
Direct thermal printing uses heat-sensitive label stock that darkens when the printhead passes over it. No ribbon is needed, which makes it simpler and cheaper to operate. However, direct thermal labels fade over time, especially in sunlight or high-temperature environments. If your barcodes scan fine when freshly printed but fail weeks later, direct thermal fade is likely the culprit.
For barcode applications, we recommend thermal transfer whenever label durability matters. Use direct thermal only for short-life labels like shipping labels that get scanned within days of printing.
DPI Resolution: Why 203 DPI Is Not Always Enough
DPI (dots per inch) determines how many individual dots the printhead can place per linear inch. Higher DPI means sharper, more defined barcode bars and spaces. Most thermal label printers operate at 203, 300, or 600 DPI.
At 203 DPI, standard-size barcodes like UPC-A and Code 128 usually scan without issues. But if you are printing small barcodes, dense 2D codes like Data Matrix or PDF417, or labels with very narrow X-dimensions, 203 DPI often produces bars that bleed into each other.
Switching to 300 DPI gives you significantly sharper edges and is the minimum we recommend for any barcode smaller than 1.5 inches wide. For micro-labels or high-density 2D barcodes, 600 DPI provides the crisp definition scanners need for reliable reads.
If your printer supports multiple DPI settings, try increasing the resolution and reprinting a test label. This single change fixes a surprising number of scan failures.
Printhead Cleaning: The Fix Most People Skip
A dirty printhead is one of the most overlooked causes of unreadable barcode labels. Over time, adhesive residue, ribbon dust, and label coating buildup accumulate on the printhead elements. This creates uneven heat distribution, which produces faded streaks, ghost bars, or blank gaps in your barcode.
Clean your printhead every time you change a ribbon roll or load a new label roll. Use a thermal printer cleaning swab or isopropyl alcohol wipe (90 percent or higher). Gently wipe the printhead element from one end to the other, never scrubbing back and forth. Let it dry for 30 seconds before closing the printer.
Also inspect the platen roller, the rubber roller that feeds labels through the printer. If it has label adhesive or debris stuck to it, labels will feed unevenly, causing distorted or stretched barcodes. Clean the platen roller with the same alcohol wipe.
Ribbon Formulation: Wax vs Resin
If you are using thermal transfer printing, the ribbon formulation directly affects barcode contrast and durability. Wax ribbons are the cheapest option and work fine for paper labels in clean, indoor environments. However, wax produces softer edges that can blur at small sizes.
Resin ribbons produce the sharpest, darkest bars with excellent chemical and heat resistance. They are ideal for synthetic label stock and harsh environments. Wax-resin ribbons offer a middle ground with good print quality and moderate durability.
If your barcodes are printing with low contrast or fuzzy edges on thermal transfer, try upgrading from a wax ribbon to a wax-resin or full resin formulation. The difference in barcode scan reliability is immediately noticeable.
Printer Calibration and Darkness Settings
Thermal label printers need regular calibration to maintain consistent print quality. Calibration tells the printer where labels start and stop, and it adjusts sensor sensitivity to the label stock you are using. If you skip calibration after changing label sizes or types, barcodes can print shifted, stretched, or with uneven darkness.
To calibrate, run the built-in calibration routine on your printer. On Zebra printers, this is typically a menu option or a button combination. On Dymo and Brother printers, calibration happens through the driver software.
Also check the darkness (or heat) setting. If darkness is too low, bars print gray instead of black, killing your contrast ratio. If darkness is too high, bars bleed and merge into each other. Adjust darkness one level at a time and reprint until bars are solid black with clean white spaces between them.
Scanner Configuration: When the Barcode Looks Fine but Still Fails
Sometimes the barcode is printed perfectly, but the scanner still cannot read it. This points to a scanner configuration issue rather than a print quality problem.
Symbology Settings: Is the Right Barcode Type Enabled?
Every barcode scanner has a list of supported symbologies that can be enabled or disabled. If the symbology your barcode uses is not enabled, the scanner will not read it, period. This is one of the most common reasons a barcode scanner beeps but does not scan.
Common symbologies include Code 128 (used for shipping and logistics), UPC and EAN (retail products), Code 39 (industrial and automotive), GS1-128 (supply chain), Data Matrix (small item marking), and PDF417 (transportation and ID cards).
Check your scanner manual for the programming barcodes that enable specific symbologies. Scan the enable barcode for the type you are using, then test your label again. Many scanners ship with only the most common symbologies enabled by default, so less common types may need manual activation.
Firmware Updates: The Silent Fix
Scanner manufacturers regularly release firmware updates that improve decoding algorithms, add symbology support, and fix bugs that cause scan failures. If your scanner worked fine for months and suddenly started rejecting barcodes, outdated firmware could be the issue.
Check the manufacturer website for your scanner model and download the latest firmware. Most modern scanners update via USB connection through a desktop utility. The update process typically takes under five minutes.
Forum users on Reddit consistently report that firmware updates resolve mysterious scan failures, especially after operating system updates or when scanning newer barcode formats.
Auto-Discrimination and Interference
Most modern scanners use auto-discrimination, which means they automatically detect and decode whichever symbology is presented. While convenient, auto-discrimination can cause inconsistent reads when multiple barcode types are visible at once or when the scanner tries multiple decode attempts before settling on an answer.
If you are scanning the same symbology repeatedly, try disabling auto-discrimination and enabling only the specific symbology you need. This forces the scanner to use a dedicated decode algorithm, which is often faster and more reliable than the auto-detection mode.
Scanner Optical Resolution and Depth of Field
Every scanner has an optical resolution limit and a depth of field, which is the range of distances within which it can successfully read barcodes. If your barcode is too dense for the scanner resolution or too close or far for its depth of field, scans will fail.
Laser scanners typically have a longer depth of field but struggle with very small or very dense barcodes. Imager-based scanners (which capture a photo of the barcode and decode it digitally) handle 2D barcodes and dense codes better but may have a shorter working range.
If barcodes scan when you hold the scanner at a specific distance but fail when closer or farther, you are outside the scanner depth of field. Check the spec sheet for your scanner and test from the recommended distance.
Label Design and Placement: Quiet Zones, X-Dimension, and Sizing
Even a perfectly printed barcode can fail to scan if the label design violates basic barcode standards. Quiet zones, X-dimension, and physical sizing all matter.
Quiet Zone Requirements
The quiet zone is the blank margin on both the left and right sides of a barcode. Scanners need this clear space to identify where the barcode starts and stops. Without adequate quiet zones, the scanner cannot lock onto the barcode pattern.
The standard quiet zone requirement is 10 times the X-dimension (the width of the narrowest bar or space in the barcode). For a barcode with a 10-mil X-dimension, you need at least 100 mils (0.1 inch) of blank space on each side.
If your label design has text, borders, or other barcodes too close to the main barcode, the quiet zone is violated. Many scan failures trace back to this single design issue. Check your label template and add more margin if anything crowds the barcode.
X-Dimension: How Small Is Too Small?
The X-dimension is the width of the narrowest bar in a barcode. It directly affects scannability because smaller X-dimensions require higher printer resolution and better scanner optics to read.
For most general-purpose applications, a 10-mil to 13-mil X-dimension works well. Going below 10 mil (0.01 inch) is risky unless you are printing at 300 DPI or higher and using a high-quality scanner. At 7.5 mils or below, only specialized scanners with high optical resolution can reliably decode the barcode.
If you are printing small barcodes on tiny labels, check the X-dimension in your barcode generation software. Increase it if possible, and confirm your printer DPI is high enough to render that X-dimension with clean edges.
Label Placement on Products
Where you place the barcode on a product or package affects scannability. Barcodes wrapped around curved surfaces, placed over seams, or applied to transparent or reflective materials are harder to scan.
For product labeling, place barcodes on flat surfaces whenever possible. For shipping cartons, place the barcode label on a flat side, not over a corner or edge. If you must label a curved item, choose a larger barcode with a wider X-dimension to give the scanner more tolerance.
Avoid placing barcodes on the bottom of products where they may get scuffed. If labels are exposed to friction during shipping or handling, apply a clear overlaminate to protect the barcode.
Contrast and Color: Getting the Right Black-to-White Ratio
Barcode scanners rely on contrast between dark bars and light spaces. When contrast is too low, the scanner cannot distinguish the barcode pattern from the background.
The PCS Value
Print Contrast Signal (PCS) is a measurement of how much contrast exists between the bars and spaces of a barcode. A PCS value of 0.70 or higher is generally required for reliable scanning. This means the bars need to absorb at least 70 percent more light than the spaces reflect.
Pure black bars on pure white backgrounds produce the highest PCS values. Any deviation from this standard reduces contrast and increases the risk of scan failures.
Color Combinations to Avoid
Red bars on white backgrounds are invisible to most scanners because scanner light is typically red or infrared. Red reflects red light, making red bars appear the same as the white background.
Dark colored labels with black printed barcodes also produce poor contrast. If you are using colored label stock, stick to light pastel colors and always print barcodes in solid black.
Avoid glossy or metallic label finishes near barcodes. Reflective surfaces bounce scanner light unpredictably, creating false readings. If you must use glossy stock, tilt the scanner at a 10 to 15 degree angle to deflect glare away from the sensor.
Environmental Factors: Lighting, Temperature, and Physical Damage
Environmental conditions can cause perfectly good barcodes to fail. These factors are often the hardest to diagnose because the barcode itself appears flawless.
Lighting and Glare
Direct sunlight and bright overhead fluorescent lights can overwhelm scanner sensors or create glare on glossy labels. If barcodes scan reliably in dim conditions but fail under bright lights, glare is the problem.
Try angling the scanner 10 to 15 degrees off perpendicular to deflect glare away from the sensor lens. For fixed-mount scanners in bright environments, install a shade or hood over the scanning area.
Temperature and Label Stock
Cold storage environments present unique challenges. Standard direct thermal labels fade rapidly in cold temperatures, and condensation on cold labels can blur barcode edges. For cold storage and freezer applications, use synthetic labels with thermal transfer resin ribbon printing.
Cryogenic labels designed for ultra-low temperature storage use special adhesives and face stocks that maintain barcode readability. Standard paper labels will fail in these conditions.
In hot environments, direct thermal labels can darken prematurely as heat-sensitive stock reacts to ambient temperature. If labels are stored near heat sources or in vehicles, switch to thermal transfer printing.
Label Damage and Wear
Labels get scratched, smudged, wet, and dirty during normal handling. Even minor damage to a barcode can cause scan failures. If your barcodes scan when freshly printed but fail after handling, abrasion or contamination is the issue.
For labels exposed to moisture, chemicals, or friction, use thermal transfer printing with resin ribbon on synthetic label stock (polypropylene or polyester). Apply a clear overlaminate for maximum protection. This combination produces barcodes that survive warehouse conditions, outdoor exposure, and chemical contact.
One Reddit Amazon FBA seller reported repeated rejections because barcodes became smudged during transit to fulfillment centers. Switching from direct thermal to thermal transfer with a protective overlaminate eliminated the problem entirely.
Brand-Specific Troubleshooting: Zebra, Dymo, and Epson Fixes
Different printer brands have unique quirks that cause barcode scan failures. Here are the most common brand-specific issues we have encountered and their fixes.
Zebra Printers: ZPL and EPL Encoding Conflicts
Zebra printers support two programming languages: ZPL (Zebra Programming Language) and EPL (Eltron Programming Language). If your label software sends commands in one language but the printer expects the other, barcodes can print as solid black blocks instead of proper barcode patterns.
A Reddit sysadmin reported a Zebra printer producing solid black barcodes due to this exact ZPL and EPL conflict. The fix is to check your printer driver settings and confirm the language matches what your label software outputs. In Zebra Setup Utilities, you can set the printer to auto-detect the language, or manually set it to match your software.
For Zebra ZD410 and ZD420 models specifically, users report barcode scan failures caused by low darkness settings by default. Navigate to the darkness setting in the printer menu and increase it by one or two levels until barcodes print solid black.
Zebra printers also have a media and ribbon calibration routine accessible through the menu. Run this calibration every time you change label stock or ribbon type to ensure consistent print quality.
Dymo Printers: Direct Thermal Challenges
Dymo label printers use direct thermal technology exclusively. This makes them simple to operate but limits barcode durability. The most common Dymo barcode issue is faded output caused by old label stock. Direct thermal labels have a shelf life of about one year. Using expired stock produces faded, low-contrast barcodes.
Check the manufacture date on your Dymo label roll. If the stock is over a year old, replace it with fresh rolls. Store unused rolls in a cool, dark place to extend shelf life.
Dymo printer driver settings also affect barcode quality. In the Dymo driver preferences, set the print quality to “Barcode and Graphics” mode rather than “Text” mode. This applies more heat for darker, sharper barcode output.
Epson Printers: Driver Alignment Issues
Epson label printers, including the ColorWorks series, sometimes produce distorted barcodes due to driver alignment settings. If your barcodes look stretched, compressed, or wavy, the print head alignment needs adjustment.
Run the alignment utility in the Epson driver software. This prints a test pattern and walks you through selecting the best alignment values. After alignment, reprint your barcode and test scanning.
Epson inkjet label printers can also produce barcodes with ink spread, where liquid ink bleeds into the spaces between bars. Use labels specifically designed for pigmented ink, and let labels dry for 30 seconds before stacking or scanning.
Generic Fix: Check Your Printer Driver Settings
Regardless of brand, printer driver settings are a commonly overlooked source of barcode problems. Open your printer properties and check the following:
Confirm the paper size matches your actual label stock exactly. A mismatch causes the printer to scale or shift the barcode, distorting it. Check that the print speed is not set too high, as faster speeds reduce print quality. For barcode printing, slower speeds produce sharper results.
Verify that any scaling or fit-to-page options are disabled. These settings resize the barcode, which changes the X-dimension and can push it below the scanner readable threshold.
How to Fix Label Printer Barcodes That Won’t Scan: Step-by-Step Decision Tree
When you are standing in front of a printer churning out unscannable labels, you need a systematic diagnostic process. Follow this decision tree to isolate the problem quickly.
Step 1: Visually inspect the printed barcode. Look at it under good lighting. Are the bars solid black with clean white spaces between them? If bars are faded, blurry, or streaky, go to Step 2. If bars look sharp and clean, skip to Step 5.
Step 2: Clean the printhead and platen roller. Use an alcohol swab to clean the printhead elements and the rubber platen roller. Print a new test label and scan it. If it scans, the problem was buildup on the printhead. If it still fails, continue to Step 3.
Step 3: Check darkness and DPI settings. Increase the darkness setting by one or two levels. If your printer supports multiple resolutions, switch to 300 DPI. Reprint and test. If quality improves but scanning is still unreliable, go to Step 4.
Step 4: Check ribbon and label stock. For thermal transfer, verify you are using the correct ribbon formulation for your label material. For direct thermal, check the label stock age. Replace if necessary and reprint.
Step 5: Verify scanner symbology settings. If the barcode looks perfect but still will not scan, check that the correct symbology is enabled in your scanner. Scan the programming barcode to enable Code 128, UPC, or whichever type you are using. Test again.
Step 6: Check quiet zones and label design. Measure the blank space on either side of the barcode. Is it at least 10 times the narrowest bar width? If not, adjust your label template to add more margin.
Step 7: Test scanning angle and distance. Hold the scanner at a 10 to 15 degree angle. Move closer or farther from the label to find the scanner depth of field sweet spot. If scanning works at a specific angle and distance, the issue is environmental.
Step 8: Check for data encoding errors. If all else fails, verify that the barcode data is encoded correctly. Check digit validation errors can cause scanners to reject otherwise perfect barcodes. Use an online barcode verifier to confirm your data encodes properly with a valid check digit.
FAQs
Why is my barcode not getting scanned?
Your barcode is likely not scanning due to one of three root causes: poor print quality (faded bars, low DPI, dirty printhead), incorrect scanner configuration (wrong symbology enabled, outdated firmware), or environmental factors (glare, label damage, wrong scanning angle). Start by visually inspecting the barcode, then check scanner symbology settings and clean the printhead.
How do I fix my barcode scanner not working?
First, confirm the correct barcode symbology is enabled in the scanner configuration. Second, update the scanner firmware to the latest version from the manufacturer website. Third, check the scanner depth of field and test from the recommended distance. If the scanner beeps but does not scan, auto-discrimination interference or unsupported symbology is the most likely cause.
What stops a barcode from scanning?
The most common things that stop a barcode from scanning include low print contrast, insufficient quiet zone margins, wrong DPI resolution (below 203), dirty printhead producing faded bars, disabled symbology in the scanner, glare from glossy labels, barcode damage from moisture or abrasion, and incorrect check digit encoding. Inspecting each of these factors systematically will identify the specific blocker.
What if the barcode is not scanning after printing?
If a freshly printed barcode will not scan, follow this diagnostic sequence: Step 1, visually inspect for faded or blurry bars and clean the printhead if needed. Step 2, increase darkness settings and verify 300 DPI resolution. Step 3, check that the correct symbology is enabled on your scanner. Step 4, ensure quiet zones are at least 10 times the X-dimension wide. Step 5, test scanning at a 10 to 15 degree angle to reduce glare.
Preventing Future Barcode Scan Failures
Knowing how to fix label printer barcodes that won’t scan is important, but preventing the problem in the first place is even better. A few maintenance habits will keep your barcodes scanning reliably.
Clean your printhead and platen roller every time you change label rolls or ribbon. This takes 30 seconds and prevents the most common cause of scan failures. Run printer calibration after switching label stock types or sizes.
Use the right combination of label stock and ribbon for your environment. Paper labels with wax ribbon work for clean indoor use. Synthetic labels with resin ribbon are necessary for warehouses, outdoor use, or chemical exposure.
Keep a barcode verifier or test scanner next to your printer. Scan the first label off every new batch before printing the rest. Catching a problem early saves you from printing hundreds of unusable labels.
Finally, keep your scanner firmware updated and document your symbology settings. When something stops working, you will have a known-good configuration to compare against.
With these practices in place, barcode scan failures become rare exceptions rather than daily frustrations. Most problems are preventable with proper printer maintenance, correct label design, and the right materials for your operating environment.