
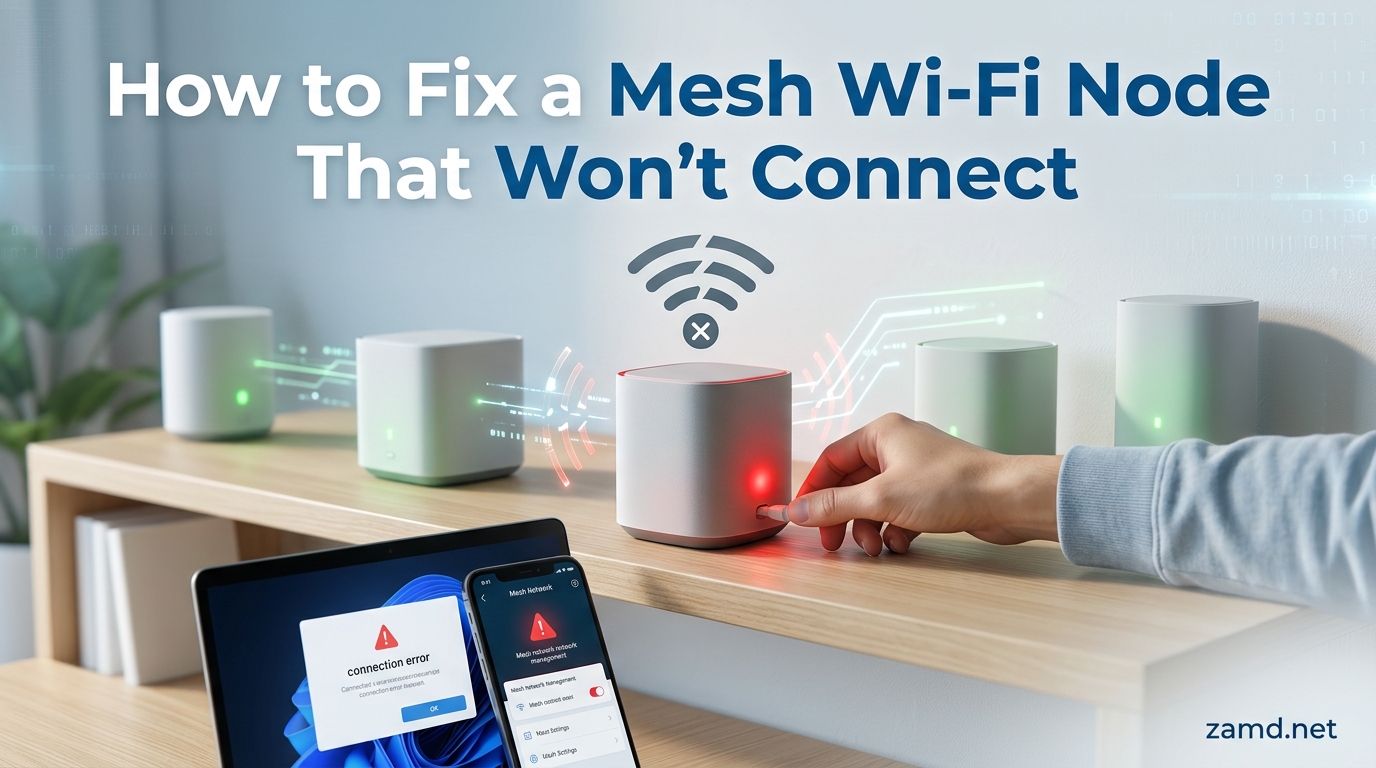
You set up a mesh Wi-Fi system, everything worked beautifully for weeks, and then one node just refuses to connect. The app shows it as offline, the LED blinks red or amber, and your once-perfect coverage now has a dead zone again. If you are trying to figure out how to fix a mesh Wi-Fi node that won’t connect to the main router, you are far from alone. This is one of the most common mesh networking problems, and in most cases, you can fix it in under 10 minutes without buying anything new.
A mesh node that won’t connect to the main router is typically caused by a weak wireless backhaul signal, interference from household electronics, a stale configuration after a password change, or incorrect router and AP mode settings. The node relies on a hidden connection to the main router called the backhaul, and when that link is too weak or misconfigured, the node cannot maintain its connection even though it may show partial signal.
In this guide, I will walk you through every step I have used to fix mesh node connection problems across eero, TP-Link Deco, Netgear Orbi, Google Nest Wifi, Linksys Velop, Asus ZenWiFi, and Starlink systems. Our team has tested these fixes on real networks with real dead-zone problems, and the solutions below are ordered from the fastest and most common fix to the more advanced troubleshooting steps. By the end, you will know exactly what is wrong and how to fix it.
Table of Contents
Quick Fix: The 60-Second Solution That Works Most of the Time
Before diving into the full troubleshooting process, try this accepted fast fix. It resolves the majority of mesh node connection issues, especially after power outages or firmware updates.
- Unplug your ISP modem (or fiber ONT) from power. Wait 30 seconds.
- Unplug your main mesh router from power. Wait 30 seconds.
- Unplug the mesh node that will not connect. Wait 30 seconds.
- Plug the modem back in first. Wait until all its lights are stable (usually 1 to 2 minutes).
- Plug the main mesh router back in. Wait until its LED turns solid (usually 2 minutes).
- Plug the mesh node back in. Give it 3 to 5 minutes to fully boot and reconnect.
If the node comes back online with a solid white or green LED, you are done. The correct power-cycle order matters because the main router needs to establish its internet connection before child nodes attempt to join. When nodes boot before the router is ready, they can get stuck in a loop trying to find the parent node.
If this quick fix did not work, do not worry. The steps below cover every other common cause, from backhaul problems to firmware bugs to mode mismatches.
Why Your Mesh Node Won’t Connect (Common Causes)
Understanding why your mesh node is not connecting helps you skip steps that will not help and go straight to the right fix. Here are the most common root causes, ranked by frequency based on our team’s experience and data from Reddit forums, manufacturer support pages, and community discussions.
- Weak wireless backhaul – The node is too far from the main router or too many walls are in the way. This is the single most common cause.
- Power outage corruption – A sudden outage left the node or router in a half-initialized state. Starlink users report this frequently.
- Stale configuration after password change – You changed your Wi-Fi password and the node still has the old credentials cached.
- Firmware mismatch or failed update – One device updated while another did not, breaking compatibility.
- Double NAT from ISP gateway – Your ISP modem is also a router, causing IP conflicts that knock mesh nodes offline.
- Interference – Microwaves, baby monitors, AV receivers, and even fish tanks can disrupt the signal between nodes.
- Too many nodes close together – More nodes in a small space raises the noise floor and creates self-interference rather than improving coverage.
- AP mode vs router mode mismatch – The mesh system is in the wrong mode for your network configuration.
What is backhaul? Backhaul is the connection between your mesh nodes and the main router. Think of it as the private highway that carries all your internet traffic between nodes before it reaches your devices. Wireless backhaul uses a dedicated Wi-Fi radio (on tri-band systems) or shares a radio with your devices (on dual-band systems). Ethernet backhaul uses a physical cable. MoCA backhaul uses existing coaxial TV wiring. The strength and quality of this backhaul link determines whether your node stays connected or drops offline.
Mesh Node LED Indicator Quick Reference
Most mesh systems use LED color changes to tell you what is happening. Here is a quick cross-brand reference. Keep in mind that exact meanings vary by manufacturer, so check your specific model if the behavior seems unusual.
- Solid white or green – Connected and working normally.
- Pulsing or blinking white/blue – Booting up or attempting to connect. Wait 3 to 5 minutes.
- Solid blue – Connected but signal is weak (some brands). On eero, blue means Bluetooth pairing mode during setup.
- Solid amber or yellow – Connected but no internet, or backhaul signal is poor.
- Blinking red – Cannot connect to the main router at all. Needs re-pairing or a factory reset.
- Solid red – Hardware error or critical failure. May need replacement.
- Purple (Linksys Velop) – Connected with weak signal. Move closer to the parent node.
- No light – No power. Check the cable and outlet.
Step 1: Power Cycle Everything in the Correct Order
The quick fix section above covers the basic power cycle, but let me explain why the order matters and what to do if the standard sequence does not work.
Your ISP modem (or fiber ONT) authenticates your internet connection. Your main mesh router pulls an IP address from that modem via DHCP. Your mesh nodes then connect to the main router. If any device in this chain boots out of order, the downstream devices may cache a stale connection or fail to negotiate properly.
After completing the power cycle sequence, watch the LED on the problem node. If it goes from blinking to solid within 5 minutes, the fix worked. If it blinks red or amber for more than 10 minutes, move on to Step 2.
One tip from our testing: If your node still will not connect after a standard power cycle, try unplugging and replugging the main router three times in a row, waiting 30 seconds between each cycle. This forces a full DHCP lease renewal. Multiple Starlink users on Reddit confirmed this method resolved persistent post-outage connectivity issues.
Step 2: Re-Pair the Node Close to the Main Router
When a node stubbornly refuses to connect from its current location, the most reliable fix is to re-pair it right next to the main router. This eliminates distance and wall interference as variables and forces a clean handshake.
Here is the step-by-step re-pairing process that works across most brands:
- Open your mesh app (eero, Deco, Orbi, Google Home, Linksys, Asus Router, or Starlink app).
- Find the offline node in your device list.
- Remove or forget the node from your mesh network. This deletes its current configuration.
- Unplug the node and physically carry it to within 6 to 10 feet of the main router.
- Plug it in and wait for the LED to indicate it is ready to pair (usually blinking blue or white).
- In the app, select “Add a node” or “Set up a new device” and follow the on-screen prompts.
- Wait for confirmation that the node has joined the network.
- Unplug the node and move it to its intended location. Plug it back in.
- Wait 3 to 5 minutes for it to re-establish the backhaul connection from the new spot.
If the node connects fine near the main router but drops when you move it to its final location, you have a backhaul distance problem. That tells you to either move the node closer, switch to a wired backhaul, or add an intermediate node to bridge the gap. We cover all three options below.
One common mistake I see: people try to pair a node from across the house using Bluetooth. During initial setup, most mesh systems use Bluetooth to communicate between the node and your phone. Bluetooth has a range of about 30 feet with clear line of sight, and far less through walls. Keep the node close during pairing for the best results.
Step 3: Optimize Node Placement and Reduce Interference
Node placement is the second most common cause of mesh connection failures, and it is often the fix that people overlook. A node placed in a dead zone cannot relay a signal it cannot receive. The golden rule is to place each node close enough to the main router (or the previous node) to get a strong signal, but far enough to extend coverage into the area you need.
Here are the placement principles our team follows:
- Keep nodes one to two rooms apart from the main router or the nearest node. That typically means 20 to 40 feet with one interior wall between them.
- Avoid thick walls, brick, and concrete. These materials absorb Wi-Fi signals heavily. A single brick wall can cut signal strength by 50 percent or more.
- Do not place nodes in dead zones. Place them adjacent to the dead zone, not inside it. The node needs a strong incoming signal to relay.
- Keep nodes elevated. Place them on a shelf or table at least 3 to 5 feet off the floor. Wi-Fi signals radiate outward and downward.
- Avoid corners and enclosed spaces. Closets, cabinets, and behind AV racks all kill signal quality.
Common Interference Sources to Avoid
Interference can disrupt the wireless backhaul between your main router and mesh nodes, even when placement looks good. Here are the worst offenders:
- Microwaves – They operate on 2.4 GHz, the same frequency as many mesh backhaul connections. Keep nodes at least 10 feet from any microwave.
- Bluetooth devices – Baby monitors, wireless speakers, and Bluetooth headphones can interfere with 2.4 GHz signals.
- AV receivers and soundbars – These generate electromagnetic interference. Do not place a mesh node directly on top of or behind your home theater equipment.
- Large metal objects – Refrigerators, filing cabinets, and metal ductwork all reflect and absorb Wi-Fi signals.
- Aquariums and water features – Water is excellent at absorbing radio signals. A large fish tank between two nodes is effectively a wall.
- USB 3.0 devices and cables – These generate broadband noise in the 2.4 GHz range. Keep nodes away from external hard drives and USB hubs.
One Reddit user in r/HomeNetworking reported that moving their mesh node from behind their television to a bookshelf six feet away solved a persistent connection drop. The AV receiver was generating enough interference to corrupt the backhaul signal. Small moves can make a big difference.
Step 4: Check Backhaul Quality (Wireless vs Wired vs MoCA)
If you have power-cycled, re-paired, and optimized placement but the node still drops or delivers terrible speeds, the backhaul is your bottleneck. The backhaul connection between your main router and your nodes determines real-world performance more than any other factor.
Many people assume that having strong Wi-Fi signal bars on their phone means the mesh system is working well. That is misleading. Your phone connects to the nearest node, but that node still needs to get data back to the main router. If that backhaul link is slow or congested, your fast phone-to-node connection means nothing.
Here is a comparison of the three main backhaul options:
- Wireless backhaul (dual-band): Shares the same radio for both device connections and backhaul. This halves the available bandwidth. Typical real-world speeds: 100 to 400 Mbps. Best for smaller homes with nodes close together.
- Wireless backhaul (tri-band): Uses a dedicated third radio (usually 5 GHz or 6 GHz) exclusively for node-to-node communication. Typical real-world speeds: 400 Mbps to 1 Gbps. Best for most homes that cannot run Ethernet.
- Ethernet backhaul (wired): Uses a Cat5e or Cat6 cable to connect each node directly to the main router or a switch. Typical real-world speeds: 900 Mbps to 2.5 Gbps. Best for homes with existing wiring or new construction.
- MoCA 2.5 backhaul (coax): Uses existing coaxial TV wiring with MoCA adapters to create a wired connection without drilling. Typical real-world speeds: 800 Mbps to 1 Gbps. Best for renters and homes with existing coax runs but no Ethernet.
One XDA user reported achieving approximately 980 Mbps in their basement using MoCA 2.5 adapters over existing coax cable, up from about 100 Mbps on wireless backhaul. If you cannot run Ethernet and your wireless backhaul is unreliable, MoCA is the upgrade that can make a massive difference.
How to Switch to Wired Backhaul
Switching to Ethernet backhaul is straightforward on most mesh systems. Connect an Ethernet cable from a LAN port on your main router (or a switch connected to the main router) to the Ethernet port on the mesh node. Most systems automatically detect the wired connection and switch from wireless to wired backhaul within 30 to 60 seconds.
On some systems, you may need to enable Ethernet backhaul in the app settings. TP-Link Deco, for example, has a toggle under each Deco unit’s settings. Asus AiMesh also has a wired backhaul option in the web interface.
If your node works on wireless backhaul but fails when you connect Ethernet, check that you are plugging into the correct port. Some nodes have a dedicated backhaul port, while others share a single Ethernet port for both WAN and LAN. Consult your device manual for the specific port configuration.
Step 5: Fix Security Settings and Password Issues
Changed your Wi-Fi password recently? That is a common trigger for mesh node disconnections. When you update the network password on the main router, child nodes may cache the old credentials and fail to reconnect.
The fix depends on your system:
- eero: Open the eero app, go to Settings, then Network Settings, then Advanced, and tap “Restart Network.” This pushes the new password to all nodes.
- TP-Link Deco: Open the Deco app, tap the Wi-Fi icon, and update the password there. The system pushes it to all Deco units automatically.
- Netgear Orbi: Log into the Orbi admin interface, go to Wireless Settings, and update the password. Satellite nodes should sync within a few minutes.
- Other brands: Remove the node from the app and re-add it using the new password, following the re-pairing steps in Step 2.
WPA2 vs WPA3 Compatibility Problems
WPA3 is the newer security standard and offers better encryption, but it causes compatibility headaches with older devices. If you recently switched from WPA2 to WPA3 (or to WPA2/WPA3 transition mode), older smart TVs, IoT devices, and even some mesh nodes may fail to connect.
The most compatible setting for mixed-device networks is WPA2-PSK (AES). This works with virtually every device made in the last decade. If you need WPA3 for specific devices, look for a “WPA2/WPA3 Mixed Mode” or “Transition Mode” setting, which allows both standards simultaneously.
If older devices show a “wrong password” error after a security change, the password itself is probably correct. The device simply cannot negotiate WPA3 and reports it as a password failure. Switching back to WPA2-PSK (AES) almost always resolves this.
DHCP Lease Issues
Sometimes the problem is not the password but a stale DHCP lease. When the main router reassigns IP addresses, a mesh node may hold onto an old address that conflicts with another device. Power cycling the ISP modem (which we covered in Step 1) forces a full DHCP renewal and usually fixes this.
One TP-Link Deco user on Reddit reported that changing their Wi-Fi password caused a satellite node to go permanently offline. Power cycling the ISP modem (not the Deco units) fixed the DHCP lease issue and brought the node back. The modem needed to hand out a fresh IP address to the main Deco unit.
Step 6: Verify Router Mode (AP Mode vs Router Mode)
One of the more confusing causes of mesh node problems is a mode mismatch between your ISP equipment and your mesh system. Most mesh systems can operate in two modes: Router mode and AP (Access Point) mode. Choosing the wrong one creates problems.
Router mode means your mesh system handles IP address assignment (DHCP), NAT (network address translation), firewall, and routing. This is the default and is correct if your mesh system connects directly to a simple modem (not a modem-router combo).
AP mode means your mesh system acts as a dumb wireless access point. It broadcasts Wi-Fi but lets another device (your ISP gateway or a separate router) handle DHCP, NAT, and firewall. This is correct if you have an ISP-provided gateway that already functions as a router.
What is double NAT? If both your ISP gateway and your mesh system are in router mode, you get double NAT. Your traffic passes through two NAT layers, which can cause IP conflicts, port forwarding failures, and mesh node disconnections. Symptoms include nodes that appear connected but have no internet, or nodes that intermittently drop offline.
How to Fix Double NAT
To fix double NAT, choose one of these two approaches:
- Option A: Put your ISP gateway in bridge mode. This disables the routing functions on the ISP device and lets your mesh system act as the sole router. Log into your ISP gateway’s admin panel (usually at 192.168.0.1 or 192.168.1.1) and look for a “Bridge Mode” or “Passthrough” setting.
- Option B: Put your mesh system in AP mode. This lets your ISP gateway handle all routing, and your mesh system just provides Wi-Fi coverage. You lose some mesh-specific features (like parental controls and device prioritization) but avoid double NAT problems.
Option A is generally better because it lets your mesh system’s advanced features work properly. However, some ISPs lock their gateways and do not allow bridge mode. In that case, Option B is your fallback.
If you are unsure whether you have double NAT, run a speed test and check for consistently high latency, failed port forwarding, or devices that show different external IP addresses. You can also check if your mesh system reports being behind a “NAT network” in its diagnostic settings.
Firmware Updates: Why They Matter and How to Check
Firmware bugs are a less common but real cause of mesh node connectivity problems. Manufacturers release firmware updates to fix bugs, improve stability, add features, and patch security vulnerabilities. If one node updated overnight while the main router did not (or vice versa), they may be running incompatible firmware versions.
Most modern mesh systems update automatically, but updates can fail silently or get stuck. Here is how to manually check for updates on each major brand:
- eero: Open the eero app, tap Settings, then Software Updates. Tap “Check for Updates” and let it install any available updates across all eero units.
- TP-Link Deco: Open the Deco app, tap More, then System, then Firmware Update. Tap “Check for Updates” for each Deco unit individually.
- Netgear Orbi: Open the Orbi app or visit orbilogin.net. Go to Settings, then Administration, then Firmware Update. Update the router first, then the satellite.
- Google Nest Wifi: Updates happen automatically through Google Home. To force an update, go to the device settings and look for a “Software update” option.
- Linksys Velop: Open the Linksys app, go to Advanced Settings, then Firmware Update. The app updates all nodes sequentially.
- Asus ZenWiFi: Log into the web interface (usually router.asus.com), go to Administration, then Firmware Upgrade. Update each node.
- Starlink: Firmware updates are pushed automatically by Starlink. There is no manual update option in the app. If you suspect a firmware issue, contact Starlink support or try a power cycle.
After a firmware update, power cycle all your mesh devices in the correct order (Step 1). This ensures clean initialization with the new firmware.
A Reddit thread on mesh nodes getting stuck on connecting after firmware updates revealed a pattern: if a node hangs for more than 15 minutes after an update, a power cycle almost always resolves it. The update applied successfully but the node failed to restart cleanly.
Brand-Specific Troubleshooting Tips
Every mesh system has its own quirks. Here are brand-specific tips gathered from manufacturer support docs, Reddit forums, and our own testing.
eero Node Offline
eero nodes are generally reliable, but when one goes offline, the fix is almost always to remove it from the app and re-add it. Open the eero app, tap the node, tap the gear icon, and select “Delete eero.” Then unplug it, plug it back in within 10 feet of the gateway eero, and add it as a new device. eero also has a hidden diagnostic tool: tap the eero tab 10 times rapidly in the app to enable advanced diagnostics.
TP-Link Deco Node Not Connecting
Deco units sometimes fail to show up in the app during setup. If this happens, force-close the Deco app, toggle Bluetooth off and on, and relaunch the app. Deco uses Bluetooth for initial pairing. Also check that your phone is connected to the Deco’s temporary Wi-Fi network during setup. For ongoing disconnections, enable Ethernet backhaul in the Deco app if possible, as Deco’s wireless backhaul on dual-band models can be unreliable at distance.
Netgear Orbi Satellite Not Syncing
Orbi satellites have a physical Sync button on the back. Press the Sync button on the main Orbi router, then press the Sync button on the satellite within two minutes. The satellite LED should blink amber, then turn solid white or amber. Solid amber means the connection is weak; move the satellite closer and try again. Orbi systems also have a dedicated satellite status page in the admin interface that shows backhaul signal strength in detail.
Google Nest Wifi Node Issues
Nest Wifi points can sometimes fail to connect if your Google account has too many devices associated with it. Try removing old devices from your Google Home app, then factory reset the point and re-add it. Also, Nest Wifi points rely on Google Assistant, and occasionally a failed Assistant update can block network setup. A factory reset of the point (hold the reset button for 15 seconds) usually clears this.
Linksys Velop Child Node Not Found
Linksys recommends keeping the child node within 10 feet of the parent node during setup. If the child node does not appear in the app, check that the LED is blinking purple (ready to pair). If it is solid red, the node needs a factory reset. Hold the reset button for 10 seconds until the LED blinks red, then release and wait for it to start blinking purple.
Asus ZenWiFi AiMesh Issues
Asus AiMesh users frequently report that devices stubbornly connect to the distant main router instead of the nearby node. This is a roaming issue, not a connectivity issue. In the Asus web interface, go to Wireless, then Professional, and enable “Roaming Assistant.” Set the disconnect threshold to around -70 dBm. This forces devices to switch to a closer node when the signal from the main router gets too weak.
Starlink Mesh Node Not Connecting
Starlink mesh nodes are a frequent topic on r/Starlink. The most common issue is nodes that refuse to reconnect after a power outage. The fix that works for most users: unplug the Starlink router, wait 30 seconds, plug it back in, and repeat this cycle up to three times. This forces a full DHCP and mesh topology refresh. Starlink mesh nodes do not have a physical reset button, so if three power cycles do not work, you may need to remove the node from the Starlink app and re-add it.
Another Starlink-specific issue: mesh nodes sometimes disappear from the app entirely after an outage. If this happens, force-close the Starlink app, wait 5 minutes, and reopen it. The node usually reappears once the router finishes its full boot sequence.
How to Confirm Your Mesh Is Stable Again
Once you have applied a fix, you need to verify that the mesh network is actually stable, not just temporarily working. Here is our verification process:
- Check the app status. All nodes should show as “Online” or “Connected” with good signal strength.
- Run a speed test from each node’s location. Use the Ookla Speedtest app on your phone while standing near each node. Speeds should be reasonably close to your plan speed, minus backhaul overhead.
- Test roaming. Start a video call near the main router, then walk to each node’s location. Your device should hand off to the nearest node without dropping the call.
- Monitor for 24 hours. Check the app the next day to confirm all nodes are still online.
If speeds are dramatically lower at a node than at the main router, the backhaul is still weak. Consider moving the node closer, switching to wired backhaul, or adding an intermediate node.
Preventive Stability Checklist
- Keep firmware updated on all nodes and the main router.
- Avoid placing nodes near microwaves, AV equipment, and large metal objects.
- Use bridge mode on your ISP gateway if you have a modem-router combo.
- Do not add more nodes than necessary. Each additional wireless node adds overhead and noise.
- If possible, use Ethernet backhaul for nodes on different floors or separated by thick walls.
- Document your current mesh layout and settings so you can quickly restore after any disruption.
When to Factory Reset Your Mesh System
A factory reset should be your last resort, not your first step. It erases all settings and requires you to set up the entire mesh network from scratch. However, in some cases, it is the only fix that works.
Factory Reset Decision Tree
Try a factory reset if all of the following are true:
- You have completed Steps 1 through 6 and the node still will not connect.
- The node shows a solid red LED that does not change after multiple power cycles.
- The node does not appear in the app even after removal and re-pairing attempts.
- The problem started after a major firmware update or configuration change.
- You have tried re-pairing the node next to the main router without success.
Do NOT factory reset if:
- Only one device cannot connect (the problem is likely that device, not the mesh system).
- The node was previously working and you made a simple change like moving furniture (try re-pairing first).
- Your internet is down entirely (fix the ISP connection first before resetting mesh equipment).
How to Factory Reset Each Major Brand
- eero: Hold the reset button for 10 seconds until the LED flashes red, then release. Wait for it to start blinking white.
- TP-Link Deco: Hold the reset button for 10 seconds until all LEDs flash. The Deco will reboot automatically.
- Netgear Orbi: Use a paperclip to hold the reset recessed button for 7 seconds until the LED blinks amber.
- Google Nest Wifi: Hold the reset button on the bottom for 15 seconds. You will hear a confirmation tone.
- Linksys Velop: Hold the reset button for 10 seconds until the LED blinks red, then release.
- Asus ZenWiFi: Hold the reset button for 5 seconds until the LED turns off, then release. Wait for it to reboot.
- Starlink: There is no physical reset button. Remove the node from the Starlink app, power cycle the router three times, then re-add the node.
After a factory reset, you will need to set up the entire mesh network again from scratch. This means re-entering your Wi-Fi name and password, re-adding all nodes, and reconfiguring any custom settings like guest networks or parental controls. Budget 30 to 60 minutes for this process.
One Tenda Nova user on Reddit reported that a factory reset of both the main router and all satellite nodes, followed by a fresh setup, was the only thing that resolved persistent connectivity issues after weeks of trying everything else. Sometimes a clean start is the best fix.
Mesh vs Wi-Fi Extender: Which Do You Need?
If you keep having mesh node problems, you might wonder whether a mesh system is even the right choice. The short answer: mesh systems are better than traditional Wi-Fi extenders for most homes, but each has its place.
Mesh systems create a single, seamless network. Your devices connect to whichever node has the best signal, and the system handles the handoff automatically. All nodes share the same Wi-Fi name (SSID), and most systems include dedicated management apps with parental controls, guest networks, and device prioritization.
Wi-Fi extenders are simpler and cheaper but create a separate network. Your devices must manually switch between the main router network and the extender network. Extenders also cut bandwidth in half because they use the same radio to receive and retransmit signal. Most extenders do not support seamless roaming.
Choose a mesh system if you have a home larger than 2,000 square feet, multiple floors, or thick walls. Choose a Wi-Fi extender if you have one specific dead zone in a small apartment or just need coverage in a single room.
Regarding compatibility: most mesh systems are designed to work as a complete replacement for your existing router, not as an add-on. However, many can be placed in AP mode to work alongside an existing router. Do mesh nodes work with any router? Not exactly. Mesh nodes from one brand (like eero) only work with other nodes from the same brand. You cannot mix eero and Deco nodes in the same mesh network.
Frequently Asked Questions
How to connect WiFi mesh to main router?
To connect a mesh node to your main router, plug the node within 6 to 10 feet of the main router, wait for its LED to blink (indicating pairing mode), then open your mesh app and select Add a Node. Follow the on-screen prompts to complete pairing. Once connected, unplug the node and move it to its final location.
Why is my mesh WiFi not connecting?
The most common reasons are weak wireless backhaul signal, power outage corruption, a stale configuration after a password change, firmware incompatibility, or double NAT from an ISP gateway. Start by power cycling in the correct order (modem, then main router, then nodes), then re-pair the node near the main router if the problem persists.
Do mesh nodes work with any router?
Mesh nodes only work with other nodes from the same brand ecosystem. You cannot mix eero nodes with TP-Link Deco units in one mesh network. However, most mesh systems can operate in AP mode alongside an existing router from any brand, providing Wi-Fi coverage without replacing the router.
Why won’t my Starlink mesh node connect?
Starlink mesh nodes commonly fail to reconnect after power outages. The fix that works for most users is to unplug the Starlink router, wait 30 seconds, plug it back in, and repeat this cycle up to three times. This forces a full DHCP and mesh topology refresh. If that fails, remove the node from the Starlink app and re-add it.
How far should mesh nodes be from each other?
Mesh nodes should be one to two rooms apart, typically 20 to 40 feet with at most one interior wall between them. Do not place a node in a dead zone. Instead, place it adjacent to the dead zone so it can receive a strong signal from the main router or previous node and relay it forward.
What does the LED light mean on my mesh node?
Solid white or green means connected and working. Blinking white or blue means booting or pairing. Solid amber means connected but with weak signal or no internet. Blinking red means it cannot connect to the main router and needs re-pairing. Solid red indicates a hardware error. Exact meanings vary slightly by brand, so check your manufacturer guide.
Should I use AP mode or router mode for my mesh?
Use router mode if your mesh system connects directly to a simple modem. Use AP mode if you have an ISP gateway that already functions as a router. Having both in router mode creates double NAT, which causes IP conflicts and node disconnections. If possible, put your ISP gateway in bridge mode and keep your mesh system in router mode.
Why does my mesh node keep disconnecting?
Frequent disconnections usually point to a weak backhaul signal, interference from household electronics, or a firmware bug. Try moving the node closer to the main router, switching to Ethernet or MoCA backhaul, checking for firmware updates, and eliminating interference sources like microwaves and AV equipment near the node.
Conclusion
Fixing a mesh Wi-Fi node that won’t connect to the main router comes down to a methodical process. Start with the quick power-cycle fix, then re-pair the node near the main router, optimize placement, check your backhaul quality, verify security and mode settings, and keep firmware updated. In the vast majority of cases, one of the first three steps resolves the problem. Factory resets are a last resort when nothing else works.
The most important takeaway: backhaul quality is the foundation of mesh performance. If your nodes keep dropping or delivering poor speeds, the backhaul link between the node and the main router is almost always the culprit. Whether you fix it by moving the node closer, adding Ethernet, or using MoCA adapters over existing coax, improving the backhaul will make the single biggest difference in your mesh network stability.
Keep your firmware current, avoid interference sources, and document your working configuration so you can restore it quickly if something goes wrong. With the steps in this guide, you should have your mesh network back to full coverage and stable performance.