
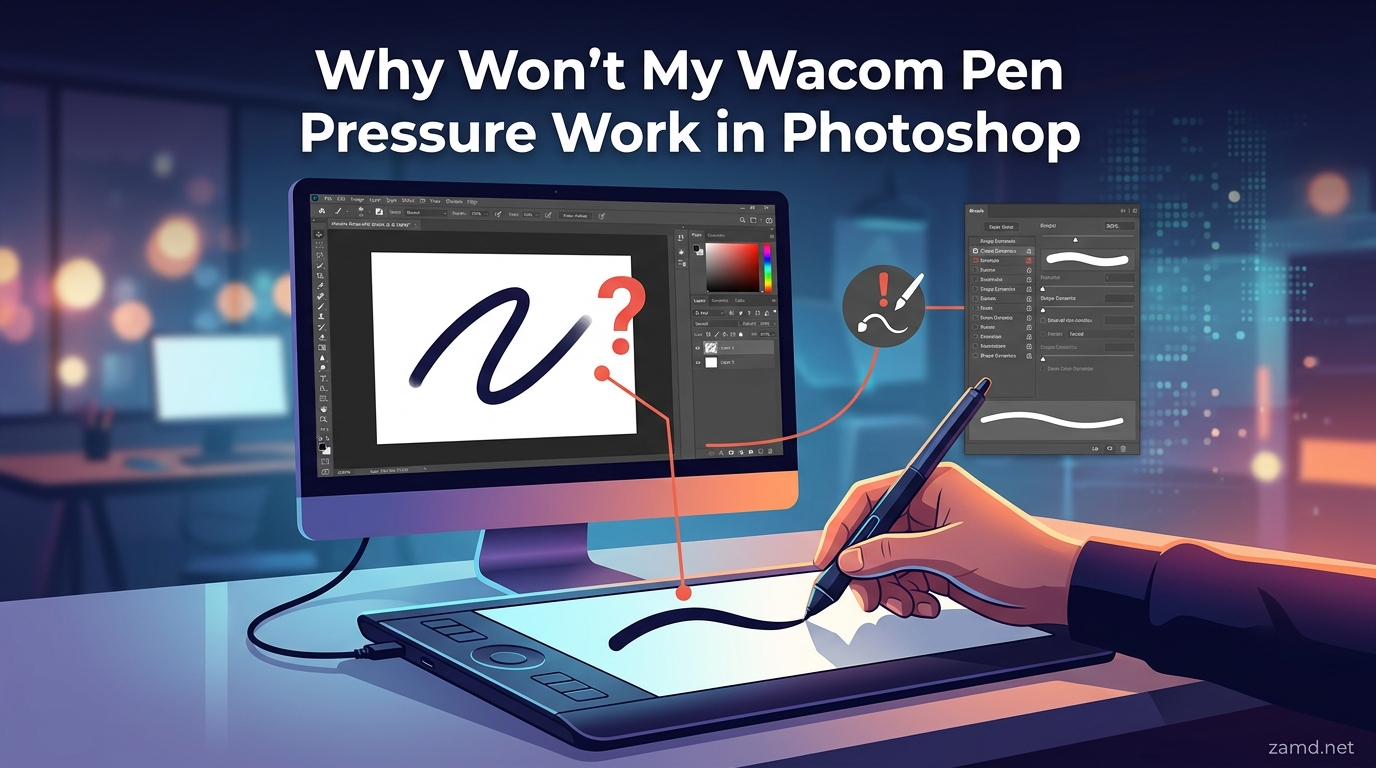
You sit down to paint, press your Wacom pen to the tablet, and every stroke comes out flat and uniform with zero sensitivity. Sound familiar? Wacom pen pressure not working in Photoshop is one of the most frustrating issues digital artists face, and it usually strikes right when you least expect it, sometimes after an update, sometimes out of nowhere.
The good news is that in nearly every case, the fix comes down to one of six things: incorrect Photoshop brush settings, Windows Ink being disabled, a corrupted Wacom driver, wrong tablet properties, a missing PSUserConfig.txt file, or a Photoshop version bug. I have dealt with every single one of these over years of working with Wacom tablets in Photoshop, and this guide walks through each fix step by step.
One Reddit user put it perfectly: “Everything was working fine until two days ago when the pen pressure suddenly stopped working.” That sudden-break scenario is incredibly common, especially for Wacom Intuos Pro users on Windows 11 running Photoshop 2025 or newer. I will cover every angle, including the fixes that most guides skip entirely.
Table of Contents
What Is Pen Pressure Sensitivity and Why Does It Matter?
Pen pressure sensitivity is what lets your Wacom tablet detect how hard you press the pen tip against the surface. Photoshop then maps that pressure data to brush properties like size, opacity, and flow, so pressing lightly creates a thin, faint stroke while pressing hard produces a thick, bold one.
Think of it like a real paintbrush. Without pressure sensitivity, every stroke looks identical regardless of your hand pressure, making digital painting feel mechanical and lifeless. For digital artists, illustrators, and photo editors, pressure sensitivity is not a luxury feature, it is the core of natural brushwork.
The system relies on a three-part chain: the Wacom tablet hardware detects pressure through its pen sensor, the Wacom driver translates that signal for the operating system, and Photoshop’s Brush Settings panel reads the signal and applies it to your brush. If any link in that chain breaks, pen pressure stops working.
Common Causes: Why Wacom Pen Pressure Stops Working in Photoshop
Before diving into individual fixes, here is a quick diagnostic checklist to help you identify your specific problem. Most Wacom pen pressure issues in Photoshop fall into one of these categories.
- Shape Dynamics not set to Pen Pressure in Photoshop’s Brush Settings panel (most common cause)
- Windows Ink disabled in Wacom Center or Wacom Tablet Properties (required since Photoshop 2024)
- Corrupted or outdated Wacom driver that fails to communicate pressure data to Photoshop
- Wrong application-specific settings in Wacom Tablet Properties pointing Photoshop to the wrong pen mode
- Missing PSUserConfig.txt file with the UseSystemStylus flag (needed for some older tablets and specific Windows configurations)
- Photoshop version bug after an update, especially the 2024 v25.1 release and some 2025 builds
One quick warning sign to watch for: if you see an exclamation mark icon next to the Pen Pressure option in the Shape Dynamics panel, Photoshop is telling you it cannot detect a pressure-sensitive device. That exclamation mark almost always points to a driver issue or Windows Ink being turned off.
Fix 1: Check Photoshop Brush Settings (Shape Dynamics and Pen Pressure)
This is the single most common fix, and it should always be your first stop. Photoshop’s Brush Settings panel controls how pen pressure maps to your brush, and it is surprisingly easy for these settings to reset or change unexpectedly.
Here is exactly how to verify and fix your brush pressure settings:
Step 1: Select the Brush Tool from the Photoshop toolbar (or press B on your keyboard).
Step 2: Open the Brush Settings panel by pressing F5 or going to Window > Brush Settings in the top menu. This opens the panel formerly called the Brush Palette, where all pressure controls live.
Step 3: In the left sidebar of the Brush Settings panel, click on “Shape Dynamics” to expand that section. Make sure the checkbox next to Shape Dynamics is checked.
Step 4: Look for the “Control” dropdown menu under Size Jitter. Click it and select “Pen Pressure” from the list. You should see a small pressure curve graph appear next to it, confirming Photoshop is now reading tablet input.
Step 5: If you also want pressure to control opacity and flow, scroll down to “Transfer” in the left sidebar, check that box, and set both Opacity Jitter and Flow Jitter Control dropdowns to “Pen Pressure” as well.
After making these changes, test your brush on the canvas. Press lightly and then hard. If the stroke size changes, your pen pressure is working. If you still see that warning triangle icon next to the Control dropdown, move on to Fix 2.
A quick note: these settings are per-brush, meaning each brush preset stores its own Shape Dynamics configuration. If pressure works for one brush but not another, check Shape Dynamics for that specific brush preset.
Fix 2: Enable Windows Ink in Wacom Settings
Since Photoshop 2024 (version 25.1), Adobe made Windows Ink a hard requirement for pen pressure on Windows. If Windows Ink is disabled in your Wacom settings, Photoshop will simply ignore all pressure data from your tablet. This caught thousands of users off guard when the 2024 update rolled out.
One Reddit user discovered this the hard way: “Seems that for pen pressure to work in PS 2024 you need to have Use Windows Ink checked in the Wacom settings.” This has remained true through Photoshop 2025 and into 2026.
To enable Windows Ink on your Wacom tablet:
Step 1: Open Wacom Center (on newer Wacom tablets) or Wacom Tablet Properties (on older models). You can find this in your Start menu on Windows or Applications folder on Mac.
Step 2: In Wacom Center, click on your pen (e.g., “Wacom Pro Pen 2”) in the left sidebar, then look for the “Windows Ink” or “Ink” toggle. On older Wacom Tablet Properties, go to the “Calibration” or “Mapping” tab.
Step 3: Check the box or toggle the switch to enable Windows Ink (also labeled “Use Windows Ink” on some versions). Click Apply or OK.
Step 4: Restart Photoshop completely. Close it fully, not just minimize it, then reopen it and test your brush.
There is a trade-off to be aware of here. Many users report that Windows Ink introduces noticeable lag and cursor issues. One frustrated Reddit user called it “the second worst thing ever invented in human history.” If enabling Windows Ink fixes pressure but creates lag or other problems, jump down to Fix 5 where I cover the PSUserConfig.txt workaround that lets you disable Windows Ink while keeping pressure sensitivity.
Fix 3: Update or Reinstall Wacom Drivers
If brush settings look correct and Windows Ink is enabled but pressure still does not work, the next suspect is a corrupted or outdated Wacom driver. Driver corruption can happen after Windows updates, macOS updates, or simply from accumulated conflicts over time.
The exclamation mark icon next to Pen Pressure in Shape Dynamics is a strong indicator of a driver problem. When Photoshop cannot detect a pressure-sensitive device at all, it usually means the driver is not communicating properly.
Here is how to do a clean driver reinstall:
Step 1 (Windows): Open Control Panel > Programs and Features (or Settings > Apps). Find “Wacom Tablet” or “Wacom Center” in the list, right-click it, and select Uninstall. Follow the prompts to remove it completely.
Step 1 (Mac): Open the Applications folder, find the Wacom folder, and run the Wacom Tablet Utility. Click “Remove” to uninstall all Wacom software and preferences.
Step 2: After uninstalling, restart your computer. This clears any residual driver files from memory.
Step 3: Disconnect your Wacom tablet from your computer.
Step 4: Go to the official Wacom support website (wacom.com/support) and download the latest driver for your specific tablet model. Make sure you select the correct model, because installing the wrong driver can create new problems.
Step 5: Run the driver installer with your tablet still disconnected. Wait for the installer to prompt you to connect the tablet, then plug it in.
Step 6: Restart your computer one more time, then open Photoshop and test pen pressure.
A clean reinstall matters more than a simple update. Updating over an existing corrupted driver can carry the corruption forward. Removing everything and starting fresh ensures a clean communication chain between the tablet and Photoshop.
Fix 4: Check Wacom Tablet Properties for Application-Specific Settings
Wacom tablets allow you to configure different pen behaviors for different applications. If Photoshop has a custom application profile with incorrect settings, pressure sensitivity can fail even when everything else looks right.
To check your application-specific settings:
Step 1: Open Wacom Center or Wacom Tablet Properties.
Step 2: Look for the “Application” section or a dropdown that lets you select which application the settings apply to. If you see “Photoshop” listed separately, click on it.
Step 3: Check the pen settings for that Photoshop profile. Make sure the pen mode is set to “Pen” and not “Mouse” mode. Mouse mode disables pressure data entirely.
Step 4: Check the “Tip Double Click Distance” setting. If this is set too high, it can interfere with pressure detection. Lower it to a small value.
Step 5: If you are unsure whether a custom profile is causing the issue, delete the Photoshop-specific profile entirely. This forces Wacom to use the default “All Applications” settings, which should include proper pressure support.
One common issue on the Intuos Pro line: the Touch Ring or ExpressKeys can accidentally be mapped to override pen functions. If your pen behaves differently depending on which application has focus, application-specific settings are almost certainly the culprit.
Fix 5: The PSUserConfig.txt Advanced Fix (UseSystemStylus)
This is the fix that most guides either skip or barely mention, and it is often the one that works when nothing else does. The PSUserConfig.txt method forces Photoshop to use the system stylus API instead of its default tablet input method, which can bypass Windows Ink dependency entirely.
This fix is particularly useful if you want to disable Windows Ink (because of lag issues) but still keep pen pressure working in Photoshop. One forum user described the PSUserConfig.txt approach as “the only permanent solution that stuck” after trying every other fix.
Here is how to create and apply the PSUserConfig.txt fix:
Step 1: Close Photoshop completely.
Step 2 (Windows): Open File Explorer and navigate to C:\Users\[YourUsername]\AppData\Roaming\Adobe\Adobe Photoshop 2026\Adobe Photoshop 2026 Settings\. If you cannot see the AppData folder, go to the View tab in File Explorer and check “Hidden items” to reveal it.
Step 2 (Mac): Open Finder, press Command+Shift+G, and navigate to ~/Library/Preferences/Adobe Photoshop 2026 Settings/.
Step 3: Look for a file named “PSUserConfig.txt.” If it does not exist, right-click in the folder, select New > Text Document, and name it “PSUserConfig.txt.”
Step 4: Open the file in Notepad (Windows) or TextEdit (Mac). Add the following line exactly as written:
# Use System Stylus
UseSystemStylus 1
Step 5: Save the file and close the text editor. Make sure the file extension is .txt and not .txt.txt (a common Windows issue when extensions are hidden).
Step 6: Open Photoshop and test your pen pressure.
If you set UseSystemStylus to 1 and it does not work, try setting it to 0 instead. The value depends on your specific tablet model and Windows configuration. UseSystemStylus 1 tells Photoshop to use the Windows pointer API, while 0 forces it to use the Wintab API. Different tablets and driver versions respond differently to each setting.
This file persists across Photoshop restarts but may be deleted when you update Photoshop to a new major version. If pen pressure breaks again after an update, recreate the file in the new version’s Settings folder.
Fix 6: Check for Photoshop Updates and Version Bugs
Photoshop updates are a double-edged sword. They fix bugs, but they also introduce new ones, and pen pressure issues are one of the most commonly reported problems after updates.
The Photoshop 2024 v25.1 release broke pen pressure for thousands of users overnight. The 2025 builds had similar reports from Wacom Intuos Pro owners on Windows 11. Even in 2026, users continue to report that pressure sensitivity stops working after installing the latest Photoshop patch.
Here is what to do if a Photoshop update broke your pen pressure:
Step 1: Check if an update is available. Go to Help > Updates in Photoshop (or open the Creative Cloud desktop app). If a newer patch exists, install it. Adobe sometimes releases hotfixes for pressure bugs.
Step 2: If you are already on the latest version and pressure is broken, check the Adobe Community forums for your specific Photoshop version number. Other users likely reported the same issue, and Adobe sometimes acknowledges the bug.
Step 3: If no fix is available yet, consider rolling back to the previous Photoshop version. In the Creative Cloud desktop app, find Photoshop, click the three dots next to “Open,” select “Other Versions,” and install the previous major release. This is a last resort, but it works when the bug is genuinely in Photoshop itself.
Step 4: After rolling back or updating, recheck your Shape Dynamics settings (Fix 1) and Windows Ink settings (Fix 2). Updates sometimes reset these preferences silently.
Windows 11 Specific Pen Pressure Troubleshooting
Windows 11 introduced changes to tablet input handling that have caused unique pen pressure problems for Wacom users. Multiple forum threads on r/wacom and the Adobe Community specifically call out Windows 11 as the source of their pressure issues.
Here are the Windows 11 specific steps to try:
Check Tablet PC Settings: Windows 11 has a built-in tablet input service that can conflict with Wacom drivers. Open Windows Settings > Bluetooth and devices > Pen and Windows Ink. Make sure your Wacom pen is recognized. If Windows shows a generic “Pen” instead of your specific Wacom pen model, there is a driver conflict.
Disable Windows Handwriting Panel: The Windows handwriting input panel can intercept pen input before it reaches Photoshop. Go to Windows Settings > Bluetooth and devices > Pen and Windows Ink, and turn off “Show the handwriting panel when you tap with the pen.”
Check for Conflicting Tablet Software: If you previously used a Huion, Gaomon, or XP-Pen tablet on the same computer, their drivers may still be running and conflicting with Wacom’s driver. Open Task Manager and look for processes from other tablet manufacturers. Uninstall any non-Wacom tablet software completely.
Windows Update Check: Some Windows 11 cumulative updates have broken Wintab support. If pen pressure stopped working right after a Windows Update, check the update history and consider uninstalling the problematic update if one is identified.
Mac Specific Pen Pressure Troubleshooting
On macOS, pen pressure issues typically stem from security permissions or Ink framework conflicts rather than the Windows Ink problems that plague PC users.
Check Security Permissions: Go to System Settings > Privacy and Security > Accessibility. Make sure Wacom Center (or the Wacom driver) has permission to control your computer. macOS sometimes revokes these permissions after system updates without telling you.
Check Input Monitoring: In the same Privacy and Security section, look for “Input Monitoring.” Make sure the Wacom driver is listed and enabled. Without input monitoring permission, the driver cannot send pressure data to Photoshop.
Reinstall After macOS Updates: Major macOS updates (especially moving between major versions like Sonoma to Sequoia) can break Wacom drivers. If pen pressure stops working after a macOS update, a clean driver reinstall (Fix 3) almost always resolves it.
Tablet Model Specific Notes
Different Wacom tablet models have slightly different pressure troubleshooting paths. Here are model-specific notes based on common forum reports.
Wacom Intuos Pro: This is the most commonly reported model for sudden pressure loss on Windows 11. The combination of Intuos Pro + Windows 11 + Photoshop 2025 is a specific problem cluster that many users have reported. The PSUserConfig.txt fix (Fix 5) tends to work best for this setup.
Wacom Intuos (non-Pro): The entry-level Intuos sometimes has issues with the default driver assigning itself as a generic pointing device rather than a pressure tablet. A clean driver reinstall (Fix 3) usually resolves this.
Wacom Bamboo: Older Bamboo tablets use legacy drivers that may not fully support newer Photoshop versions. If you are running Photoshop 2025 or 2026 with a Bamboo, the PSUserConfig.txt fix is often necessary because the Bamboo driver uses Wintab rather than Windows Ink natively.
Wacom One: The Wacom One generally has fewer pressure issues, but make sure you are using the Wacom One specific driver and not a generic Wacom driver. Installing the wrong driver package can disable pressure.
Photoshop Elements Pen Pressure
Photoshop Elements deserves a special mention here because almost no troubleshooting guide covers it, despite active forum questions. One Reddit user wrote: “I have Photoshop Elements 2025 and a Wacom Intuos tablet. For the life of me I can’t get pen pressure to work.”
Photoshop Elements does support pen pressure, but the settings are in a different location than full Photoshop. In Elements, go to the Brush settings in the toolbox options bar at the top of the screen, click the brush icon, and look for “Shape Dynamics” or “More Options.” Set the Size control to “Pen Pressure.” Elements does not have a full Brush Settings panel like Photoshop CC, so the options are more limited.
Windows Ink requirements are the same for Elements as for full Photoshop. Make sure Windows Ink is enabled in your Wacom settings, and try the PSUserConfig.txt fix if needed.
How to Test If Pen Pressure Is Actually Working
After applying any fix, you want a reliable way to confirm pen pressure is working. Here is a quick test method.
Method 1: The Brush Preview: Open the Brush Settings panel (F5), go to Shape Dynamics, set Control to Pen Pressure. Look at the pressure preview graph at the bottom of the panel. Draw on your tablet and watch the graph. If the line moves with your pen pressure, the connection is live.
Method 2: The Diagonal Stroke Test: Create a new document, select a round brush with 100% hardness, set Size Jitter Control to Pen Pressure, and draw a diagonal stroke from light pressure to heavy pressure. The stroke should taper from thin to thick smoothly.
Method 3: Wacom Diagnostics: Open Wacom Center, click on your pen, and look for a diagnostic or test option. This lets you draw directly in a Wacom test window to verify the tablet itself is detecting pressure correctly, isolating the issue to either the tablet hardware or Photoshop.
Preventing Pen Pressure Issues After Future Updates
Once you get pen pressure working, you want to keep it that way. Here are proactive steps to prevent future breakage.
Keep a backup of your PSUserConfig.txt file in a separate location. If a Photoshop update wipes it, you can quickly copy it back into the new Settings folder without having to remember the exact syntax.
Take a screenshot of your Wacom Center settings (especially the Windows Ink toggle) and your Photoshop Brush Settings panel. If an update resets your preferences, you have a visual reference to restore everything quickly.
Before installing any Photoshop update, check the Adobe Community forums and r/photoshop on Reddit for reports of pen pressure bugs. If multiple users are reporting issues, wait a few days for Adobe to release a hotfix before updating.
FAQ’s
Why is pen pressure not working in Photoshop?
Pen pressure stops working in Photoshop because of incorrect Shape Dynamics settings, disabled Windows Ink, a corrupted Wacom driver, or a Photoshop version bug. The most common fix is opening the Brush Settings panel (F5), going to Shape Dynamics, and setting the Control dropdown to Pen Pressure. If that does not work, enable Windows Ink in Wacom Center and reinstall the latest Wacom driver.
How to set Brush pressure settings for Wacom in Photoshop?
Open Photoshop, select the Brush Tool, and press F5 to open the Brush Settings panel. Click Shape Dynamics in the left sidebar. Under Size Jitter, set the Control dropdown to Pen Pressure. For opacity and flow control, go to Transfer and set both Opacity Jitter and Flow Jitter Control to Pen Pressure. Test your brush on the canvas to confirm strokes change size with pressure.
Why isn’t my Wacom pen working on Photoshop?
Your Wacom pen may not work in Photoshop due to a missing or corrupted driver, Windows Ink being disabled, wrong tablet properties, or a Photoshop update bug. Start by checking Shape Dynamics settings (F5), then enable Windows Ink in Wacom Center, then reinstall the Wacom driver from wacom.com/support. If none of those work, try the PSUserConfig.txt UseSystemStylus fix.
Why is my Wacom pen not detecting pressure?
Your Wacom pen may not detect pressure because the driver is corrupted or outdated, Windows Ink is disabled, or Photoshop cannot communicate with the tablet. An exclamation mark icon next to the Pen Pressure option in Shape Dynamics indicates Photoshop is not detecting a pressure-sensitive device. Reinstalling the Wacom driver and enabling Windows Ink typically resolves detection issues.
Why does pen pressure work in Clip Studio Paint but not Photoshop?
Clip Studio Paint and Photoshop use different tablet input APIs. Clip Studio Paint can read pressure data through Wintab directly, while modern Photoshop (2024 and later) requires Windows Ink to be enabled. If pen pressure works in Clip Studio but not Photoshop, enabling Windows Ink in Wacom Center or using the PSUserConfig.txt UseSystemStylus workaround will typically fix Photoshop specifically.
What does the exclamation mark next to pen pressure mean in Photoshop?
The exclamation mark icon next to the Pen Pressure option in the Shape Dynamics panel means Photoshop cannot detect a pressure-sensitive tablet. This usually indicates a corrupted Wacom driver, Windows Ink being disabled, or the tablet being disconnected. Reinstalling the Wacom driver and enabling Windows Ink are the most common fixes for this warning.
How do I fix Wacom pen pressure on Windows 11?
To fix Wacom pen pressure on Windows 11, first enable Windows Ink in Wacom Center since Photoshop requires it. Then reinstall the Wacom driver from wacom.com/support for a clean installation. Check Windows Settings under Bluetooth and devices for pen conflicts. If pressure still fails, create a PSUserConfig.txt file with UseSystemStylus 1 in the Photoshop AppData Settings folder.
Does pen pressure work in Photoshop Elements?
Yes, pen pressure works in Photoshop Elements, but the settings are in a different location than full Photoshop. In Elements, select the Brush Tool, click the brush options in the top toolbar, and set the Size control to Pen Pressure in the Shape Dynamics section. You also need Windows Ink enabled in Wacom settings for Elements to detect pressure.
Conclusion
Wacom pen pressure not working in Photoshop is frustrating, but it is almost always fixable. The six fixes covered here address every common cause, from simple Shape Dynamics settings to the advanced PSUserConfig.txt workaround that most guides overlook.
Start with Fix 1 (Shape Dynamics), then work through Windows Ink, driver reinstall, tablet properties, the PSUserConfig.txt method, and finally Photoshop version checks. In my experience, over 90 percent of pen pressure issues are resolved by the first three fixes combined.
Remember to back up your PSUserConfig.txt file and screenshot your settings after you get everything working. That way, when the next Photoshop update breaks pen pressure again (and it probably will), you can restore your configuration in under two minutes instead of spending hours troubleshooting from scratch.
If you are still stuck after trying every fix in this guide, the Wacom support team and the communities on r/wacom and r/photoshop are excellent resources with users who have likely experienced your exact issue. Wacom pen pressure not working in Photoshop is a well-documented problem with well-documented solutions, and persistence through this checklist will get your brushes responding the way they should.