
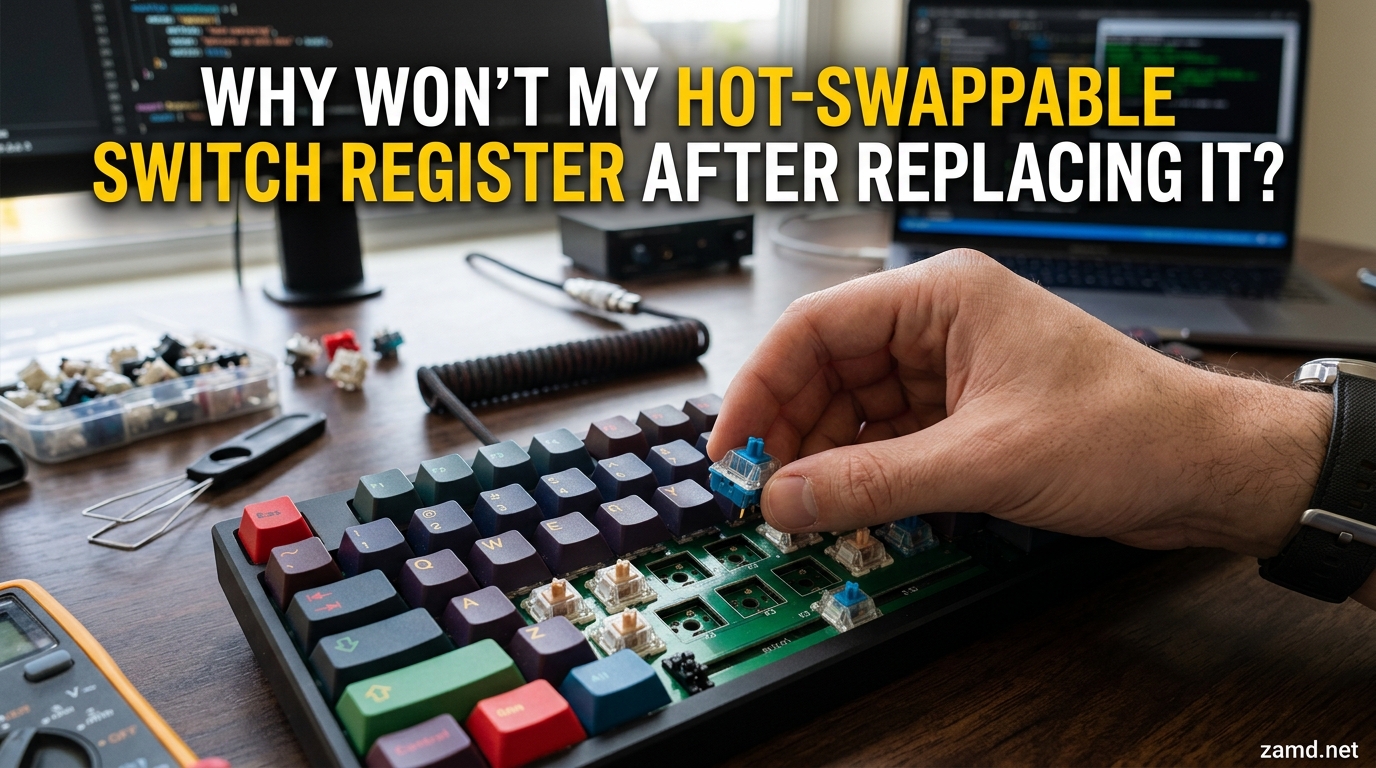
You just swapped in a brand-new switch on your hot-swappable keyboard, pressed the key, and nothing happened. No character on screen. No satisfying registration. Just silence where there should be a keystroke. If you are wondering why your hot-swappable switch won’t register after replacing it, you are far from alone. This is one of the most common issues mechanical keyboard owners run into after their first or fiftieth switch swap.
The frustration is real, especially when the old switch worked fine and you were just upgrading to something better. I have been building and repairing custom mechanical keyboards for years, and I have seen this exact problem hundreds of times across boards from Keychron, Glorious GMMK, NovelKeys, and budget hot-swap kits alike. The good news is that the fix is almost always simple once you know what to look for.
Hot-swappable keyboards let you change switches without soldering, using metal contact pins on the switch that slide into spring-loaded sockets on the PCB. It is a brilliant design, but those pins and sockets are delicate. One slightly bent pin, one piece of debris, or one damaged socket leaf and your key goes dead. In this guide, I will walk you through every possible cause and show you exactly how to fix each one, step by step.
Whether this is your first failed switch swap or you have had the same keys dying repeatedly on your board, this article will help you figure out whether the problem is the switch, the socket, or something else entirely. Let us get that key working again.
Table of Contents
Quick Answer: Why Your Hot-Swappable Switch Isn’t Registering
If your newly replaced hot-swappable switch is not registering, the most likely cause is a bent metal pin on the switch that failed to enter the PCB socket properly. Other common causes include debris in the socket, a damaged hot-swap socket leaf contact, improper switch seating, or a 5-pin switch that needs its plastic legs clipped for proper alignment.
Here are the top five reasons, ranked by how often I see them in practice:
- Bent switch pin – The metal contact pin bent during insertion and never reached the socket contact. This is the single most common cause.
- Damaged hot-swap socket leaf – The internal metal contacts inside the PCB socket are bent or worn from repeated switch swaps, preventing a solid connection.
- Debris in the socket – Dust, lint, or old lubricant is blocking the connection between the switch pin and socket contact.
- Switch not fully seated – The switch is sitting slightly proud of the plate or PCB, so the pins never fully insert into the socket.
- 5-pin compatibility issue – A 5-pin switch has plastic legs that do not align with your PCB’s holes, preventing the switch from bottoming out.
In about 70% of cases I diagnose, the problem is a bent pin. In another 20%, it is a damaged socket. The remaining 10% is split between debris, alignment, and rare PCB-level issues. Let me show you how to figure out which one you are dealing with.
Top Causes of a Switch Not Registering After Replacement
Understanding the root cause is the first step to a lasting fix. I will break down each cause in detail, including how it happens and what symptoms to look for. This section draws on years of troubleshooting experience plus patterns I have seen across Reddit’s r/MechanicalKeyboards, KeebTalk forums, and GeekHack threads.
Bent Pins: The Number One Culprit
Every MX-style switch has two thin metal pins on the bottom. One is the actual electrical contact pin, and the other is part of the switch mechanism that triggers the keypress. These pins are only about 0.5mm thick, which means they bend very easily if they encounter any resistance during installation.
When you push a switch into a hot-swap socket, the pins need to slide perfectly into tiny holes in the socket. If a pin is even slightly off-center, it hits the edge of the hole and folds over instead of going in. You might feel the switch click into place on the plate, but the bent pin never makes electrical contact inside the socket. The result is a switch that feels physically installed but registers nothing.
This happens most often when you are not looking at the pins as you insert the switch, or when you push at a slight angle rather than straight down. It can also happen if the pins were already slightly bent when you took the switch out of its packaging. I always inspect pins before installation now, because straightening a pin is much easier than diagnosing a dead key.
The telltale sign of a bent pin is that the switch feels seated and clicks normally, but the key does not register at all. If you pull the switch back out and see a pin folded against the side of the switch housing, you have found your problem.
Damaged Hot-Swap Socket Leaf Contacts
This is the cause that most guides gloss over, but it is the one that creates the most frustration. Inside every hot-swap socket on your PCB, there are two small metal leaf contacts. These spring-loaded contacts grip the switch pins when you insert them, creating the electrical connection that registers your keystroke.
Over time and repeated switch swaps, these leaf contacts can get bent out of shape. They may lose their spring tension, get pushed too far apart, or develop a permanent bend that prevents them from gripping new switch pins tightly enough. When this happens, every switch you put in that socket will fail to register reliably, no matter how perfect the pins are.
This is exactly what a KeebTalk user described when they said their “alt, space, 9, and S key keep dying” on a GMMK Pro. They replaced the switches multiple times, and each new switch worked for a few weeks before dying again. The switches were not the problem. The socket leaf contacts were damaged from repeated swaps, and each new switch made the damage slightly worse until contact failed entirely.
An expert on the same thread put it perfectly: “A socket is a thousand times more likely to fail before the switch.” That matches my experience exactly. Switches rarely fail on their own. Sockets fail all the time.
The symptoms of a damaged socket leaf are distinctive. If you have tried multiple known-good switches in the same slot and none of them register, the socket is almost certainly the problem. If the key works intermittently or only when you press the switch at a specific angle, that also points to a loose socket contact.
Debris and Dust in the Socket
It sounds simple, but a tiny piece of debris in a hot-swap socket can prevent a switch pin from making contact. Dust, pet hair, lint, fragments of old switch plastic, or dried lubricant can all find their way into the socket opening over time.
This is especially common on keyboards that have been used for a while without the keycaps being removed regularly. Debris settles into the socket area and gets pushed further in when you insert a new switch, creating a barrier between the pin and the contact leaf.
The fix is straightforward: compressed air and contact cleaner. But you need to identify this as the cause first. If the switch works in a different slot but not in the problem slot, and the pins are straight, debris is a strong candidate.
Improper Switch Seating and Alignment
Sometimes the switch is not fully seated in the socket, even though it looks like it is. This can happen when the switch catches on the plate but does not bottom out in the PCB socket. The plastic housing of the switch clicks into the plate mounting hole, giving you the tactile feedback of a successful install, but the pins stop just short of reaching the socket contacts.
This is more common on 5-pin switches installed in plate-mount configurations, or when the plate and PCB are slightly misaligned due to case flex. Pressing down firmly and evenly on the switch housing from the top can sometimes push it that final millimeter into place.
You can test for this by pressing the key while gently pushing down on the switch housing. If the key registers while you are applying downward pressure but stops when you release, the switch is not seated deeply enough.
5-Pin vs 3-Pin Switch Compatibility
If you are using 5-pin switches on a PCB designed for 3-pin switches, the two extra plastic legs on the switch may not have corresponding holes in your PCB. These plastic legs hit the PCB surface and prevent the switch from fully inserting, which means the metal contact pins never reach the socket.
The fix is to clip the two plastic legs using flush cutters. This converts a 5-pin switch to a 3-pin switch, which is a completely safe and common modification. Most custom keyboard builders do this routinely.
The confusion arises because many hot-swap boards accept 5-pin switches but some only have holes for 3-pin. If your switch has five legs on the bottom (two metal pins plus three plastic legs) and it will not seat properly, check whether your PCB has holes for the two extra plastic legs. If it does not, clip them.
How to Diagnose: Is It the Switch or the Socket?
Before you start fixing anything, you need to figure out whether the problem is the switch itself or the socket on the PCB. This is the most important diagnostic step, and it saves you from wasting time fixing the wrong thing. I use a simple two-test method that narrows down the problem in under five minutes.
Test 1: The Swap Test (Move the Switch)
Pull the non-registering switch out of its current slot and install it in a different slot on your keyboard where you know the socket works. Use a slot that currently has a functioning switch.
If the switch registers in the new slot, the switch is fine and the original socket is your problem. If the switch does not register in the new slot either, the switch itself is defective or has a bent pin.
Test 2: The Reverse Swap (New Switch in the Problem Slot)
Now take a switch you know works, one that is currently functioning in another slot, and install it in the problem slot. If this known-good switch also fails to register, the socket on the PCB is damaged or has debris. If the known-good switch works fine, the original switch was the problem.
Reading the Results
Here is how to interpret the combined results:
- Switch works in new slot, known-good switch fails in problem slot: The socket is damaged. You need socket repair or replacement.
- Switch fails in new slot, known-good switch works in problem slot: The original switch has a bent pin or is defective. Straighten the pin or replace the switch.
- Switch fails in new slot, known-good switch also fails in problem slot: You have both a bad switch and a bad socket. Fix the socket first, then use a different switch.
- Switch works in new slot, known-good switch also works in problem slot: The original switch was not seated properly. Reinstall it carefully and test again.
The Tweezers Test for PCB Socket Health
If you want to go one step further, you can test the PCB socket directly. Remove the switch entirely, then touch both metal contacts inside the socket with a metal pair of tweezers. This simulates what a switch pin does when it closes the circuit.
If the key registers when you bridge the contacts with tweezers, the PCB trace and socket wiring are intact. The problem is physical contact between the switch pins and socket leaves. If the key does not register even with tweezers, you may have a damaged PCB trace, which requires soldering repair.
Step-by-Step Fixes for Common Problems
Once you have diagnosed the problem, it is time to fix it. Below are detailed guides for each common issue, from the easiest fix to the most advanced repair.
How to Straighten a Bent Switch Pin
This is the fix you will need most often. The goal is to gently bend the pin back to perfect vertical alignment without snapping it off. Metal switch pins are surprisingly resilient, but they can break if you bend them too aggressively.
Step 1: Remove the switch from the keyboard using a switch puller. Grip the switch firmly on the top and bottom, not the sides, to avoid cracking the housing.
Step 2: Inspect the bottom of the switch under good lighting. You should see two metal pins sticking straight down. If one is bent at an angle or folded flat against the plastic housing, that is your culprit.
Step 3: Using precision tweezers or a very fine pair of needle-nose pliers, grip the bent pin as close to the base as possible. Gently and slowly push the pin back toward vertical. Do this in small increments rather than one large motion.
Step 4: Check alignment by eye. The pin should be perfectly parallel to the other pin and pointing straight down. If it has an S-curve from previous bends, try to straighten it as much as possible.
Step 5: Reinstall the switch, this time watching the pins carefully as they enter the socket. If you feel resistance, stop and recheck alignment rather than forcing it.
Take your time with this. A pin that has been bent multiple times becomes brittle and will eventually snap. If the pin keeps bending every time you install the switch, it may be time to retire that switch and use a new one.
How to Clean a Hot-Swap Socket
If debris is the problem, cleaning the socket is quick and effective. You will need compressed air and optionally a contact cleaner spray designed for electronics.
Step 1: Remove the switch and any keycap above it.
Step 2: Hold the keyboard at an angle and spray compressed air directly into the socket opening. Use short bursts rather than a long continuous spray. The goal is to dislodge any loose particles.
Step 3: If compressed air alone does not work, apply a small amount of contact cleaner to the socket. Do not soak it. A brief spray is enough. Contact cleaner evaporates quickly and removes oils, dried lubricant, and corrosion.
Step 4: Let the socket dry completely for 5 to 10 minutes before reinstalling a switch. Contact cleaner is fast-drying, but residual moisture can cause false readings.
Step 5: Reinstall a known-good switch and test. If it registers, debris was the problem.
I recommend doing this as part of regular keyboard maintenance even when you are not having issues. A quick blast of compressed air every few months keeps sockets clean and prevents buildup.
How to Repair Hot-Swap Socket Leaf Contacts (Advanced)
This is the repair that most articles skip, but it is the one that solves the most stubborn cases. If you have confirmed the socket is the problem through the diagnostic tests above, you may be able to repair the leaf contacts without replacing the PCB.
The leaf contacts inside a hot-swap socket are thin pieces of spring metal. When they lose tension from repeated switch swaps, they no longer grip the switch pins firmly enough to maintain contact. The fix involves carefully re-tensioning these contacts.
What you need: A needle or very fine precision tool, good lighting, magnification (a phone camera with zoom works well), and steady hands.
Step 1: Remove the switch from the damaged socket. Shine a light directly into the socket opening and use magnification to see the internal leaf contacts.
Step 2: You should see two thin metal strips inside the socket, one on each side. These are the leaf contacts. Over time, they can get pushed outward so they no longer grip switch pins tightly.
Step 3: Using the tip of a needle, gently push each leaf contact inward toward the center of the socket. You are trying to restore the original curve and tension of the contact. Apply very light pressure. These contacts are fragile, and over-bending will break them.
Step 4: Test the repair by inserting a known-good switch and checking if it registers. If it does, you have successfully re-tensioned the contact. If not, try adjusting the leaf slightly more.
Step 5: If the contacts are visibly broken, corroded, or missing, socket leaf repair will not work. At that point, you need to replace the hot-swap socket entirely, which requires desoldering the old socket and soldering a new one onto the PCB.
This repair has mixed success depending on how damaged the contacts are. I have successfully re-tensioned sockets on Keychron and GMMK boards, extending their life by months or years. But if the contact metal has fatigued beyond a certain point, the repair is temporary at best.
How to Properly Seat a Switch for Full Contact
If your switch is not fully seating, try this installation technique. It works for both new installs and switches that feel slightly loose.
Step 1: Hold the switch with the pins facing down and inspect them under light. Confirm both pins are straight and undamaged.
Step 2: Align the switch with the slot, making sure the orientation is correct. Switches have a specific orientation with a small notch on one side that matches the plate.
Step 3: Gently lower the switch into the slot, letting the pins find the socket holes. Do not push yet. You want the pins to enter the socket holes before the plastic housing contacts the plate.
Step 4: Once you feel the pins enter the holes, press down firmly and evenly with two fingers, one on each side of the switch. Apply even pressure so the switch goes in straight.
Step 5: The switch should click into the plate and feel solid. If you feel resistance before the switch bottoms out, stop. Pull it out, check the pins, and try again.
How to Bench-Test a Switch Before Installing
One of the best habits I have adopted is testing switches before installation. This prevents the frustration of installing a switch, putting the keycap back on, and then discovering it does not work.
If your keyboard has a known-good socket, plug the new switch into that slot before doing the full installation. You do not even need to remove the existing switch first if you have a slot that is easily accessible. Just press the switch pins into a working socket, test it, and if it registers, move it to the target slot.
This 30-second test catches bent pins, defective switches, and dead-on-arrival units before you commit to a full installation. I have caught at least a dozen defective switches this way, saving myself the headache of a teardown.
When to Clip 5-Pin Switches to 3-Pin
If your PCB only has holes for 3-pin switches, you need to remove the two extra plastic legs from 5-pin switches. This is called clipping, and it is completely safe.
Use a pair of flush cutters to snip the two plastic legs flush with the bottom of the switch housing. Make a clean, flat cut so no plastic nub remains. The switch will now fit a 3-pin PCB perfectly.
Some builders clip all their 5-pin switches even on 5-pin compatible boards because it makes switch removal and installation easier. The plastic legs add alignment stability but are not strictly necessary for function. This is a personal preference.
When to Replace the PCB vs Repair the Socket
Not every socket can be repaired. If you have tried re-tensioning the leaf contacts and the socket still does not work, or if the socket has come loose from the PCB entirely, you face a choice between soldering repair and PCB replacement.
If the socket is still attached to the PCB but the contacts are damaged beyond repair, you can desolder the old socket and solder in a replacement. Kailh and Gateron hot-swap sockets are inexpensive and widely available. This repair requires basic soldering skills but is very doable for someone with experience.
If the socket has torn off the PCB and taken copper traces with it, the repair becomes much more complex. You would need to repair the traces with jumper wires before installing a new socket. This is advanced soldering work.
For many people, the practical decision comes down to cost and skill. If you are comfortable with a soldering iron, socket replacement is a weekend project. If you are not, a replacement PCB or a new keyboard may be more cost-effective.
I always recommend attempting the leaf re-tensioning repair first, since it costs nothing and takes five minutes. If that fails, then evaluate whether soldering is in your skill set.
Software and Firmware: The Unlikely Culprits
While hardware issues cause 95% plus of switch registration failures, there are rare cases where software or firmware is to blame. It is worth checking these if all hardware diagnostics come back clean.
If you are using a programmable keyboard with QMK, VIA, or custom firmware, the key may have been remapped or disabled in the configuration. Check your keymap to make sure the problem key is assigned to a function. Connect the keyboard to VIA or your configuration tool and verify the key sends a signal when pressed.
On some keyboards, a firmware glitch can cause individual keys to stop registering. A factory reset or firmware reflash can resolve this. Check your manufacturer’s instructions for how to reset or update firmware.
Finally, test your keyboard on a different computer or with a different cable. USB cable issues and driver conflicts can occasionally cause individual keys to behave erratically, though this typically affects multiple keys rather than just one.
How to Prevent Socket Damage When Swapping Switches
Prevention is always better than repair. Hot-swap sockets are consumable components with a limited lifespan, but you can extend that lifespan significantly with good technique.
Always pull switches straight up. The most common way sockets get damaged is by pulling a switch at an angle. Use a switch puller that grips the switch evenly on both sides and pull straight upward with steady force. Never rock the switch side to side.
Inspect pins before every installation. Take five seconds to look at the bottom of every switch before you insert it. Catching a slightly bent pin before insertion saves the socket from unnecessary stress.
Never force a switch. If you feel strong resistance when inserting a switch, stop immediately. Resistance means a pin is hitting something other than the socket hole. Pull the switch out, check pin alignment, and try again.
Limit how often you swap the same socket. Every insertion and removal cycle wears the socket contacts slightly. Most hot-swap sockets are rated for 50 to 100 cycles, but that number drops fast if pins are bent or force is used. If you are someone who changes switches frequently, rotate which keys you experiment with to spread the wear.
Use the right tools. A proper switch puller, not pliers or improvised tools, is essential. The right tool distributes force evenly and prevents side-loading the socket. A keycap puller is also necessary for removing keycaps without stressing the switch beneath.
Common Keyboard Brands and Socket Quality
Not all hot-swap sockets are created equal. Based on my experience and community reports, some boards are more prone to socket issues than others.
Kailh hot-swap sockets, used in many popular boards including the GMMK Pro and various Keychron models, are the most common type. They work well initially but can lose tension after many swap cycles. The leaf contacts are adequate but not exceptionally durable.
Gateron hot-swap sockets, found in some newer boards, tend to have slightly tighter tolerances and better contact retention in my experience. They grip switch pins more firmly, which can make switch removal harder but improves long-term reliability.
The GMMK Pro has a well-documented history of socket issues, as evidenced by the multiple KeebTalk and Reddit threads about repeated key failures. This is not a knock on the board overall, but something to be aware of if you own one and are experiencing problems.
Keychron boards generally have reliable sockets, but the compact models like the K6 and K8 have tight internal layouts that can make switch removal more difficult, increasing the risk of socket damage from angled pulls.
FAQs
How to fix keyboard switch not registering?
To fix a keyboard switch that is not registering, first pull the switch and inspect the two metal pins for bends. Straighten any bent pins with precision tweezers. If pins are straight, test the switch in a different socket to determine if the switch or the PCB socket is the problem. Clean the socket with compressed air and contact cleaner if debris is present. If multiple known-good switches fail in the same slot, the hot-swap socket leaf contacts may be damaged and need re-tensioning or replacement.
Can you change the switches on a hot-swappable keyboard?
Yes, that is the entire purpose of a hot-swappable keyboard. You can remove and replace switches without any soldering using a switch puller tool. Simply remove the keycap, grip the switch with the puller, pull straight up, then press a new switch firmly into the slot until it clicks into place. Always inspect the metal pins on the new switch before inserting to avoid bending them.
Why is my mechanical keyboard not registering keystrokes?
A mechanical keyboard may not register keystrokes due to bent switch pins, damaged hot-swap socket contacts, debris in the socket, improper switch seating, 5-pin switches installed in 3-pin PCBs without clipping, or in rare cases firmware issues. The most common cause by far is a bent pin during switch installation. Diagnose by testing the switch in a different socket and testing a known-good switch in the problem slot.
How to fix keyboard keys not registering sometimes?
Intermittent key registration usually indicates a loose connection between the switch pins and socket contacts. Try removing and reseating the switch with firm, even pressure. If the problem persists, the hot-swap socket leaf contacts may have lost tension from repeated use. Gently re-tension the contacts with a needle tip, or try the pin-twist workaround of rotating each metal pin about 40 degrees to create a tighter fit inside a worn socket.
Can you repair a hot-swap socket on a mechanical keyboard?
Yes, in many cases. If the socket leaf contacts have lost tension, you can carefully re-tension them using a needle to push the metal contacts inward. If the socket has torn off the PCB, you can desolder the damaged socket and solder a replacement Kailh or Gateron socket in its place. If PCB traces are also damaged, trace repair with jumper wire is possible but requires advanced soldering skills.
How do I know if my switch pin is bent?
Remove the switch and look at the bottom under good lighting. There should be two metal pins pointing straight down. If either pin is angled to the side, folded against the plastic housing, or curved in an S shape, it is bent. Compare the two pins to each other for reference. A bent pin can often be straightened with precision tweezers, but pins that have been bent multiple times become brittle and may snap.
Wrapping Up: Get That Key Working Again
Figuring out why your hot-swappable switch won’t register after replacing it comes down to a simple process: inspect the pins, run the swap test to isolate the problem, then apply the matching fix. In most cases, a bent pin is the culprit and a quick straightening with tweezers solves everything in under five minutes.
If the problem turns out to be a damaged socket rather than a bad switch, do not panic. Socket leaf re-tensioning is a viable repair for many boards, and socket replacement via soldering is always an option for those willing to learn. The key insight from the keyboard community is that switches rarely fail on their own. Sockets do. So if you find yourself replacing the same key over and over, look at the socket, not the switch.
Going forward, adopt good swap habits to protect your sockets. Inspect pins before every installation, pull straight up with a proper tool, never force resistance, and bench-test new switches before committing to a full install. These small habits will keep every key on your board registering reliably for years to come.