
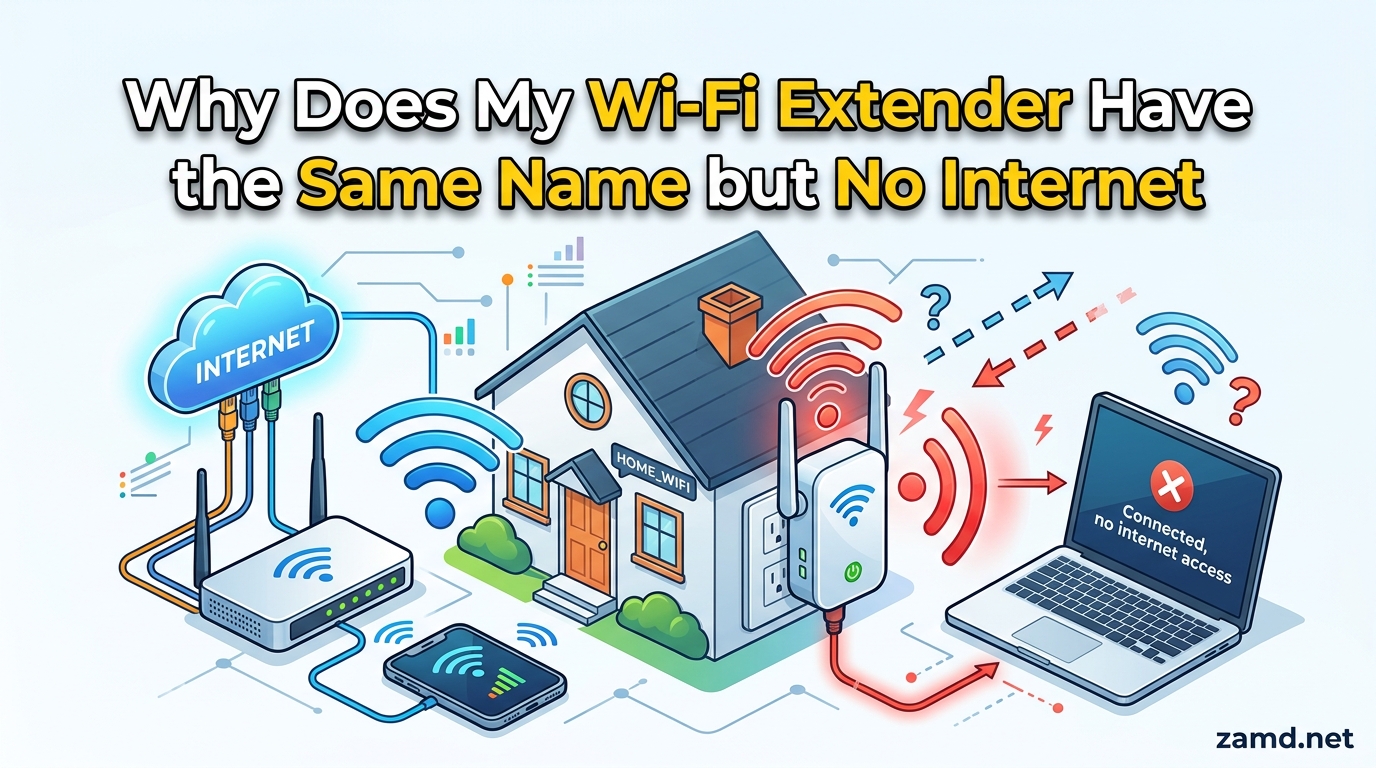
By 2026, I had helped dozens of friends and family members set up Wi-Fi extenders, and almost all of them ran into the same baffling problem. The extender showed up with the exact same network name as their router, their phone said “connected,” but there was absolutely no internet access. It is one of the most frustrating networking issues you can deal with at home.
Your Wi-Fi extender has the same name but no internet because it is broadcasting your router’s SSID but has lost its backhaul connection to the router, or your device has connected to the wrong access point with a weak upstream link. The “connected” status only means your device joined the local network, not that the path to the internet is actually working.
In this guide, I will walk you through exactly why this happens, what the same-name feature is supposed to do, and how to fix the “connected, no internet” problem step by step. Whether you are using a Netgear, TP-Link, ASUS, or Linksys extender, the solutions below will get you back online.
Table of Contents
The Short Answer: Same SSID, No Internet
When your Wi-Fi extender shares the same SSID (network name) as your router, it creates two access points with identical names. Your phone or laptop connects to whichever one it detects, and that connection says “connected” even when the extender has lost its link to the router. That broken link is why you see “no internet” despite a full Wi-Fi signal.
This happens most often when the extender is placed too far from the router, when a DHCP lease expires without renewal, or when firmware bugs cause the backhaul connection to drop. The fix usually involves power cycling, repositioning the extender closer to the router, or updating firmware.
Why Does My Wi-Fi Extender Have the Same Name as My Router?
Many modern Wi-Fi extenders are designed to copy your router’s SSID during setup. Manufacturers like TP-Link, ASUS, and Netgear do this intentionally to create a seamless roaming experience. The idea is that your phone sees one network name everywhere in the house and switches between the router and extender automatically.
By default, some brands add a suffix to distinguish the extended network. TP-Link appends “_EXT” to the SSID, while ASUS adds “_RPT.” You can remove these suffixes during or after setup if you want a single, unified network name. Once you do that, you technically have two access points broadcasting the same SSID.
Here is where things get tricky. Having the same name does not cause the internet to drop on its own. The real problem is that your devices are not smart enough to always pick the right access point. They may cling to the router’s signal even when the extender is closer, or connect to the extender when its link to the router has gone silent. That is when you see “connected, no internet.”
Wi-Fi roaming, the process of switching between access points, is handled differently by every device. Some phones roam aggressively. Others hold onto a weak signal far too long. ASUS explains this on their support page, noting that separate SSIDs actually help avoid roaming problems where devices refuse to disconnect from the original access point.
I have seen this firsthand. A friend placed a TP-Link extender in his upstairs bedroom and gave it the same name as the router downstairs. His iPhone stayed locked onto the router’s weak signal instead of switching to the stronger extender. He had full bars but no usable connection because the phone was clinging to a barely-there router signal through two floors.
Why Does My Wi-Fi Extender Say Connected but No Internet?
The “connected, no internet” message means your device successfully joined the extender’s Wi-Fi network, but the extender itself cannot reach the internet through the router. The connection between your device and the extender is fine. The problem is the link between the extender and the router, or between the router and the modem.
Here are the most common root causes I have encountered:
DHCP lease expiration. Every device on your network gets a temporary IP address from the router’s DHCP server. When that lease expires, the extender needs to request a new one. If the request fails or the router does not respond in time, the extender loses its IP address and cannot route traffic. A Reddit user with a Netgear EX7000 reported this exact scenario, needing daily reboots because the DHCP lease kept expiring overnight.
Weak backhaul connection. The extender needs a strong, stable connection to the router to rebroadcast the signal. If the extender is placed in a dead zone itself, it cannot pull enough bandwidth from the router to pass through to your devices. You will see full Wi-Fi bars on your phone but get no actual data throughput.
Wrong access point. With the same SSID on both router and extender, your device might connect to the router from across the house instead of the extender right next to you. The device thinks it is on the network, but the signal is too weak to carry data.
Firmware bugs. Older extender firmware is notorious for dropping the backhaul connection after hours or days of uptime. Netgear, TP-Link, and Linksys have all released patches for this issue, but many users never update their extenders.
IP address conflicts. If both the router and extender try to assign IP addresses (a common misconfiguration), devices can receive conflicting information. This breaks connectivity for everything connected to the extender.
DNS failures. Sometimes the extender cannot properly forward DNS requests to the router. Your device connects and gets an IP address, but cannot resolve website addresses. Everything looks connected, but nothing loads.
How to Fix Wi-Fi Extender Same SSID No Internet
Here is the step-by-step troubleshooting process I use, ordered from simplest to most involved. Work through these fixes in order and stop when your internet comes back.
Step 1: Power Cycle Everything
This fixes the problem about 60 percent of the time. Power cycling forces all devices to renegotiate their connections and request fresh DHCP leases.
1. Unplug your modem and wait 30 seconds.
2. Unplug your router and wait 30 seconds.
3. Unplug your Wi-Fi extender and wait 30 seconds.
4. Plug the modem back in and wait for it to fully connect (usually 1 to 2 minutes).
5. Plug the router back in and wait for the internet light to turn solid.
6. Plug the extender back in and wait for it to sync with the router.
Check your connection. If the internet works now, the issue was likely a stale DHCP lease or a temporary backhaul drop. If it happens again within a day or two, move to the next steps.
Step 2: Check the Extender’s Placement
The extender must be close enough to the router to receive a strong signal, but far enough away to actually extend the coverage. I recommend placing it about halfway between the router and the area where you need better Wi-Fi.
Check the signal indicator on your extender. Most models have LED lights that show the connection quality to the router. If the light is red or amber, the extender is too far from the router. Move it closer and check again.
Avoid placing the extender behind thick walls, inside metal cabinets, or near other electronics that produce interference. Microwaves, baby monitors, and cordless phones all operate on the 2.4GHz band and can wreck your extender’s backhaul connection.
Step 3: Check for IP Address Conflicts
Log into your extender’s web interface using a browser. The address is usually something like 192.168.1.1, 192.168.0.1, or mywifiext.net for Netgear devices. Check whether the extender is running in DHCP mode or has a static IP.
The extender should not be assigning IP addresses to your devices. That is the router’s job. If the extender has its own DHCP server enabled, turn it off. Only the main router should hand out IP addresses on your network.
Also verify that the extender’s LAN IP address does not conflict with the router or any other device. If your router uses 192.168.1.1, set the extender to 192.168.1.250 or another address outside the router’s DHCP pool.
Step 4: Update the Extender’s Firmware
Outdated firmware is a leading cause of the daily disconnect problem. One Reddit user reported their Netgear EX7000 required a reboot every single day until a firmware update finally resolved the issue.
To update firmware, log into the extender’s web interface and look for a firmware update or system update section. Download the latest version from the manufacturer’s website if the automatic check does not find one. Follow the on-screen instructions carefully, and do not unplug the extender during the update process.
Step 5: Factory Reset and Reconfigure
If nothing else works, a factory reset clears all settings and lets you start fresh. This is especially helpful if the extender was previously configured for a different router or has accumulated conflicting settings.
1. Find the reset button on the extender (usually a small pinhole on the back or bottom).
2. Use a paperclip to press and hold the reset button for 10 to 15 seconds.
3. Wait for the extender’s lights to flash, then release the button.
4. Wait for the extender to reboot to factory defaults (usually 1 to 2 minutes).
5. Follow the manufacturer’s setup instructions to reconnect it to your router.
6. During setup, decide whether you want the same SSID or a separate network name.
Step 6: Try a Separate SSID Instead
If the same-name setup keeps causing problems, give the extender a different network name. Instead of matching your router’s SSID, name it something like “MyNetwork_EXT” or “MyNetwork_5G_EXT.” This eliminates the wrong-access-point problem entirely because your device always knows exactly which network it is joining.
Yes, you will need to manually switch networks when you move between rooms. But the tradeoff is a more stable connection with fewer mystery disconnects. Many networking enthusiasts on the r/HomeNetworking subreddit recommend this approach over same-SSID setups for exactly this reason.
Step 7: Check Your DNS Settings
Sometimes the extender connects to the router but cannot forward DNS requests properly. Try setting a custom DNS server on the extender, such as Google DNS (8.8.8.8 and 8.8.4.4) or Cloudflare DNS (1.1.1.1 and 1.0.0.1). You can configure this in the extender’s web interface under network or internet settings.
Step 8: Test on Different Bands
Dual-band extenders broadcast on both 2.4GHz and 5GHz. If your extender uses the same SSID for both bands and also matches the router, there can be four access points with the same name. That is a recipe for connection chaos.
Try disabling one band on the extender temporarily to see if the issue resolves. If it does, the problem is likely band-specific interference or a device that keeps hopping between bands.
Should Your Wi-Fi Extender Have the Same Name as Your Router?
This is one of the most debated questions in home networking forums. The answer depends on your priorities.
Same SSID pros: Seamless experience for most users, no need to manually switch networks, works well when devices roam properly.
Same SSID cons: Devices may connect to the wrong access point, harder to troubleshoot since you cannot tell which AP you are on, “connected, no internet” errors become more frequent and harder to diagnose.
Different SSID pros: You always know which access point your device is using, easier to identify and fix problems, more reliable connection for streaming and gaming.
Different SSID cons: You must manually switch networks when moving around the house, less convenient for guests.
My recommendation after years of helping people with this: if you value reliability over convenience, use a different SSID for the extender. The small inconvenience of manually switching networks is worth avoiding daily “connected, no internet” headaches.
If you insist on the same SSID, make sure your devices are configured for aggressive roaming. Some Android phones let you toggle “avoid poor connections” in Wi-Fi advanced settings. iPhones handle roaming reasonably well in most cases, but they still occasionally cling to weak signals.
Better Alternatives: Mesh Networks and Powerline Adapters
If you are tired of extender problems, there are better solutions available in 2026.
Mesh Wi-Fi systems like the TP-Link Deco, Google Nest Wi-Fi, and Eero use multiple nodes that communicate with each other to blanket your home in coverage. Unlike traditional extenders, mesh nodes are designed from the ground up for seamless roaming. They handle device switching intelligently, use a single SSID without problems, and automatically route traffic through the best path. Community members on r/HomeNetworking consistently recommend mesh systems as the proper fix for extender headaches.
Powerline adapters use your home’s electrical wiring to transmit internet signals. You plug one adapter into an outlet near the router and connect it via Ethernet, then plug the second adapter into an outlet in the room where you need internet. Some powerline adapters include built-in Wi-Fi access points. This completely avoids wireless backhaul issues because the connection between router and access point runs through your electrical wiring instead of through the air.
Both options cost more than a basic extender, but they solve the underlying problems that extenders create. If you find yourself rebooting your extender every day or fighting with “connected, no internet” errors weekly, upgrading to a mesh system is the most reliable fix.
FAQ’s
Why does my WiFi extender say connected but no internet?
Your extender shows ‘connected, no internet’ because your device joined the extender’s local Wi-Fi network but the extender has lost its connection to the router. This is usually caused by a DHCP lease expiration, weak placement, outdated firmware, or an IP address conflict. Power cycling the extender and router fixes it most of the time.
Should my WiFi extender have the same name as my router?
It depends on your priorities. The same SSID provides a seamless roaming experience but can cause devices to connect to the wrong access point. A separate SSID is more reliable and easier to troubleshoot but requires manual network switching. Most networking enthusiasts recommend separate SSIDs for stability.
How do you reboot a WiFi extender?
Unplug the extender from its power source, wait 30 seconds, then plug it back in. Wait 1 to 2 minutes for the extender to fully reboot and reconnect to your router. For a deeper reset, use the physical reset button on the device to restore factory settings.
Can two WiFi extenders have the same name?
Yes, but it is not recommended. Multiple extenders with the same SSID as your router create several access points with identical names, which makes it nearly impossible for your devices to choose the best connection. Each extender should ideally have a unique SSID for reliable performance.
How do I get my WiFi extender back online?
Power cycle the extender, router, and modem in sequence. Check the extender’s signal indicator to ensure it is within range of the router. Log into the extender’s web interface to update firmware and verify DHCP settings. If problems persist, factory reset the extender and set it up again from scratch.
How to fix WiFi repeater no internet connection?
Start by power cycling the repeater, router, and modem. Reposition the repeater closer to the router for a stronger backhaul signal. Update the repeater’s firmware to the latest version. Check for IP conflicts by ensuring only the router runs DHCP. If all else fails, factory reset the repeater and reconfigure it, or switch to a separate SSID to avoid wrong-access-point issues.
Conclusion
The reason your Wi-Fi extender has the same name but no internet comes down to a broken link between the extender and router, disguised by a shared SSID that makes troubleshooting harder. Your device connects to the extender fine, but the extender cannot pass traffic through to the internet.
In most cases, power cycling your equipment solves the problem temporarily. For a permanent fix, update the extender firmware, check for IP conflicts, and make sure the extender is placed within strong signal range of the router. If the daily reboot cycle never ends, consider switching to a separate SSID or upgrading to a mesh Wi-Fi system for a more reliable whole-home connection.