
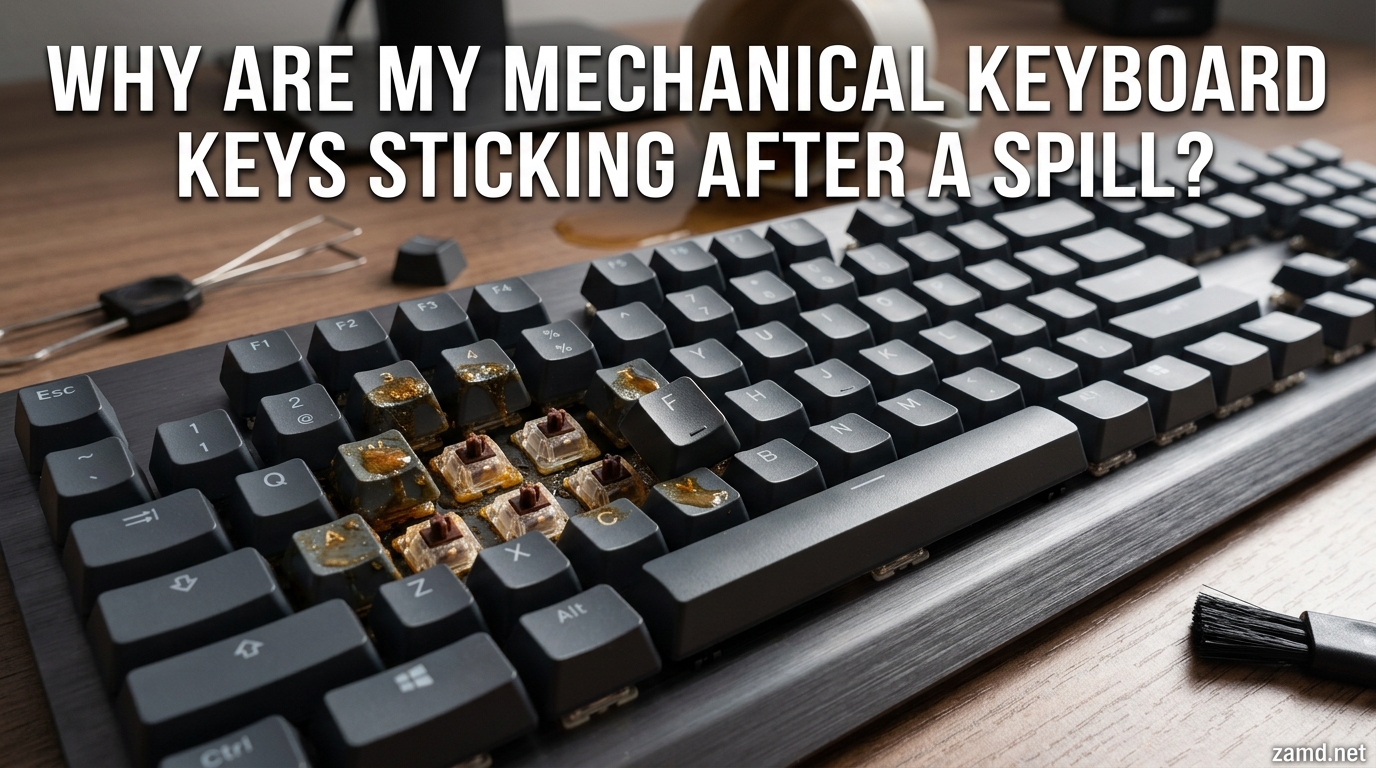
If you just knocked over your coffee, energy drink, or glass of water onto your mechanical keyboard, you are probably watching your keys slow down and stick with a sinking feeling. I have been there, and the good news is that your keyboard is likely salvageable if you act fast.
Mechanical keyboard keys stick after a spill because liquid seeps between the keycap and the switch mechanism, leaving behind sticky residue (especially from sugary drinks) that creates friction on the switch stem. When you press the key, the residue grabs the stem instead of letting it slide smoothly back to its resting position. The problem gets worse over time as sugar caramelizes and hardens, which is why quick action matters.
In this guide, I will walk you through exactly why this happens, what to do in the first 60 seconds after a spill, how to clean surface gunk versus deep switch contamination, and when you should consider replacing switches entirely. I have spent years using, building, and repairing mechanical keyboards, and the methods below come from real testing plus community-proven techniques from forums like r/MechanicalKeyboards.
One quick clarification before we start: this article is about physical sticky keys caused by liquid damage. If your keyboard is acting strange in software (modifiers staying active, keys repeating), you might be dealing with the Windows Sticky Keys accessibility feature, which you can turn off in Settings > Accessibility > Keyboard. That is a completely different problem from what we are covering here.
Table of Contents
Quick Emergency Reference: Do This Right Now
If you are reading this with a wet keyboard in front of you, follow these steps immediately:
- Unplug the keyboard right now. If it is wireless, turn it off and remove the battery if possible.
- Flip it upside down immediately to let liquid drain out instead of seeping deeper into the PCB.
- Do NOT press any keys. Pressing keys forces liquid deeper into the switch housing and spreads contamination to neighboring switches.
- Gently shake it while upside down to encourage liquid to exit through the gaps between keycaps.
- Move it to a dry, well-ventilated area and let it drain on a towel for at least 30 minutes before attempting any cleaning.
Once the immediate crisis is handled, come back and follow the detailed cleaning steps below. The next sections explain everything you need to know.
Why Are My Mechanical Keyboard Keys Sticking After a Spill: The Root Causes
To fix the problem properly, you need to understand what is actually happening inside your keyboard. Mechanical keyboard switches are precision devices with tight tolerances. Inside each switch, a plastic stem slides up and down inside a housing, guided by metal contacts that register each keypress. When liquid gets into this tight space, it disrupts the smooth mechanical movement in several different ways.
Sugar Residue and Caramelization
The most common culprit behind sticky keys is sugar residue. When you spill soda, juice, energy drinks, or sweetened coffee, the liquid contains dissolved sugars that coat every surface they touch. As the liquid evaporates, the sugar stays behind as a sticky film on the switch stem, the inside of the switch housing, and the metal contacts.
This residue acts like glue. Every time you press the key, the switch stem has to push through this sticky layer, creating resistance and a slow, sluggish return. Over hours and days, the remaining moisture continues to evaporate and the sugar undergoes a process called caramelization, where heat and oxidation cause the sugar molecules to polymerize into a hard, brittle crust. This hardened residue is significantly harder to remove than fresh sugar, which is why immediate cleaning is so important.
I learned this the hard way with an orange juice spill. I wiped the surface and thought I was fine, but the sugar inside the switches kept caramelizing for weeks. Keys that felt slightly stiff on day one became nearly unusable by day ten because I had not cleaned inside the switch housing.
Mineral Deposits and Salt Corrosion
Even if you spilled plain water, you are not entirely safe. Tap water contains dissolved minerals like calcium and magnesium that leave behind deposits as the water evaporates. These mineral deposits create a rough surface inside the switch, increasing friction and causing a gritty, scratchy feel when you press the key.
Sports drinks and salt-containing liquids are even worse. Salt is highly corrosive to the metal contacts inside mechanical switches and on the PCB circuit board. Even after the liquid dries, residual salt continues to attract moisture from the air and accelerate corrosion of the gold-plated contact leaves and switch terminals. This type of damage can progress over weeks and months, long after you think the spill is cleaned up.
Surface Residue Versus Switch Damage
Not all sticky keys have the same cause, and this distinction matters for choosing the right fix. Surface residue sits on top of the keycap or around the base of the switch. It causes the keycap itself to feel sticky to the touch but does not affect the internal switch mechanism. This is easy to clean with isopropyl alcohol and a cotton swab without removing the keycap.
Switch-level contamination means liquid has penetrated inside the switch housing and coated the stem, contact leaves, or spring. This is the more serious problem. Keys with switch-level damage feel stiff, slow, or crunchy when pressed, even after the keycap surface is perfectly clean. Fixing this requires getting cleaning solution inside the switch, which I cover in the deep cleaning section below.
Why Stabilizer Keys Are Hit Hardest
If only certain keys are sticking, there is a pattern. Keys with stabilizers, including the spacebar, Enter, Shift, Backspace, and some larger modifier keys, are disproportionately affected by spills. Stabilizers are metal wires that run under wide keys to keep them level, and they sit in plastic housings with small amounts of lubricant. When liquid gets into these housings, it mixes with the lubricant to create a gummy paste that makes the key feel sluggish and inconsistent. Cleaning stabilizers is more involved than cleaning standard switches, and I address this in the deep cleaning section.
How Different Liquids Affect Your Keyboard
Not all spills are created equal. The type of liquid you spilled directly determines how bad the damage will be and how aggressive your cleaning approach needs to be. Here is what you need to know about each category.
Plain Water Spills: Lowest Risk
Plain water is the best-case scenario for a keyboard spill. Pure water does not leave sticky residue, and if your keyboard was off when the spill happened, the risk of permanent damage is relatively low. The main concerns with water are short circuits (if the keyboard was powered on) and mineral deposits from tap water.
If you spilled distilled or filtered water, you are in even better shape. Distilled water contains no minerals and will evaporate cleanly without leaving deposits behind. Many users report full recovery from water spills with just proper drying time and no cleaning needed at all.
Coffee and Tea: Moderate Risk
Coffee and tea are more problematic than water because they contain dissolved solids, natural oils, and often added sugar. Coffee oils can coat switch components and leave a film that attracts dust over time. If you take your coffee with sugar or milk, you also have the sugar residue problem to deal with, which puts coffee closer to the sugary drink category.
The tannins in tea can also leave brown stains on white or light-colored keycaps. These are cosmetic issues but can be frustrating. A soak in warm soapy water or a diluted hydrogen peroxide solution (for white keycaps only) usually removes these stains.
Sugary Drinks: Highest Risk
Soda, juice, energy drinks, and sweetened beverages are the worst-case scenario for a keyboard spill. These liquids are packed with sugar and other dissolved solids that create thick, sticky residue as they dry. The high viscosity of sugary drinks means they penetrate switches more slowly but also stick more aggressively to internal surfaces once they get inside.
Multiple Reddit users on r/MechanicalKeyboards report that soda and energy drink spills have the lowest recovery rates of any liquid type. One user described a Monster Energy spill where they had to soak switches in isopropyl alcohol for 48 hours straight before most of them became usable again. Another user reported that orange juice residue continued causing problems for months because the sugar had caramelized before they realized how deep the contamination went.
Sports Drinks and Salty Liquids: Corrosion Risk
Sports drinks like Gatorade and Powerade combine the worst of both worlds: they contain significant sugar plus electrolytes (salts). The sugar creates sticky residue while the salt accelerates corrosion of metal contacts inside the switches and on the PCB. Even after thorough cleaning, residual salt can continue causing problems for weeks.
If you spilled a sports drink, I recommend being extra thorough with your cleaning and monitoring affected keys for several weeks after the initial repair. Any keys that start feeling inconsistent again may have ongoing corrosion that requires switch replacement.
The Caramelization Timeline
Here is why speed matters so much with sugary spills. Fresh sugar residue dissolves easily in water and isopropyl alcohol, making it straightforward to clean. But as hours pass, the sugar undergoes caramelization, where heat and oxygen cause the sugar to polymerize into harder, more crystalline structures. After 24 to 48 hours, the residue becomes significantly more difficult to dissolve.
After a week or more, caramelized sugar can become almost rock-hard inside a switch, making syringe-based cleaning methods ineffective. At that point, your best option is switch soaking or replacement. This is why cleaning a sugary spill within the first few hours dramatically increases your chances of a full recovery.
The Critical First 60 Seconds: Emergency Response
What you do in the first minute after a spill matters more than anything else. These steps apply regardless of what liquid you spilled. Follow them in order and resist the urge to panic-clean, which can make things worse.
Step 1: Disconnect Power Immediately
The very first thing you need to do is cut power to the keyboard. If it is a wired keyboard, unplug the USB cable from the keyboard end first, then from the computer. If it is wireless, turn off the power switch and remove the battery if your keyboard has a removable battery compartment.
Why is this so urgent? Liquid and electricity are a dangerous combination inside a keyboard. When liquid bridges electrical contacts on the PCB circuit board, it can cause short circuits that fry components instantly. The keyboard might survive liquid contamination if it was unpowered, but a short circuit can cause permanent damage in milliseconds.
Step 2: Flip It and Drain
Once power is disconnected, immediately flip the keyboard upside down. Gravity is your best friend right now. Liquid that is sitting on top of the switch plate will drain downward and out through the gaps between keycaps, rather than seeping deeper into the switch housings and PCB.
Hold it upside down and gently rock it side to side. You do not need to shake it violently. Gentle, controlled movements encourage liquid to pool at the lowest point and exit through the nearest gap. Keep the keyboard upside down for at least 30 seconds to allow as much liquid as possible to drain out.
Step 3: Remove Keycaps on Affected Keys (Optional but Helpful)
If you have a keycap puller and can identify which keys got the worst of the spill, removing those keycaps gives liquid a wider escape path. This step is optional because in the panic of the moment you might not have a keycap puller handy. But if you do, pop off the keycaps in the spill zone to open up the area and help liquid evaporate faster.
Step 4: Blot, Do Not Wipe
Use a lint-free cloth or paper towel to gently blot liquid off the surface. Do not wipe across the keycaps, because wiping can push liquid into the gaps between keys and force it deeper into the switches. Press the cloth down gently to absorb liquid, then lift it straight up.
Step 5: Move to a Dry, Ventilated Area
Place the keyboard upside down on a towel in a well-ventilated room. Do not put it in a closed drawer or cabinet. Air circulation is essential for moisture to evaporate from inside the switch housings. A room with a ceiling fan or a nearby open window will speed up the drying process significantly.
Step 6: Wait Before Cleaning
Let the keyboard sit for at least 30 to 60 minutes before you start the detailed cleaning process. This gives surface liquid time to drain and begin evaporating. Trying to clean while liquid is still actively pooling inside the keyboard can spread contamination to switches that were not initially affected.
What NOT to Do: Mistakes That Make It Worse
Before we get to the cleaning methods, I want to cover the common mistakes that turn a recoverable spill into a permanently dead keyboard. I have seen every one of these in forum posts, and they all make the situation worse.
Mistake 1: Using a Hair Dryer or Heat Gun
This is the single most damaging thing you can do. Heat from a hair dryer warps plastic keycaps, melts switch housings, and can damage solder joints on the PCB. Even on the lowest setting, a hair dryer concentrates heat unevenly and can cause irreversible damage. One user on r/MechanicalKeyboards reported that a hair dryer melted their spacebar stabilizer housing, making the keyboard unfixable.
Air drying at room temperature is always the right approach. If you want to speed things up, use a small fan positioned a few feet away to create gentle air circulation. Never apply direct heat.
Mistake 2: Putting the Keyboard in Rice
The rice myth needs to die. Putting your keyboard in a bag of rice does not absorb moisture effectively because the liquid inside switch housings and under the PCB is not exposed to the rice. Worse, rice dust and debris can get inside the keyboard and create new contamination problems.
Multiple users on forums confirm that rice is useless for keyboards and can actually make things worse by introducing starch particles into the switch mechanisms. Use silica gel packets instead if you want a desiccant. They are far more effective and do not leave debris behind.
Mistake 3: Spraying WD40 on the Switches
WD40 is not a lubricant and should never be used inside a mechanical keyboard switch. It is a solvent and water-displacement spray that leaves behind an oily residue that attracts dust, degrades plastic over time, and can interfere with the electrical contacts inside switches. I address this in detail in the FAQ section, but the short answer is: do not spray WD40 on your keyboard.
If you need to lubricate switches after cleaning, use a dedicated switch lubricant like Krytox 205g0 or TriboSys 3204. These are formulated specifically for mechanical keyboard switches and will not damage the plastic or electrical components.
Mistake 4: Reassembling While Still Damp
Putting keycaps back on before the keyboard and switches are completely dry traps moisture inside the switch housing. This leads to continued corrosion and can re-introduce stickiness after you thought the problem was fixed. Always wait the full 48 to 72 hours before reassembly.
Mistake 5: Pressing Keys to Test During Cleaning
It is tempting to press keys after each cleaning step to see if they feel better. Do not do this. Pressing a key while the switch is still wet pushes liquid and cleaning solution deeper into the housing and spreads it to the metal contacts. Wait until everything is dry before testing.
Mistake 6: Using Tap Water for Cleaning
If you rinse keycaps under the tap, use distilled water for the final rinse. Tap water leaves mineral deposits on keycaps as it dries, which can create a cloudy film. For switch cleaning, always use isopropyl alcohol, never water.
Step-by-Step Surface Cleaning: Keycaps and Visible Residue
Once the emergency response is complete and the keyboard has had time to drain, the next step is surface cleaning. This removes visible residue from keycaps and the areas around the switches. For minor spills, this may be all you need.
Tools You Will Need
Before starting, gather your cleaning supplies:
- Keycap puller (wire puller is best to avoid scratching keycaps)
- Isopropyl alcohol, 90% concentration or higher
- Cotton swabs (Q-tips work fine)
- Lint-free cloth or microfiber cloth
- Compressed air can or bulb blower
- Small container for soaking keycaps
- Warm soapy water (mild dish soap)
- Soft toothbrush for stubborn residue
Step 1: Remove All Keycaps
Use your keycap puller to remove all keycaps, starting from the edges and working inward. Work gently and pull straight up to avoid bending switch stems. If you have a wire keycap puller, position the wires under opposite corners of the keycap and pull straight up with even pressure.
Place the keycaps in a container of warm soapy water as you remove them. This starts the soaking process, which loosens sticky residue from the keycap surfaces and stems. Let them soak for 30 to 60 minutes.
Step 2: Clean the Keyboard Plate and Switch Exteriors
With the keycaps removed, you now have clear access to the keyboard plate and the tops of the switches. Dip a cotton swab in isopropyl alcohol and clean around the base of each switch, paying special attention to any areas with visible sticky residue. The alcohol dissolves sugar and oil residue on contact.
Use compressed air to blow out any dried liquid deposits or debris from between the switches. Hold the can upright and use short bursts to avoid spraying liquid propellant onto the board.
Step 3: Scrub Stubborn Residue
For residue that does not come off with a cotton swab, use a soft toothbrush dipped in isopropyl alcohol. Brush gently in small circles around the base of the affected switches. The bristles can reach into crevices that a cotton swab cannot.
Step 4: Clean and Dry the Keycaps
After soaking, rinse each keycap in clean water (distilled if possible) and scrub the underside with a toothbrush to remove any remaining residue from the keycap stem. Pay attention to the inside of the keycap stem, where sugary residue can accumulate and cause the keycap to stick on the switch stem even after the switch itself is clean.
Place all keycaps on a clean towel to air dry. Make sure they are completely dry before reinstallation, which typically takes 6 to 12 hours. Any moisture inside the keycap stem will transfer to the switch when you reinstall.
Step 5: Test Keys Before Full Reassembly
Before putting all the keycaps back, press each switch stem directly with your finger (the keyboard should be completely dry and unplugged during this test). Any switch that feels gritty, stiff, or slow to return has switch-level contamination that requires deep cleaning. Note which keys feel wrong so you can target them in the next phase.
Deep Cleaning: Getting Inside the Switches
If surface cleaning did not resolve the stickiness, the contamination is inside the switch housing. Deep cleaning requires getting isopropyl alcohol inside the switch to dissolve residue on the stem, contact leaves, and spring. The approach differs depending on whether your keyboard has hot-swappable switches or soldered switches.
Isopropyl Alcohol Concentration Guide: 70% vs 90% vs 99%
The concentration of your isopropyl alcohol matters for effective cleaning. Here is when to use each type:
70% isopropyl alcohol contains 30% water, which means it evaporates slowly and can leave moisture behind inside switches. It is fine for surface cleaning of keycaps and the keyboard plate, but I do not recommend it for internal switch cleaning because the water content can promote corrosion on metal contacts.
90% isopropyl alcohol is the sweet spot for switch cleaning. It has enough water to help dissolve sugar residue effectively, but not so much that it leaves significant moisture behind. It evaporates quickly and is the concentration most recommended by the mechanical keyboard community.
99% isopropyl alcohol evaporates almost instantly, which is great for preventing moisture damage. However, its extremely low water content makes it slightly less effective at dissolving heavy sugar residue. Use 99% for a final flush after cleaning, or when you want to minimize drying time.
For most users, 90% is the best choice. If you can only find 70%, it will work, but allow extra drying time and consider a final rinse with 99% if available.
Method 1: The Syringe Technique for Minor Contamination
If only a few switches are affected and the contamination is relatively fresh, you can clean them without removing them from the keyboard. This method uses a syringe or dropper to inject isopropyl alcohol directly into the switch housing.
- Remove the keycap from the affected switch.
- Press the switch stem down and hold it.
- Using a syringe or dropper, apply 3 to 5 drops of 90% isopropyl alcohol directly onto the switch stem, letting it flow down into the housing.
- Press and release the switch stem 20 to 30 times to work the alcohol through the internal mechanisms and dissolve the residue.
- Hold the switch open and use compressed air to blow out the dirty alcohol and dissolved residue.
- Repeat this process 2 to 3 times until the alcohol coming out looks clean.
- Let the switch air dry for at least 2 hours before testing.
This technique works well for minor spills and recent contamination. Forum users on r/MechanicalKeyboards report good success with this method for coffee and water spills, but note that it may not be sufficient for heavy sugar contamination from soda or energy drinks.
Method 2: Switch Removal and Soaking for Severe Contamination
If the syringe method does not work, or if you are dealing with a heavy sugary spill affecting many switches, you need to remove the switches and soak them. This is where the difference between hot-swappable and soldered keyboards becomes critical.
Hot-Swappable Keyboards: Easy Switch Removal
If your keyboard has hot-swappable switches (common on models from Glorious, Keychron, and many custom builds), you are in luck. Hot-swappable switches can be pulled directly from the PCB using a switch puller without any soldering. This makes deep cleaning dramatically easier.
To clean hot-swappable switches:
- Remove all keycaps.
- Use a switch puller to remove affected switches from the PCB.
- Place the removed switches in a small container filled with 90% isopropyl alcohol.
- Let them soak for 1 to 2 hours for moderate contamination, or 24 to 48 hours for severe sugary spills.
- Remove each switch and press the stem 20 to 30 times to work out dissolved residue.
- Blow out the switches with compressed air to remove remaining liquid.
- Place switches stem-side down on a towel and let them air dry for at least 12 hours.
- Test each switch before reinstallation by pressing the stem. It should feel smooth and consistent.
The community consensus is that hot-swappable keyboards have dramatically better recovery rates from spills. The ability to remove and individually soak switches means you can clean them far more thoroughly than any in-place method.
Soldered Switches: When Desoldering Becomes Necessary
If your keyboard has soldered switches (most prebuilt keyboards from brands like Corsair, Razer, and Logitech), deep cleaning is significantly harder. You cannot remove individual switches without desoldering them from the PCB, which requires a soldering iron, solder sucker or desoldering braid, and some practice.
For soldered keyboards, I recommend trying the syringe method first. If that does not resolve the issue, you have two options:
Option A: Desolder the affected switches. This is the most thorough solution but requires soldering skills. Remove the affected switches, soak them in isopropyl alcohol, clean them, dry them, and resolder them. If a switch is permanently damaged, you can replace it with a new one of the same type.
Option B: Replace the keyboard. If multiple switches are damaged and you do not have soldering skills, the cost of professional repair may exceed the value of the keyboard. This is especially true for budget keyboards under $100.
Cleaning Stabilizers
If your spacebar, Enter, Shift, or other stabilized keys are sticking, the stabilizer housings likely have liquid mixed with lubricant. Remove the keycap and inspect the stabilizer housing. Use a cotton swab dipped in isopropyl alcohol to clean out the old, contaminated lubricant. Apply fresh stabilizer lubricant (dielectric grease or a dedicated stabilizer lube like Super Lube) before reassembly.
Drying and Reassembly: The 48 to 72 Hour Rule
After cleaning, the drying phase is where most people get impatient and ruin their recovery. The community consensus from r/MechanicalKeyboards and multiple forum discussions is that 48 to 72 hours of drying time is the minimum before reassembly and reconnection. Rushing this step is the number one cause of permanent damage after a spill.
Why 48 to 72 Hours?
Isopropyl alcohol evaporates quickly, but any water content in the cleaning solution (especially if you used 70% concentration) takes much longer to fully evaporate from inside the tight tolerances of a switch housing. Additionally, if any liquid reached the PCB, it can pool under components and in gaps between the PCB and switch plate where air circulation is minimal.
Connecting power to a keyboard with residual moisture inside can cause short circuits on the PCB, even if the switches themselves are dry. The 48 to 72 hour window gives enough time for all moisture, even in hard-to-reach areas, to fully evaporate.
Proper Drying Setup
Place the keyboard (disassembled, with keycaps removed) in a room-temperature room with good air circulation. A small fan positioned a few feet away, set on low, provides gentle airflow without the risks of a heat source. Do not use a hair dryer, heat gun, or oven.
If you want to speed up drying, place silica gel packets around the keyboard. Silica gel is far more effective than rice at absorbing moisture from the air, and it does not leave debris behind. You can buy silica gel packets in bulk online, or save them from product packaging.
Testing Before Full Reassembly
After the drying period, do a quick test before putting everything back together:
- Visually inspect the PCB and switch plate for any signs of moisture, residue, or corrosion.
- Press each switch stem directly with your finger. All switches should feel smooth, consistent, and return quickly to their resting position.
- Sniff the keyboard. If you smell residual liquid (especially sweet smells from sugary drinks), there may still be contamination inside switches. Re-clean those switches and extend drying time.
- Only after all switches feel right and the board looks clean should you reassemble and reconnect power.
Reassembly Order
Reinstall switches first (if you removed them from a hot-swappable board), making sure each one clicks fully into place. Then reinstall keycaps, starting with the larger stabilized keys (spacebar, Enter, Shift) since they require more careful alignment. Test each key after installation to confirm it registers properly.
Why Certain Keys Are More Vulnerable to Sticking
Spills rarely affect all keys equally. Understanding which keys are most vulnerable helps you prioritize your cleaning effort and diagnose problems faster.
Stabilizer Keys Trap More Liquid
Keys with stabilizers (spacebar, Enter, Shift, Backspace, and sometimes Tab and Caps Lock) have a larger footprint and more complex internal mechanisms. The stabilizer wire runs perpendicular to the key and sits in plastic housings on both ends. These housings are like tiny cups that collect and hold liquid, making them the last parts of the keyboard to dry out.
If your spacebar or Enter key is sticking but your letter keys are fine, the stabilizer housing is almost certainly the problem. Clean it thoroughly with isopropyl alcohol and apply fresh lubricant before reassembly.
Spill Zone Concentration
Liquid tends to pool in the area where the spill occurred. Keys directly under the spill point get the heaviest contamination, while keys on the far side of the keyboard may be untouched. Check the keys in the immediate spill zone first, then work outward.
Lower Row Keys Are Last to Dry
If liquid drains downward across the keyboard plate, it collects at the bottom edge near the lowest row of keys. Even if the spill happened at the top of the keyboard, the bottom row keys may end up with the most contamination because gravity pulls liquid down to them.
Should You Fix It or Replace It? A Decision Framework
Not every spill is worth fixing, and sometimes replacement is the smarter financial decision. Here is how to decide.
When Cleaning Is Worth It
Cleaning is almost always worth trying if:
- You spilled plain water, black coffee, or tea without sugar.
- The keyboard is a custom or premium build worth $150 or more.
- The keyboard has hot-swappable switches (easy to clean and replace).
- Only a few keys are affected.
- You can start cleaning within the first few hours of the spill.
When Replacement Makes More Sense
Consider replacing the keyboard if:
- You spilled a large amount of sugary soda or energy drink across most of the keyboard.
- The keyboard is a budget model under $80 to $100 and has soldered switches.
- Multiple switches feel crunchy or unresponsive even after deep cleaning.
- The PCB shows visible corrosion or burn marks near affected switches.
- The keyboard has a persistent smell that will not go away after cleaning.
When to Seek Professional Help
If you have a premium keyboard ($200+) and do not feel confident performing deep cleaning or desoldering yourself, professional repair services can help. Some keyboard manufacturers offer repair services, and there are independent technicians who specialize in mechanical keyboard repair. The cost is typically lower than replacing a high-end board.
Prevention: Keeping Your Keyboard Safe
The best spill recovery is the one you never need. Here are practical prevention tips that the community unanimously recommends.
Use Spill-Proof Containers
The simplest prevention measure is using a spill-proof travel mug or tumbler with a locking lid for any beverage near your keyboard. This eliminates the most common cause of spills: an open-topped glass or mug getting knocked over by an elbow or a pet.
Consider a Keyboard Cover
Silicone keyboard covers protect against minor splashes and dust. They do affect typing feel, so they are not for everyone, but if you frequently drink near your keyboard, a cover provides an extra layer of protection. Some keyboard manufacturers sell custom-fit covers for specific models.
Build an Emergency Spill Kit
Keep a small kit near your desk with the supplies you need for immediate spill response:
- A keycap puller
- A bottle of 90% isopropyl alcohol
- A pack of cotton swabs
- A lint-free microfiber cloth
- A small can of compressed air
- A few silica gel packets
Having these supplies within arm’s reach means you can start the emergency response within seconds, which dramatically increases recovery rates.
Long-Term Maintenance After a Spill
Even after a successful cleaning, monitor your keyboard for several weeks. Watch for keys that start feeling inconsistent, sticky, or sluggish, as these can be signs of ongoing corrosion. If you notice any keys degrading over time, clean them again with isopropyl alcohol. For keyboards with hot-swappable switches, keep a few spare switches on hand so you can quickly swap out any that become permanently damaged.
FAQs
How to fix sticky keyboard keys after spill?
To fix sticky keyboard keys after a spill, first unplug the keyboard and flip it upside down to drain. Remove the keycaps with a keycap puller and clean them in warm soapy water. Apply 90% isopropyl alcohol to the affected switches using a cotton swab or syringe, pressing the switch stem repeatedly to work the alcohol through the mechanism. Let everything dry for 48 to 72 hours before reassembly. For heavy sugary spills, remove the switches and soak them in isopropyl alcohol for several hours.
How to stop mechanical keyboard keys from sticking?
To stop mechanical keyboard keys from sticking, clean the affected switches with 90% isopropyl alcohol to dissolve sticky residue, dry the keyboard thoroughly for 48 to 72 hours, and apply fresh switch lubricant if needed. Prevent future sticking by using spill-proof drink containers, keeping a keyboard cover handy, and performing regular maintenance cleaning every few months to remove dust and debris buildup.
How do I unstick a mechanical keyboard key?
To unstick a mechanical keyboard key, remove the keycap with a keycap puller, then apply 3 to 5 drops of 90% isopropyl alcohol directly onto the switch stem while pressing it down. Press and release the stem 20 to 30 times to work the alcohol through the switch and dissolve residue. Blow out the dirty liquid with compressed air and repeat 2 to 3 times. Let the switch dry for at least 2 hours before testing.
Can I spray WD40 on keyboard?
No, you should never spray WD40 on a mechanical keyboard. WD40 is a solvent and water-displacement spray, not a lubricant. It leaves an oily residue that attracts dust, degrades plastic components over time, and can interfere with the electrical contacts inside switches. For lubricating mechanical keyboard switches, use dedicated switch lubricants like Krytox 205g0 or TriboSys 3204, which are specifically formulated for keyboard use.
How long should I wait for my keyboard to dry after a spill?
You should wait a minimum of 48 to 72 hours for your keyboard to fully dry after a spill before reconnecting power or reassembling. This drying time ensures that all moisture, including liquid trapped inside switch housings and under the PCB, has fully evaporated. Rushing the drying process is the most common cause of permanent short circuit damage. Use a fan for gentle air circulation and silica gel packets to speed up drying without heat.
Do I need to replace switches after a keyboard spill?
You do not always need to replace switches after a keyboard spill. Many switches can be fully recovered with thorough isopropyl alcohol cleaning. However, if a switch still feels gritty, sluggish, or unresponsive after deep cleaning and full drying, the internal contacts may be permanently corroded and the switch should be replaced. On hot-swappable keyboards, replacement is easy and inexpensive. On soldered keyboards, you will need desoldering skills or professional help.
Conclusion: Recovery Is Possible With the Right Approach
Understanding why your mechanical keyboard keys are sticking after a spill comes down to one core mechanism: liquid leaves behind residue (especially sugar) that creates friction inside the precision switch mechanism, and that residue gets harder to remove as it dries and caramelizes over time. The faster you act, the better your chances of a full recovery.
Water spills have the highest recovery rate, followed by coffee and tea. Sugary drinks like soda and energy drinks are the most challenging, but even those can often be fixed with thorough switch soaking in 90% isopropyl alcohol and patient 48 to 72 hour drying. Hot-swappable keyboards give you a significant advantage because you can remove and individually clean each affected switch.
The most important takeaway: do not rush. Unplug immediately, drain thoroughly, clean with isopropyl alcohol, and wait the full drying period before testing. Avoid heat, avoid WD40, and avoid the rice myth. With the right approach, most spilled-on mechanical keyboards can be brought back to life.