
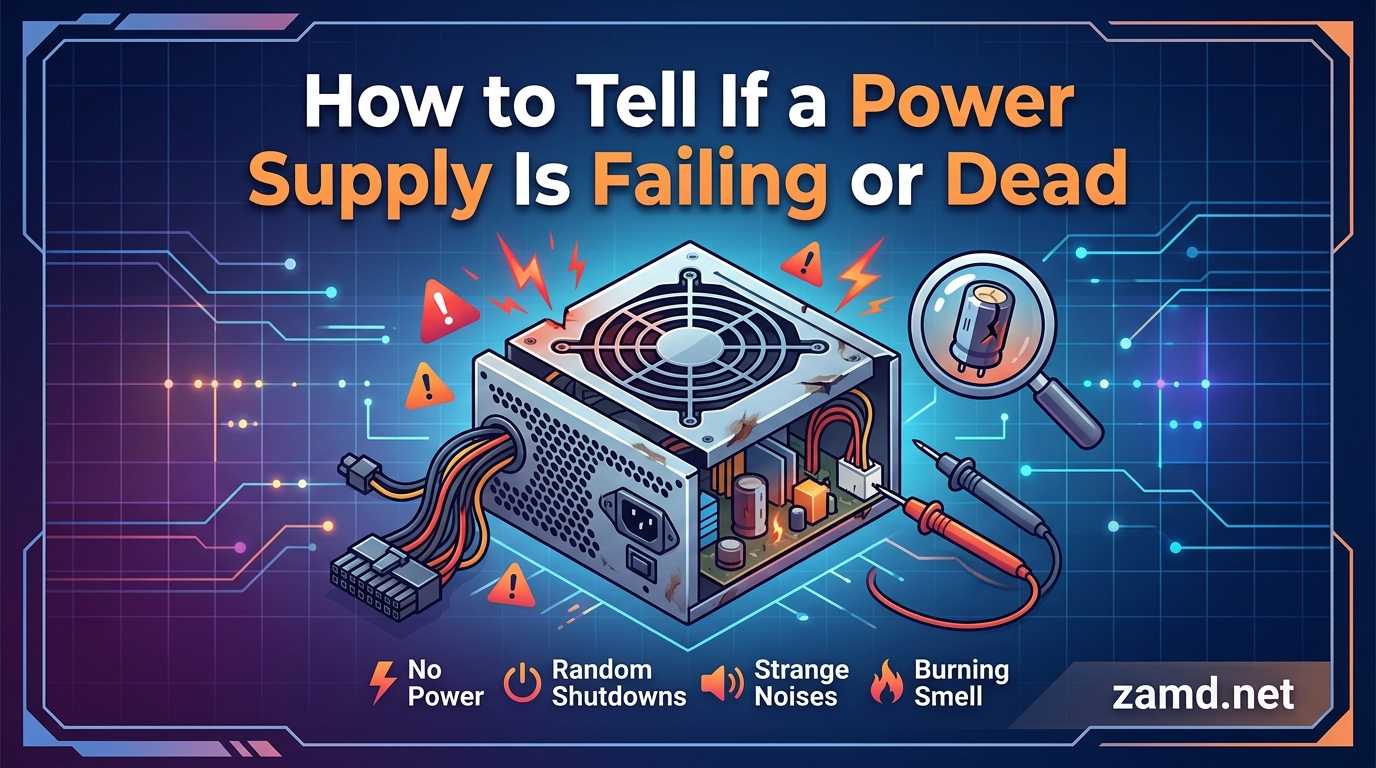
Your power supply unit (PSU) is the single component every other part of your PC depends on. When it starts failing, the symptoms can look like a GPU problem, a RAM issue, or even a motherboard failure. That confusion is exactly why so many people waste money replacing the wrong parts.
If you are dealing with random shutdowns, blue screens, or a system that will not turn on, learning how to tell if a power supply is failing or dead can save you hours of frustration and hundreds of dollars in unnecessary replacements.
I have spent years troubleshooting PCs as a builder and technician. In that time, I have seen PSUs fail in every way imaginable, from slow degradation to sudden sparks and smoke. This guide covers every warning sign, four practical testing methods you can do at home, and how to tell a PSU failure apart from a motherboard or GPU problem.
By the end of this article, you will know exactly what to look for, how to test your PSU safely, and what to do next if it turns out to be dead.
Table of Contents
Quick Reference: 10 Warning Signs of a Failing PSU
If you are short on time, here is a fast checklist of the most common symptoms of a failing or dead power supply. If you are experiencing two or more of these, your PSU is a prime suspect.
- Random shutdowns or restarts – PC powers off without warning, especially under load.
- System will not power on at all – No fans, no lights, no response when you press the power button.
- Frequent Blue Screen of Death (BSOD) – Repeated crashes with various error codes.
- Burning smell or visible smoke – Shut down immediately and unplug the PC.
- Unusual noises – Coil whine, buzzing, clicking, or grinding sounds from the PSU.
- Cold boot failures – PC struggles to start after being off for hours but works fine on restart.
- Crashes during gaming or heavy load – System runs fine for basic tasks but dies under stress.
- Peripheral failures – USB devices disconnect randomly or drives spin down unexpectedly.
- GPU performance drops – Lower framerates or crashes that look like a graphics card issue.
- Electrical shock or tingling – You feel a buzz or shock when touching the metal case.
Keep in mind that any single symptom could have multiple causes. The testing methods later in this guide will help you confirm whether the PSU is the actual culprit.
How to Tell If a Power Supply Is Failing: Detailed Symptoms
Now let us break down each symptom in detail. Understanding why each one happens will help you make a more accurate diagnosis.
1. Random Shutdowns or Restarts Under Load
This is the number one sign of a failing PSU, and it is also the most commonly misdiagnosed. When your PSU can no longer deliver stable voltage under heavy draw, the system shuts down to protect itself.
The key pattern to watch for is load-related shutdowns. If your PC runs fine during web browsing or watching videos but crashes the moment you launch a game or start a render, your PSU is struggling to deliver enough power on the 12V rail.
Random restarts are similar but slightly different. Instead of a full shutdown, the system reboots automatically. Windows Event Viewer will typically show a Kernel-Power Event ID 41 error, which means the system rebooted without cleanly shutting down first.
I have seen this pattern dozens of times in gaming PCs where the user upgraded to a more powerful GPU without checking if their PSU could handle it. The PSU was not dead, but it was being pushed past its limit, which accelerates wear and eventual failure.
2. PC Will Not Power On At All
When you press the power button and absolutely nothing happens, the PSU is one of the first suspects. No fan spin, no LED lights, no POST beep, and no display output.
However, this symptom has multiple possible causes. The power button itself could be faulty, a cable could be loose, or the motherboard could be dead. Before blaming the PSU, check that the switch on the back of the unit is flipped to the “I” (on) position and that the power cable is seated firmly.
If the PSU fan does not twitch at all when you try to power on, and you have verified all connections are correct, the PSU is likely dead. The paperclip test described later in this guide will confirm it definitively.
One important note from my experience: a PSU that appears completely dead may still have its 5VSB (standby) rail working. This is why some motherboards still show a standby LED even when the PSU cannot deliver full power. A lit standby LED does not guarantee your PSU is healthy.
3. Frequent Blue Screen of Death (BSOD) Errors
BSODs are frustrating because they can be caused by almost any hardware or software issue. But when a PSU is failing, you tend to see a specific pattern: multiple different error codes rather than the same one repeatedly.
A failing PSU delivers unstable voltage, which causes different components to malfunction at different times. One crash might report a memory error, the next a graphics driver error, and the one after that a kernel error. This variety is a strong indicator that the root cause is power delivery, not a specific component.
The BSOD error codes section later in this guide covers the specific codes most commonly linked to PSU problems.
4. Burning Smell or Visible Smoke
This is the most urgent warning sign on this list. If you smell burning plastic, ozone, or an electrical burning odor coming from your PC, shut it down immediately and unplug it from the wall.
Visible smoke or sparks from the PSU area means a component inside has failed catastrophically. One Reddit user described hearing a pop followed by white sparks shooting from their PSU while gaming. That kind of failure can send voltage spikes through your entire system.
A burning smell does not always mean the PSU is the source. It could also come from a shorted motherboard component or a failing capacitor elsewhere. But regardless of the source, you need to power off and investigate before turning the PC back on.
If the smell is coming from the PSU specifically, do not attempt to test it or open it. Replace it. A PSU that has produced smoke or a burning smell is unsafe to use, even if it still appears to function.
5. Unusual Noises: Coil Whine, Buzzing, and Clicking
PSUs can produce several types of sounds, and each one tells a different story about what is happening inside.
Coil whine is a high-pitched electrical noise caused by vibrations in the inductor coils under load. By itself, coil whine is not necessarily a sign of impending failure. Many quality PSUs produce some coil whine, especially when powering high-end GPUs. However, if coil whine appears suddenly on a PSU that was previously quiet, it can indicate that components are degrading.
Buzzing sounds are more concerning. A persistent buzz often points to a failing capacitor or a transformer that is vibrating abnormally. If the buzz changes pitch with system load, the PSU is struggling to regulate voltage.
Clicking sounds are the most alarming of the three. A single click when the PC shuts down under load usually means a protection circuit (like OCP or OPP) has tripped. Repeated clicking without the system starting means the PSU is trying to power on and failing repeatedly. This often indicates a short circuit or a failed internal component.
My rule of thumb: coil whine that has always been there is probably fine. Any new buzzing or clicking sound warrants investigation.
6. Cold Boot Failures and Intermittent Starts
A cold boot failure happens when your PC has been powered off for hours (typically overnight) and struggles to start up. You press the power button, and either nothing happens or the system starts briefly and then shuts off.
The strange part is that if you try again a few minutes later or hit the restart button, the PC often boots successfully and runs fine for the rest of the day. This intermittent behavior is maddening but it is a classic sign of aging capacitors inside the PSU.
Capacitors lose their ability to hold and deliver charge over time, especially in cheaper PSUs. When the PSU is cold, the degraded capacitors cannot deliver the initial burst of power needed for startup. After a few attempts, they warm up slightly and perform adequately.
This symptom gets progressively worse over weeks and months. Eventually, the PSU will fail to start at all. If you are experiencing cold boot failures, start planning a replacement now rather than waiting for a total failure.
7. Overheating and Fan Failure
Most modern PSUs use a thermal-controlled fan that only spins when needed. Some use a zero-RPM mode at low loads for silent operation. But if the fan never spins even under heavy load, or if you can feel the PSU exhaust is extremely hot, the cooling system may have failed.
An overheating PSU will trigger its thermal protection and shut down. If this happens repeatedly, the internal components degrade faster, shortening the PSU’s lifespan significantly.
You can check fan operation by putting your hand near the PSU exhaust during a gaming session or stress test. If there is no airflow and the case feels hot, the fan may be dead. A failed fan is not a catastrophic problem on its own, but it will accelerate the failure of everything else inside the PSU.
8. Peripheral Failures and Inconsistent USB Behavior
When a PSU’s 5V and 3.3V rails become unstable, peripherals connected to your PC start behaving erratically. USB devices may disconnect and reconnect randomly, external drives may spin down without warning, and connected LEDs or fans may flicker.
This symptom is often mistaken for a USB controller problem or a motherboard issue. But if multiple USB devices are acting up simultaneously, the common factor is the power source.
Internal drives can also be affected. If your SSD or hard drive occasionally disappears from the system and reappears after a reboot, unstable power delivery from the PSU is a likely cause. Over time, these voltage fluctuations can corrupt data on your drives.
9. GPU Performance Drops and Crashes During Gaming
Your graphics card is typically the most power-hungry component in your system. When a PSU is degrading, the GPU is usually the first component to feel the effects.
Symptoms include lower-than-expected framerates, stuttering during graphically intense scenes, driver crashes that recover after a few seconds, and complete system freezes during gaming sessions. These problems often do not occur during lighter workloads.
One community member on a PC building forum described a scenario where their system ran perfectly during web browsing and video playback but crashed every time they launched a demanding game. The GPU was blamed initially, but replacing the PSU fixed the issue completely. The old PSU could no longer sustain the amperage the GPU needed on the 12V rail.
If you are experiencing GPU crashes and have already updated drivers and checked temperatures, test your PSU before replacing the graphics card.
10. Electrical Shock or Tingling When Touching the Case
If you feel a mild shock, buzz, or tingling sensation when touching the metal part of your PC case, the PSU may have a grounding issue or a failed internal isolation component.
This is a safety hazard. A properly functioning PSU should isolate the high-voltage AC input from the low-voltage DC output and the case. When that isolation fails, leakage current can reach the case.
Stop using the PC immediately and have the PSU replaced. This is not a symptom to ignore or work around, as it indicates a potentially dangerous electrical fault.
BSOD Error Codes Often Linked to PSU Failure
Windows blue screen error codes can give you valuable clues about whether your PSU is the root cause. While these codes can have many triggers, certain patterns are strongly associated with power delivery problems.
Kernel-Power Event ID 41: This is technically not a BSOD but a Windows Event Viewer log entry. It means the system rebooted without cleanly shutting down first. If you see this in Event Viewer repeatedly, your PC lost power abruptly, which points to the PSU or a power-related issue.
WHEA_UNCORRECTABLE_ERROR: This error indicates a hardware exception that the system could not recover from. It is often caused by unstable voltage reaching the CPU or RAM, which can happen when a PSU’s voltage regulation is failing.
IRQL_NOT_LESS_OR_EQUAL: While commonly associated with driver issues, this error can also occur when unstable power causes memory corruption. If you see this error along with other symptoms on this list, the PSU is worth investigating.
MEMORY_MANAGEMENT: This error suggests the system detected a problem with memory operations. Faulty RAM is the usual suspect, but unstable power delivery to the RAM modules from a failing PSU can trigger it as well.
KERNEL_SECURITY_CHECK_FAILURE: This indicates a kernel-level integrity check failed. It can be triggered by corrupted data caused by voltage fluctuations during write operations.
To check for these errors, open Windows Event Viewer, navigate to Windows Logs, then System. Look for entries around the time of your crashes. If you see a pattern of Kernel-Power 41 events or a mix of different hardware-related BSOD codes, your PSU should be a primary suspect.
PSU vs Motherboard vs GPU: How to Tell Which Is Failing
This is the single most common diagnostic question in PC troubleshooting communities. Users experience crashes or boot failures and have no idea which component to blame. Here is how to separate PSU symptoms from motherboard and GPU issues.
When It Is Probably the PSU
Your PSU is the likely culprit if you see multiple unrelated symptoms occurring together. For example, random shutdowns combined with USB disconnections, or BSODs with different error codes happening back to back. The PSU is the only component whose failure can affect every other part of the system simultaneously.
Load-related crashes are another strong indicator. If problems only occur when the system is under heavy load (gaming, rendering, stress testing) but everything works fine during light use, the PSU is struggling to deliver sufficient power.
When It Is Probably the Motherboard
Motherboard failures tend to produce more specific symptoms. You might see POST error codes on a debug LED display, hear specific beep patterns, or find that certain ports or slots stop working while others continue normally.
If only one component is misbehaving (for example, one RAM slot does not work, or one USB controller fails while the other works fine), the motherboard is more likely the issue. A PSU problem would typically affect all connected components.
When It Is Probably the GPU
GPU problems are usually limited to display-related issues: artifacts on screen, distorted graphics, driver crashes that mention the graphics adapter specifically, or a black screen while the rest of the system keeps running.
If you can hear game audio continuing after the screen goes black, or if the system stays responsive through a remote desktop connection while the display is dead, the GPU is the prime suspect rather than the PSU.
The Swap Test: The Most Reliable Method
The most definitive way to identify a failing component is the swap test. If you have access to a known-good PSU, swap it in and see if the problems disappear. This is the method recommended by virtually every experienced PC builder.
If the system works perfectly with the replacement PSU, your original unit is confirmed faulty. If the problems persist with the new PSU, the issue lies elsewhere (motherboard, GPU, RAM, or CPU).
I always recommend keeping a spare known-good PSU on hand if you build PCs regularly or troubleshoot for friends and family. It eliminates guesswork and saves hours of diagnostic time.
How to Test If a Power Supply Is Dead: 4 Methods
Once you suspect your PSU might be failing, you need to confirm it. Here are four testing methods, ranging from a free DIY trick to professional-grade tools.
Method 1: The Paperclip Test (No Tools Required)
The paperclip test is the most well-known DIY method for checking if a PSU can power on at all. It works by jumping the power-on signal pin to a ground pin on the 24-pin motherboard connector, which tells the PSU to turn on without needing a motherboard.
What you need: a standard metal paperclip and a PSU that is disconnected from all components.
Step 1: Turn off the PSU using the switch on the back and unplug it from the wall.
Step 2: Disconnect the 24-pin cable from the motherboard and all other cables from your components.
Step 3: Straighten one end of the paperclip. Insert one end into the pin hole for the green wire (pin 16, the PS_ON pin) and the other end into any black wire pin (ground) on the 24-pin connector.
Step 4: Plug the PSU back into the wall and flip the rear switch to the on position.
Step 5: If the PSU fan starts spinning, the PSU can at least turn on. If nothing happens, the PSU is likely dead.
Important limitations: The paperclip test only tells you whether the PSU turns on. It does not test whether the PSU can deliver stable voltage under load. A PSU can pass the paperclip test and still fail when powering a full system. Use this as a preliminary check, not a definitive diagnosis.
Safety note: Make sure the PSU is completely disconnected from all components before performing this test. You are only bridging two pins on the 24-pin connector, nothing else.
Method 2: Using a Dedicated PSU Tester
A dedicated PSU tester is an inexpensive tool (typically under 15 dollars) that plugs directly into your PSU connectors and provides a quick diagnostic readout. Most models accept the 24-pin motherboard connector and have additional ports for 8-pin CPU, PCIe, and SATA connectors.
To use one, simply plug the PSU connectors into the corresponding ports on the tester. The tester’s LCD screen or LEDs will show whether each voltage rail (12V, 5V, 3.3V) is within acceptable range. Some testers also sound an alarm if they detect a fault.
PSU testers are faster and more informative than the paperclip test. They check actual voltage levels rather than just whether the fan spins. However, they still only test under no-load or minimal-load conditions, so they will not catch problems that only appear under heavy system load.
If you troubleshoot PCs more than once a year, a PSU tester is worth the investment. It is the quickest way to rule out (or confirm) a dead PSU.
Method 3: Testing With a Digital Multimeter
A digital multimeter gives you the most precise voltage readings of any DIY testing method. It allows you to measure the actual voltage on each rail (12V, 5V, 3.3V) and compare it against the ATX specification tolerances.
ATX voltage tolerances: The 12V rail should read between 11.40V and 12.60V. The 5V rail should read between 4.75V and 5.25V. The 3.3V rail should read between 3.14V and 3.47V. Readings outside these ranges indicate a problem.
Step 1: Set your multimeter to the DC voltage setting (usually marked with a V and a straight line with dots).
Step 2: With the PSU plugged into the motherboard and powered on (you can use the paperclip method to jump-start it), insert the black multimeter probe into any ground pin (black wire) on a connector.
Step 3: Touch the red probe to the pin you want to test. For the 12V rail, test a yellow wire pin on a PCIe or CPU connector. For 5V, test a red wire pin. For 3.3V, test the appropriate pin on the 24-pin connector.
Step 4: Record the reading and compare it to the ATX tolerance range.
Step 5: Repeat for each rail and check readings under load if possible by having the system running a stress test while measuring.
A PSU that shows correct voltage at idle but drops significantly under load is failing. Voltage drops of more than 5 percent from the nominal value under load are a clear warning sign.
Safety note: Never let the two multimeter probes touch each other while they are in contact with PSU pins. This will cause a short circuit. Work carefully and deliberately.
Method 4: Software Voltage Monitoring
If you can boot into Windows and want to check voltages without opening your case, software tools can give you real-time readings. While not as accurate as a multimeter, they are useful for spotting obvious problems.
HWiNFO and HWMonitor are the two most popular free tools. They read voltage sensor data from your motherboard and display the current values for each rail alongside the rated values.
To use them effectively, launch the software and let it run in the background while you stress-test your system with a tool like OCCT or AIDA64. Watch the voltage readings during the stress test. If any rail drops significantly or fluctuates wildly, your PSU is struggling.
You can also check voltages in your motherboard BIOS. Most BIOS screens display real-time voltage readings for the 12V, 5V, and 3.3V rails. This is a quick check you can do before booting into Windows.
Limitation: Software tools rely on motherboard sensors, which are not always calibrated accurately. Treat unusual software readings as a signal to investigate further with a hardware test, not as a definitive diagnosis.
Understanding PSU Protection Features: OVP, UVP, OCP, SCP, OPP
Quality PSUs include built-in protection circuits designed to shut down the unit before it can damage your components. Understanding these features helps you interpret what is happening when your PC suddenly powers off.
OVP (Over Voltage Protection): Shuts down the PSU if voltage on any rail exceeds a safe threshold. This protects your components from receiving too much voltage.
UVP (Under Voltage Protection): Shuts down the PSU if voltage drops below a safe level. This can trigger if the PSU is overloaded or failing internally.
OCP (Over Current Protection): Shuts down the PSU if the current draw on any rail exceeds its rated maximum. This prevents overheating and component damage from excessive power draw.
SCP (Short Circuit Protection): Shuts down the PSU immediately if a short circuit is detected on any output. This is the fastest-acting protection and can trigger within milliseconds.
OPP (Over Power Protection): Shuts down the PSU if the total power output exceeds the unit’s rated wattage. This is your last line of defense if you are overloading the PSU.
If your PC repeatedly shuts down under load and then starts up again fine after a few minutes, one of these protection circuits is likely tripping. This is the PSU telling you it cannot handle the demand being placed on it. Repeated protection trips will eventually damage the PSU permanently.
Cheap, low-quality PSUs often lack some or all of these protection features. This is why no-name PSUs are dangerous: when they fail, there is nothing to stop a voltage spike from traveling to your motherboard, GPU, and storage drives.
What Causes PSU Failure and What to Do Immediately
PSU failure is not random. Understanding the common causes helps you assess whether your unit is at risk and take action before a failure occurs.
Common Causes of PSU Failure
Aging capacitors: Electrolytic capacitors inside the PSU degrade over time, losing their ability to filter and deliver clean voltage. This is the most common cause of gradual PSU failure. Cheaper PSUs use lower-grade capacitors that age faster.
Power surges and lightning: Voltage spikes from the electrical grid, lightning strikes, or faulty household wiring can overwhelm the PSU’s protection circuits and damage internal components.
Dust buildup and overheating: Dust accumulating inside the PSU restricts airflow and traps heat. Over time, elevated temperatures accelerate the degradation of capacitors and other components.
Continuous overloading: Running a PSU near or beyond its rated wattage for extended periods generates excess heat and stresses components. A PSU rated for 550W that regularly delivers 540W will fail sooner than one that comfortably delivers 400W.
Poor quality units: Budget PSUs from unknown brands often use substandard components, lack proper protection circuits, and have significantly shorter lifespans. Prebuilt PCs and cheap cases sometimes include these low-quality units.
What to Do Immediately If Your PSU Shows Danger Signs
If you smell burning, see smoke, hear sparking sounds, or feel an electrical shock from your PC case, follow these steps immediately:
Step 1: Shut down the PC normally if possible. If the system is unresponsive or showing severe symptoms, hold the power button for 5 to 10 seconds to force a shutdown.
Step 2: Switch off the PSU using the rear switch.
Step 3: Unplug the power cable from the wall outlet.
Step 4: Do not attempt to open, repair, or test the PSU. Internal capacitors can hold dangerous voltage for extended periods even after the unit is unplugged.
Step 5: If you suspect the PSU may have damaged other components, have the entire system checked by a professional before powering it on again with a replacement PSU.
Never open a PSU casing. Even unplugged, the internal capacitors can deliver a serious or lethal electric shock. PSU repair should only be performed by qualified electronics technicians with proper discharge procedures.
PSU Lifespan Expectations
A quality PSU from a reputable brand typically lasts 5 to 10 years under normal use. PSUs with higher-quality components and longer warranties tend to last longer.
Budget PSUs may only last 2 to 4 years, especially if they are regularly pushed near their rated capacity. If your PSU is more than 5 years old and you are experiencing any symptoms from this guide, age is likely a contributing factor.
Warranty length is a useful indicator of expected lifespan. A PSU with a 10-year warranty is built with higher-quality components than one with a 3-year warranty. Brands like Seasonic, Corsair, EVGA, and be quiet! are generally trusted for quality and warranty support.
How to Prevent PSU Failure and When to Replace
Preventing PSU failure is far cheaper than dealing with the consequences. Here are practical steps to extend the life of your power supply and know when it is time for a replacement.
Choose a Quality PSU From the Start
Look for PSUs from reputable brands with at least an 80 Plus Bronze efficiency certification. The 80 Plus program certifies that a PSU meets minimum efficiency standards at various load levels. Higher tiers (Gold, Platinum, Titanium) indicate greater efficiency, which means less waste heat and longer component life.
PSU tier lists maintained by PC building communities (such as the Cultists Network PSU Tier List) are excellent resources for evaluating quality. They rank PSUs based on internal components, protection features, and independent testing results.
When in doubt, choose a well-reviewed unit from an established brand over a cheaper alternative with similar advertised specifications.
Buy More Wattage Than You Need
Running a PSU at 50 to 70 percent of its rated capacity is ideal for longevity. This gives you headroom for future upgrades, reduces heat generation, and ensures the PSU is not constantly stressed.
Use a wattage calculator (OuterVision and PCPartPicker both offer free ones) to estimate your system’s power draw, then add 20 to 30 percent headroom. For example, if your system draws 450W at peak load, a 650W PSU gives you comfortable headroom.
Keep the PSU Clean and Cool
Dust is the enemy of electronics. Periodically check that the PSU intake and exhaust vents are not blocked by dust or obstructed by cables. If your case has a dust filter over the PSU intake, clean it regularly.
Ensure your case has adequate airflow. A PSU mounted at the bottom of the case with the intake facing down should pull fresh air from outside through a case vent. If the intake faces up (into the case), it will be drawing in warmer air from your GPU.
Use a Surge Protector or UPS
A good surge protector absorbs voltage spikes before they reach your PSU. For even better protection, consider an uninterruptible power supply (UPS), which provides battery backup and clean, regulated power during outages and brownouts.
When to Replace Your PSU
Replace your PSU if it is more than 7 to 10 years old, even if you are not currently experiencing problems. Aging PSUs degrade gradually, and waiting for a failure risks damage to your other components.
If you are upgrading to a more powerful GPU or CPU, calculate your new power requirements. A PSU that was sufficient for your old hardware may be inadequate for upgraded components.
Never attempt to repair a PSU yourself. Unlike other PC components, PSUs contain dangerous stored voltage in their capacitors. If a PSU is faulty, replace it. The cost of a new PSU is trivial compared to the cost of replacing a motherboard, GPU, and CPU that were damaged by a failing power supply.
FAQ’s
How do I force a PSU to turn on?
To force a PSU to turn on without a motherboard, use the paperclip test. Disconnect the 24-pin cable from all components, then insert one end of a metal paperclip into the green wire pin (pin 16, PS_ON) and the other end into any black wire pin (ground). Plug in and switch on the PSU. If the fan spins, the PSU can power on. Always disconnect the PSU from all components before performing this test.
What is the lifespan of a PSU?
A quality PSU from a reputable brand typically lasts 5 to 10 years under normal use. Budget PSUs with lower-quality components may only last 2 to 4 years. Warranty length is a good indicator of expected lifespan: a PSU with a 10-year warranty is built with better components than one with a 3-year warranty.
Is there a way to test a power supply?
Yes. You can test a power supply using four methods: the paperclip test (free, checks if the PSU turns on), a dedicated PSU tester tool (checks voltage rails on each connector), a digital multimeter (provides precise voltage readings), and software monitoring tools like HWiNFO or HWMonitor (shows real-time voltage readings in Windows). For the most accurate diagnosis, combine a hardware test with a load stress test.
What is the paperclip test for power supply?
The paperclip test is a DIY method to check if a power supply can turn on. You straighten a metal paperclip and insert one end into the PS_ON pin (pin 16, green wire) and the other into a ground pin (black wire) on the 24-pin motherboard connector. With the PSU plugged in and switched on, the fan should start spinning if the unit is functional. The test only confirms the PSU can power on, not that it can deliver stable voltage under load.
Conclusion
Knowing how to tell if a power supply is failing or dead is one of the most valuable diagnostic skills for any PC owner. The symptoms are wide-ranging, from random shutdowns and BSODs to burning smells and cold boot failures. But they all trace back to one common factor: unstable or insufficient power delivery.
Start with the quick reference checklist to see if your symptoms match. Then use the testing methods, beginning with the paperclip test and moving to a PSU tester or multimeter for more definitive results. If your PSU is more than 5 to 7 years old and showing any warning signs, replacement is the safest path forward.
Remember that a failing PSU does not just inconvenience you. It can damage your motherboard, GPU, storage drives, and other expensive components. A replacement PSU costing a fraction of what your other parts are worth is always the smarter investment. Test, confirm, and replace with confidence.