
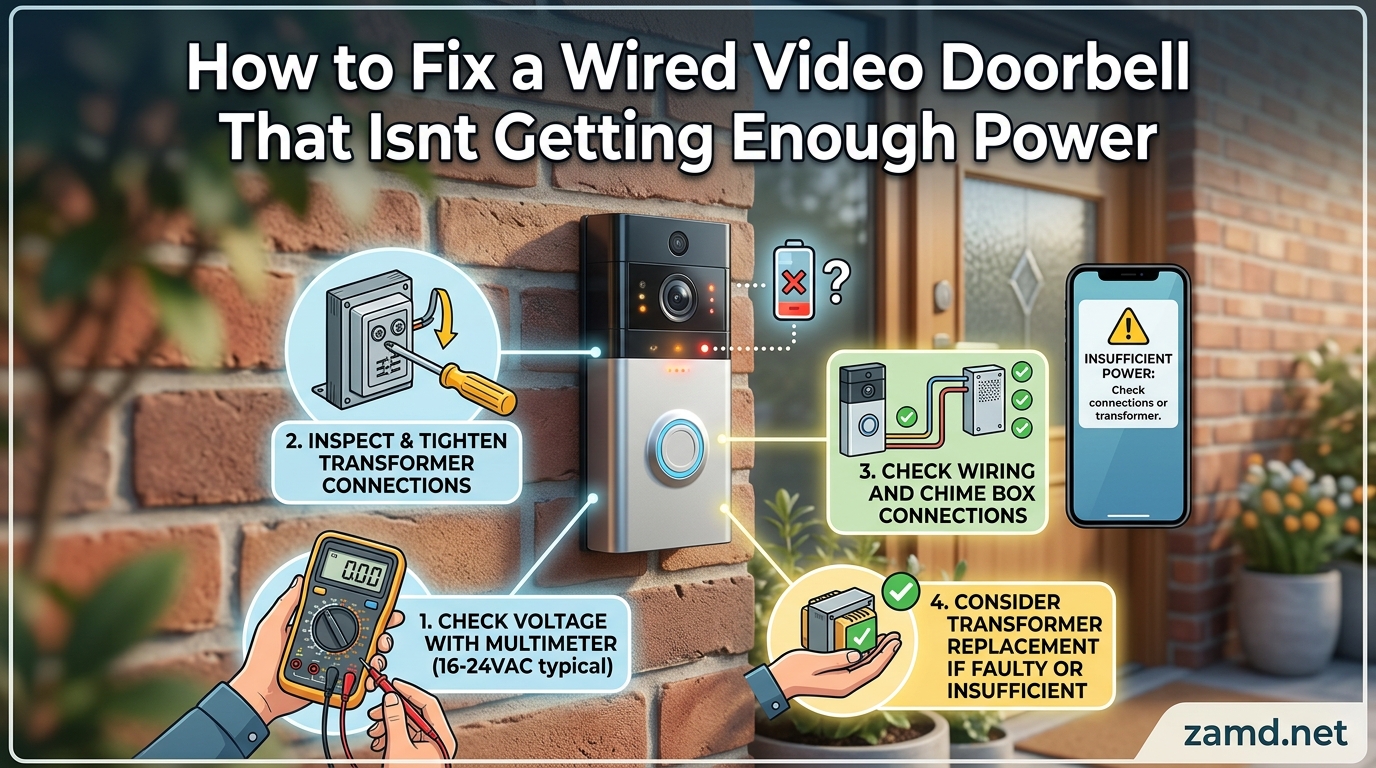
A wired video doorbell that isn’t getting enough power almost always traces back to one of four issues: an underpowered or failing transformer, loose or corroded wiring, a mechanical chime creating voltage drop, or incorrect voltage settings on a multi-tap transformer. I’ve helped dozens of homeowners troubleshoot this exact problem across Ring, Nest, Eufy, Arlo, and Wyze doorbells, and the fix is usually straightforward once you know where to look.
If you want to learn how to fix a wired video doorbell that isn’t getting enough power, this guide walks you through every step from diagnosis to repair. We’ll cover transformer testing with a multimeter, wiring inspection, chime bypass installation, and transformer replacement. Every section is brand-agnostic so it works whether you have a Ring Pro 2, a Nest Doorbell (wired), an Eufy wired model, or an Arlo Video Doorbell.
Low power in a video doorbell causes battery drain, disabled features like night vision and motion detection, choppy live video, and complete device shutdowns. In homes built before 2010, the original doorbell transformer is often rated at just 10 VA, which is nowhere near enough for a modern smart doorbell that needs 16 to 24V AC at 20 to 40 VA. The good news is that most power fixes cost under $30 in parts and take less than an hour.
Here’s what we’ll cover in this troubleshooting guide:
- A quick diagnostic flowchart so you can identify your specific problem fast
- Signs and symptoms of insufficient doorbell power (including app-specific warnings)
- How doorbell transformers work and how to find yours
- Step-by-step multimeter testing of transformer voltage
- A voltage requirements comparison table for all major doorbell brands
- How to fix wiring issues including wire gauge and corroded connections
- How to bypass or upgrade your chime to eliminate voltage drop
- How to replace an underpowered transformer
- WiFi signal strength and its surprising effect on power consumption
- Old home wiring considerations and safety precautions
Table of Contents
Quick Diagnostic: Where to Start When Your Doorbell Isn’t Getting Enough Power
Before diving into detailed troubleshooting, run through this quick diagnostic flowchart. It will help you identify the most likely cause in under 10 minutes and point you to the right section of this guide.
Step 1: Check the doorbell app. Open your doorbell’s app and look for power status. Ring shows a Device Health page with a power rating. Nest shows a power status indicator. Eufy displays a transformer compatibility message. Arlo shows a device connection status. Write down what the app says, because it tells you a lot about where the problem sits.
Step 2: Check the circuit breaker. Go to your electrical panel and find the breaker labeled “doorbell” or “doorbell transformer.” If it’s tripped, flip it off and back on. This sounds obvious, but tripped breakers cause a surprising number of “dead doorbell” complaints.
Step 3: Test the transformer voltage with a multimeter. If the breaker is fine, locate your doorbell transformer and measure its output. You’re looking for 16 to 24V AC. If you read under 16V or zero volts, the transformer is the problem. Skip to the section on replacing an underpowered transformer.
Step 4: Inspect wiring connections. If the transformer reads correctly, check the wire connections at the doorbell, the chime, and the transformer. Loose wires, corroded contacts, and wrong wire gauge all cause voltage drop.
Step 5: Check for chime-related voltage drop. Press the doorbell button while measuring voltage at the doorbell terminals. If voltage drops significantly when pressed, your mechanical chime is starving the doorbell of power. You need a chime bypass module or power kit.
Step 6: Rule out WiFi drain. If voltage checks out but the doorbell still shows power issues, check WiFi signal strength (RSSI). A weak signal forces the doorbell to work harder and consume more power, which can read as a power problem in the app.
Most power problems get resolved by Step 3 or Step 4. But we’ll walk through each one in detail below.
Signs Your Doorbell Isn’t Getting Enough Power
Power issues in wired video doorbells show up in several ways. Knowing the specific symptom helps narrow down the root cause faster. Here are the most common signs I’ve encountered across different brands.
Common Symptoms Across All Brands
The most universal symptom is a doorbell battery that refuses to stay charged, even though the doorbell is hardwired. If your wired doorbell has a battery indicator that keeps dropping, power is not flowing consistently from the transformer. Other common signs include:
- Flashing red or blue indicator lights (varies by brand) signaling a power fault
- Live View or video feed that frequently disconnects or goes offline
- Motion detection not triggering or missing events entirely
- Night vision failing to activate in low light
- Two-way audio cutting out or sounding garbled
- Doorbell chime buzzing, humming, or not ringing at all
- Device randomly going offline and coming back hours later
- Package detection, bird’s eye view, or other advanced features grayed out in the app
These symptoms can also point to WiFi or firmware issues, which is why testing voltage with a multimeter is so important. The app warnings below help confirm whether you’re dealing with a power problem specifically.
Brand-Specific Power Warnings
Each major doorbell brand reports power issues differently in its app. Here’s what to look for:
Ring: The Ring app shows a Device Health page. Under “Power” you’ll see a rating of Good, Low, or Very Low. Ring doorbells that fall below the minimum voltage threshold display a warning like “Your device may not be receiving enough power.” Advanced features get automatically disabled when power drops, with a message telling you that the feature requires more power than available.
Nest (Google): The Nest app and Google Home app display power status in the device settings. If the Nest Doorbell (wired) isn’t getting enough power, you’ll see a message like “Low voltage” or “Not enough power.” The doorbell may also automatically disable video recording or reduce video quality to conserve power.
Eufy: Eufy doorbells show an “incompatible transformer” error when the voltage or VA rating falls below requirements. This is Eufy’s way of saying the transformer can’t supply enough current. Even if voltage is correct, a low VA rating will trigger this error.
Arlo: Arlo wired doorbells report power issues through the device status in the Arlo app. You may see a message about the device being offline or losing connection, which often traces back to power rather than WiFi.
Wyze: Wyze Video Doorbell Pro and wired models show power-related issues as device offline errors. Wyze forums document cases where a diode in parallel with the doorbell circuit caused power problems, so check for that if you’ve done custom wiring.
What Is a Doorbell Transformer and How Does It Work
Understanding how your doorbell’s power system works makes troubleshooting much easier. A wired video doorbell gets power from a step-down transformer that converts your home’s 120V mains voltage to the low-voltage AC power the doorbell needs, typically 16 to 24V AC.
The doorbell circuit is a simple series loop. Power flows from the transformer to the doorbell button, then through the chime (if you have a mechanical one), and back to the transformer. Every component in that loop affects the voltage the doorbell actually receives. A weak transformer, a resistant chime, or thin wires can each reduce the voltage at the doorbell terminals below what it needs to function properly.
Understanding VA Ratings (Volt-Amperes)
VA stands for Volt-Ampere, and it measures the total power capacity of the transformer. Many homeowners fixate on voltage (16V vs 24V) and ignore VA, but VA is equally important. A 16V 10VA transformer might deliver the right voltage under no load, but when the doorbell draws current, the voltage sags because the transformer can’t supply enough power.
Think of it like a water pipe. Voltage is the water pressure, and VA is the pipe diameter. You can have the right pressure (16V), but if the pipe is too narrow (low VA), the flow drops when something downstream tries to draw water. Most modern video doorbells need at least 16V 30VA. Older transformers in homes built before 2000 are often rated at just 10VA, which is why power issues are so common in older homes.
To calculate your VA needs, add up the power consumption of everything on the doorbell circuit. The video doorbell itself typically draws 5 to 10 VA. A mechanical chime adds another 5 to 10 VA. If you plan to add a second doorbell on the same transformer, add that too. The transformer’s VA rating should exceed the total by at least 20% as a safety margin.
What Is Voltage Drop and Why It Matters
Voltage drop happens when voltage decreases as it travels through wires and components. The longer the wire run from the transformer to the doorbell, the more voltage you lose. Thin wires (higher gauge numbers) make voltage drop worse because they have more resistance. This is why wire gauge matters so much for doorbell circuits.
A transformer reading 18V at its output terminals might only deliver 14V at the doorbell if the wire run is long and the gauge is thin. That 4V drop is enough to cause power problems. The mechanical chime adds resistance too, creating another voltage drop point in the circuit.
Where to Find Your Doorbell Transformer
Doorbell transformers hide in different places depending on your home’s age and layout. The most common locations I’ve found them include:
- Mounted on or near the electrical panel in the basement or utility room
- Attached to a junction box in the attic near where the doorbell wire comes through the wall
- On the side of the furnace or HVAC unit in basements and crawlspaces
- Behind the doorbell chime cover (some older homes have the transformer built into the chime housing)
- In the garage near the breaker box
- In a hallway closet near the front door
The transformer is a small metal box, usually about 2 inches square, with two low-voltage wire terminals on one side and a label showing the voltage and VA rating. It connects to a 120V electrical box on the back side. Follow the thin doorbell wires from your chime unit, and you’ll eventually trace back to it.
How to Fix a Wired Video Doorbell That Isn’t Getting Enough Power: Testing Transformer Voltage
Testing your doorbell transformer with a multimeter is the single most important diagnostic step. It tells you definitively whether the transformer is the problem or you need to look elsewhere. Here’s how to do it properly.
Tools You’ll Need
Gather these tools before starting. Most are available at any hardware store for under $50 total:
- Digital multimeter (must support AC voltage measurement up to at least 30V)
- Flathead and Phillips screwdrivers
- Torx screwdriver (for Ring doorbell mounting screws)
- Voltage tester (non-contact, for safety verification)
- Wire stripper (if you plan to redo connections)
- Flashlight or headlamp
- Pencil and paper to write down readings
Step-by-Step: Testing Transformer Voltage with a Multimeter
Follow these steps carefully. Working with low-voltage doorbell circuits is generally safe, but you should always verify power is off before touching wires if you plan to disconnect anything.
Step 1: Set your multimeter to AC voltage. Turn the dial to the AC voltage setting (marked with a V and a wavy line). Set the range to 200V AC or the lowest AC setting above 30V. Do NOT use the DC voltage setting, because doorbell transformers output AC power, not DC.
Step 2: Locate the transformer. Using the locations listed earlier, find your doorbell transformer. You need access to the two low-voltage terminals where the doorbell wires connect.
Step 3: Place the multimeter probes on the transformer terminals. Touch one probe to each of the two screw terminals on the transformer where the doorbell wires connect. Polarity doesn’t matter for AC voltage, so either probe on either terminal works fine.
Step 4: Read the voltage. The multimeter will display the AC voltage output. Write it down. Here’s how to interpret the reading:
- 16 to 24V AC: Transformer output is within normal range. The problem is likely wiring, chime, or the doorbell itself.
- 10 to 15V AC: Transformer is underpowered or on the wrong voltage tap. Needs replacement or tap adjustment.
- Under 10V AC: Transformer is failing or almost completely dead. Replace it.
- 0V AC: Transformer is dead, breaker is tripped, or a wire is disconnected. Check the breaker first, then wiring, then the transformer.
- Above 27V AC: Transformer may be overpowered or malfunctioning. Some doorbells tolerate up to 24V but not higher.
Step 5: Test voltage at the doorbell. Remove the doorbell from its mounting bracket and place the multimeter probes on the two wire terminals where the doorbell connects. Compare this reading to the transformer reading. If there’s a significant difference (more than 2 to 3V lower at the doorbell), you have voltage drop caused by wiring or the chime.
Step 6: Test voltage drop when the button is pressed. Have someone press the doorbell button while you measure voltage at the doorbell terminals. If voltage drops significantly when the chime activates, the mechanical chime is creating resistance and starving the doorbell of power. This means you need a chime bypass module.
These voltage readings tell you exactly where the problem is. If the transformer reads fine but the doorbell reads low, focus on wiring and chime issues. If the transformer itself reads low, replace it.
Voltage Requirements: What Your Video Doorbell Actually Needs
Different doorbell brands have different power requirements. Using a transformer that doesn’t meet your doorbell’s needs is the most common cause of power problems. Here’s a comparison of voltage and VA requirements for all major brands.
Ring Video Doorbell (battery models used as wired): 8 to 24V AC, minimum 5 VA. These doorbells use the wired connection to trickle-charge the battery, so they have lower requirements.
Ring Pro, Pro 2, Elite: 16 to 24V AC, minimum 30 VA recommended (10 VA minimum but will cause power issues). Ring Pro models are the most demanding and frequently have power problems on older transformers.
Nest Doorbell (wired, 1st and 2nd gen): 16 to 24V AC, minimum 10 VA (Nest recommends 20 to 40 VA for reliable operation). Nest doorbells will function on 10 VA but disable some features.
Eufy Wired Video Doorbell (all models): 16 to 24V AC, minimum 30 VA. Eufy is strict about VA requirements and will display an “incompatible transformer” error if the VA rating is too low, even if voltage is correct.
Arlo Video Doorbell (wired): 16 to 24V AC, minimum 10 VA (Arlo recommends 20 to 30 VA). Works on lower VA but may disable features.
Wyze Video Doorbell (wired): 8 to 24V AC, minimum 10 VA. Wyze is one of the more tolerant brands for voltage range.
As a general rule, a 16V 30VA transformer will satisfy almost every consumer video doorbell on the market. If you want to future-proof or run multiple doorbells, a 24V 40VA transformer gives you headroom. The key takeaway: if your transformer is rated at 16V 10VA or lower, it’s almost certainly too weak for a modern smart doorbell.
Single-Tap vs Multi-Tap Transformers
Some older transformers have multiple voltage output terminals, known as taps. A multi-tap transformer might have terminals for 8V, 16V, and 24V all on the same unit. This is actually a common source of power problems, because the doorbell wires may be connected to the wrong tap.
I’ve seen numerous cases where a homeowner checked their transformer and saw “16V” on the label, only to discover the wires were actually connected to the 8V tap. This is exactly what happened to a DIY StackExchange user whose Ring doorbell wasn’t getting enough power. Their transformer had multiple options but was set at 8V 20VA instead of 16V.
If your transformer has multiple terminals, check which terminal the doorbell wires are actually connected to. The label near each terminal shows the voltage for that tap. Moving the wire from the 8V terminal to the 16V terminal may be all the fix you need.
How to Choose the Right Replacement Transformer
When shopping for a replacement doorbell transformer, look for these specifications:
- Voltage: 16V or 24V AC. Match your doorbell’s recommended voltage. 16V is the safe default for all brands.
- VA Rating: 30VA minimum for a single video doorbell. 40VA if you want headroom or plan to add a second doorbell.
- Mounting Type: Choose a transformer that mounts to an electrical junction box, matching your existing setup.
- Wire Terminals: Screw terminals are standard. Avoid push-in connectors that can loosen over time.
- UL Listed: Only buy transformers that are UL listed for safety and code compliance.
A 16V 30VA transformer costs roughly $15 to $25 and works with virtually every video doorbell brand. If you have a Ring Pro or Eufy doorbell and want zero power issues, this is the upgrade to make.
How to Fix Doorbell Wiring Issues
If your transformer voltage checks out but your doorbell still isn’t getting enough power, the wiring is the next suspect. Wiring problems cause voltage drop that reduces the power reaching your doorbell terminals. Common issues include loose connections, corroded wires, wrong wire gauge, and long wire runs.
Inspecting Wire Connections
Start by inspecting every connection point in the doorbell circuit. There are three main junction points: the transformer terminals, the chime terminals, and the doorbell terminals. At each point, check that the wire is securely fastened under the screw terminal and that no bare wire is exposed beyond the terminal.
Loose connections are incredibly common. The thin doorbell wires (typically 18 or 20 AWG) work themselves loose over time due to temperature cycling and vibrations. One Reddit user reported that their Ring doorbell stopped working entirely, and the fix was simply tightening a loose wire at the transformer. The transformer voltage wasn’t registering until the connection was secured.
Here’s how to fix loose connections properly:
Step 1: Turn off the circuit breaker that powers the doorbell transformer. Verify power is off using a non-contact voltage tester.
Step 2: At each connection point, loosen the terminal screw and remove the wire. If the wire end is corroded, frayed, or discolored, clip it off and strip about half an inch of fresh insulation using a wire stripper.
Step 3: Bend the stripped wire into a small hook shape, hook it around the terminal screw clockwise (so tightening the screw pulls the wire in), and tighten firmly. The wire should not move when you tug it gently.
Step 4: Repeat at all three connection points (transformer, chime, doorbell).
Step 5: Turn the breaker back on and test voltage at the doorbell terminals with your multimeter.
Wire Gauge and Distance: Why Wire Thickness Matters
Doorbell wire gauge directly affects how much voltage reaches the doorbell. Thicker wires (lower AWG numbers) have less resistance and reduce voltage drop over long distances. The standard recommendation for doorbell wiring is 18 AWG for runs under 30 feet and 16 AWG or thicker for runs over 30 feet.
If your wire run from the transformer to the doorbell is longer than 50 feet, voltage drop becomes a real problem even with a properly rated transformer. In this case, you either need thicker wire (14 AWG or 16 AWG) or you need to move the transformer closer to the doorbell.
Ring’s own support documentation notes that wires that are too thin or too thick might not deliver enough power. This is because very thick wires (like 12 AWG) may not seat properly under small doorbell terminal screws, creating a poor connection. Stick with 18 AWG for most installations, and only go thicker for very long runs.
Corroded and Damaged Wires
In older homes, doorbell wires can corrode over decades of use. Copper wire turns dark or green when corroded, and the corrosion creates electrical resistance that reduces voltage. If you live in a home built before 1990, inspect the wire ends at all connection points.
If the wire is corroded, cut back to clean copper and strip fresh insulation. If the corrosion extends deep into the wall, you may need to replace the wire run entirely. This is more involved but sometimes necessary in very old homes.
Old Home Wiring (Pre-1980s) Considerations
Homes built before 1980 present unique challenges for smart doorbell power. The original doorbell wiring in these homes was designed for simple mechanical doorbells that barely drew any current. Modern video doorbells need 10 to 30 times more power.
Common old home wiring problems include aluminum doorbell wires (used in some 1970s homes) that corrode faster than copper, shared circuits where the doorbell transformer powers other low-voltage devices, and junction boxes hidden behind drywall that add resistance to the circuit.
If your home was built before 1985 and you’re installing a video doorbell for the first time, plan to replace the transformer proactively. Don’t wait for power problems to appear. The original transformer is almost certainly underpowered for a smart doorbell. While you’re at it, inspect the wire condition and replace any corroded sections.
One more old home issue: some pre-1980s doorbell circuits share a breaker with lighting or other circuits. If the breaker keeps tripping when you install a new doorbell, the circuit may be overloaded. This requires an electrician to resolve safely.
How to Bypass or Upgrade Your Doorbell Chime
The mechanical chime in your doorbell circuit can be a major source of power problems for video doorbells. The chime is an electromagnetic device that creates resistance in the circuit, which causes voltage drop. When the doorbell button is pressed, the chime activates and draws a burst of current, momentarily pulling voltage away from the video doorbell.
A Google Nest Community user described this exact issue: “When I press the doorbell the voltage drops below 16V. My doorbell does not seem to be getting consistent power.” This is a textbook case of chime-induced voltage drop. The fix is a chime bypass module or power kit.
When You Need a Chime Bypass
You need a chime bypass module if any of the following apply:
- Voltage at the doorbell drops by more than 2V when the button is pressed
- Your doorbell app shows power issues even though the transformer reads correctly
- Your mechanical chime buzzes or hums continuously after installing a video doorbell
- The chime doesn’t ring when the button is pressed
- You’ve installed a video doorbell and your indoor chime no longer works
Most video doorbell manufacturers include a power kit or bypass module in the box. Ring includes the Pro Power Kit with Ring Pro doorbells. Nest includes a chime connector. Eufy includes a power kit for some models. If yours didn’t come with one, you can buy a universal doorbell chime bypass module for about $10 to $15.
How to Install a Chime Bypass Module
The bypass module installs inside your mechanical chime housing. It regulates power to the chime so it doesn’t steal voltage from the doorbell. Here’s the general procedure:
Step 1: Turn off the circuit breaker powering the doorbell transformer.
Step 2: Remove the cover from your mechanical doorbell chime. It’s usually held on by friction or a couple of screws.
Step 3: Locate the two wire terminals on the chime (usually labeled “Front” and “Trans” or “Transformer”). Loosen both screws and disconnect the wires.
Step 4: Connect the bypass module wires to the two terminals where the doorbell wires were. The module typically has two wires with fork terminals that go under the screw terminals.
Step 5: Reconnect the original doorbell wires to the bypass module’s input terminals, following the manufacturer’s instructions for your specific kit.
Step 6: Secure the bypass module inside the chime housing using the included adhesive pad or zip ties. Make sure it’s not touching any moving parts of the chime.
Step 7: Replace the chime cover, turn the breaker back on, and test the doorbell.
After installing the bypass, measure voltage at the doorbell terminals again while someone presses the button. The voltage should remain stable instead of dropping.
Ring Pro Power Kit vs Chime Kit Mini
Ring has two different power accessories, and the difference confuses many users. The Pro Power Kit (V1 and V2) is designed for Ring Pro and Pro 2 doorbells. It installs inside the chime and regulates power flow to prevent both chime damage and doorbell power loss. Version V2 simplified the installation process compared to V1.
The Ring Chime Kit Mini is a newer, smaller bypass module for use with the Ring Doorbell Wired and other newer Ring models. It does the same basic job but has a more compact form factor and simpler wiring.
If you have a Ring Pro that’s not getting enough power, make sure the Pro Power Kit is installed correctly inside your chime. Many power problems on Ring Pro doorbells trace back to a missing or incorrectly installed power kit.
How to Replace an Underpowered Doorbell Transformer
If your transformer voltage test showed a reading below 16V, the transformer needs to be replaced. This is one of the most effective fixes for video doorbell power problems, and most homeowners can do it themselves in about 30 minutes.
Before You Start: Safety First
Transformer replacement involves working near 120V electrical connections. While the low-voltage side is safe, the high-voltage side is dangerous. Always turn off the circuit breaker before beginning, and verify with a non-contact voltage tester that power is off at the transformer’s junction box. If you’re not comfortable working around electrical boxes, hire an electrician. This job typically costs $100 to $150 if you hire a professional.
Step-by-Step Transformer Replacement
Step 1: Turn off power. Switch off the circuit breaker that controls the doorbell transformer. Use a non-contact voltage tester on the transformer body and wires to confirm power is off.
Step 2: Disconnect the low-voltage wires. At the transformer’s low-voltage terminals, loosen the screws and remove the two doorbell wires. Take a photo first so you remember which wire goes where.
Step 3: Remove the old transformer. The transformer is mounted to an electrical junction box. Depending on the mounting style, you’ll either unscrew it from the front (if it screws into a cover plate) or remove it from inside the box (if it’s a plug-on type). For screw-mount transformers, remove the two mounting screws and carefully pull the transformer away from the junction box.
Step 4: Disconnect the high-voltage wires. Inside the junction box, the transformer has two or three wires connected to the 120V supply: black (hot), white (neutral), and possibly green or bare (ground). Remove the wire nuts connecting these wires. Keep the wire nuts for reuse.
Step 5: Install the new transformer. Thread the high-voltage wires of your new transformer into the junction box through the same opening. Connect black to black, white to white, and ground to ground using wire nuts. Wrap each connection with electrical tape for extra security.
Step 6: Mount the new transformer. Position the transformer against the junction box and secure it with the mounting screws. Make sure it’s firmly attached and the low-voltage terminals are accessible.
Step 7: Connect the low-voltage doorbell wires. Attach the two doorbell wires to the low-voltage terminals on the new transformer. Tighten the screws firmly.
Step 8: Turn the power back on. Flip the circuit breaker back on and immediately test the transformer output with your multimeter. You should read the rated voltage (16V or 24V AC).
Step 9: Test the doorbell. Check your doorbell app to see if power warnings have cleared. Test the chime by pressing the button. Measure voltage at the doorbell terminals to confirm proper power delivery.
Most power problems disappear immediately after upgrading to a 16V 30VA transformer. If your doorbell still shows power issues after replacement, the problem is in the wiring or chime, not the transformer.
How to Calculate Your Total VA Needs
To make sure your replacement transformer is powerful enough, add up the VA requirements of everything on the circuit. Here’s a practical example:
Ring Pro 2 doorbell: approximately 10 VA under normal operation. Mechanical chime: approximately 5 VA. That’s 15 VA total. Adding a 20% safety margin gives 18 VA. A 30VA transformer provides plenty of headroom.
If you want to run two video doorbells (front and back door) on one transformer, add both: 10 VA + 10 VA + 5 VA (chime) = 25 VA. With a 20% margin, that’s 30 VA. So a 30VA transformer can barely handle two doorbells, and a 40VA unit would be the better choice.
WiFi Signal Strength and Power Drain
Here’s something most troubleshooting guides miss: weak WiFi signal directly causes power problems in video doorbells. When the WiFi signal is weak, the doorbell’s radio amplifier works harder to maintain a connection. This increased power draw can drop the voltage below the doorbell’s minimum threshold, triggering power warnings in the app.
A Ring Community member discovered this when they replaced their transformer but the doorbell still showed power issues. The real problem was a weak WiFi signal causing the doorbell to consume extra power. After installing a WiFi extender closer to the doorbell, the power warning cleared on its own.
How to Check Your WiFi Signal (RSSI)
RSSI stands for Received Signal Strength Indicator. Most doorbell apps show this number in the device settings or device health page. Here’s how to interpret it:
- RSSI -40 to -60: Excellent signal. WiFi is not causing power issues.
- RSSI -60 to -70: Good signal. Minor power impact.
- RSSI -70 to -80: Fair signal. The doorbell is working harder and may show power warnings. Consider a WiFi extender.
- RSSI -80 or worse: Poor signal. The doorbell is consuming significant extra power trying to maintain connection. Move your router closer or add an extender.
If your RSSI is worse than -70 and your doorbell shows power warnings, fixing the WiFi may resolve the power issue without any electrical work. Move your router closer to the front door, add a mesh WiFi node, or use a WiFi extender placed between the router and the doorbell.
Firmware Updates and Power Consumption
Outdated firmware can also cause excessive power consumption. Manufacturers regularly release firmware updates that optimize power management. Check your doorbell app for available firmware updates and install them. After updating, restart the doorbell and check if power warnings clear.
Some firmware versions have had bugs that caused unnecessary power draw. If power problems appeared suddenly after a firmware update, report it to the manufacturer and check community forums for others experiencing the same issue. A fix usually follows within weeks.
How to Fix a Wired Video Doorbell That Isn’t Getting Enough Power: Troubleshooting Multiple Doorbells
If you have two video doorbells (front door and back door) connected to a single transformer, power problems are more common. The transformer must supply enough VA for both doorbells simultaneously, and the wiring is more complex with more connection points that can fail.
To troubleshoot multi-doorbell setups, test each doorbell independently. Disconnect one doorbell’s wires and check if the other’s power issues resolve. If they do, the transformer can’t handle the combined load and needs upgrading to a higher VA rating. A 40VA transformer is the minimum recommendation for two video doorbells.
Also check that both doorbells are wired in parallel, not in series. Series wiring divides the voltage between the two doorbells, giving each only half the transformer’s output. Parallel wiring gives each doorbell the full transformer voltage. If you’re not sure how your doorbells are wired, consult an electrician.
Safety Precautions When Working with Doorbell Circuits
Working with doorbell electrical systems is generally safe because the doorbell circuit itself is low voltage (16 to 24V AC). However, the transformer connects to 120V mains power on its input side, and that voltage is dangerous. Follow these safety rules.
Electrical Safety Checklist
- Always turn off the circuit breaker before touching the transformer or junction box wiring
- Verify power is off with a non-contact voltage tester before beginning any work
- Never touch the 120V input wires on the transformer with the power on
- Use insulated tools rated for electrical work
- Keep the work area dry; never work on electrical wiring in wet conditions
- If wires are damaged beyond simple repair, don’t attempt to splice them yourself
- Follow local electrical codes; some jurisdictions require a licensed electrician for transformer replacement
- If you smell burning plastic or see scorch marks near the transformer, turn off the breaker immediately and call an electrician
When to Call an Electrician
You can handle most doorbell power fixes yourself, but some situations require a professional. Call a licensed electrician if:
- The junction box is metal and shows signs of overheating or melting
- You need to run new wiring through finished walls
- The transformer is mounted in a difficult location (inside a finished ceiling, behind drywall)
- Your home has aluminum wiring, which requires special connectors and techniques
- The circuit breaker repeatedly trips after installing a new transformer
- You’re not comfortable working with 120V electrical connections
- Local building codes require a permit or licensed electrician for the work
An electrician will typically charge $100 to $200 for doorbell transformer replacement, depending on your location and the complexity of the job. This is money well spent if you’re uncomfortable with any part of the process.
Preventive Maintenance: Keeping Your Doorbell Powered Long-Term
Once you’ve fixed your doorbell power issue, a few preventive steps will keep it running reliably for years. These are simple checks you can do annually.
Check the doorbell app’s power status monthly. If the rating starts dropping from “Good” to “Low” over time, a wire connection may be loosening or the transformer may be aging. Catch problems early before they cause the doorbell to go offline.
Inspect wire connections annually. Remove the doorbell from its mount and check that the terminal screws are still tight. Temperature changes cause metal to expand and contract, which loosens screws over time. A quick tightening takes two minutes.
Test transformer voltage annually with a multimeter. If the output voltage has dropped from its rated value by more than 10%, the transformer is aging and may need replacement soon. Replacing it proactively prevents a sudden doorbell outage.
Keep the doorbell firmware updated. Manufacturers optimize power management with each update. Running outdated firmware can cause unnecessary power consumption.
Monitor WiFi signal strength. If you rearrange furniture, add smart home devices, or change your router, the WiFi environment shifts. A signal that was fine last year may have degraded. Check RSSI periodically and add an extender if needed.
FAQ’s
How do I increase the voltage of my doorbell?
To increase your doorbell voltage, you need to replace the existing transformer with a higher-voltage model. Most wired video doorbells require 16 to 24V AC. First, test your current transformer output with a multimeter set to AC voltage. If it reads below 16V, purchase a 16V 30VA replacement transformer. Turn off the circuit breaker, disconnect the old transformer’s low-voltage and high-voltage wires, install the new transformer, and reconnect all wires. After restoring power, verify the new transformer outputs 16 to 24V AC with your multimeter.
Why is my hardwired Ring doorbell battery low?
A hardwired Ring doorbell’s battery reads low for several reasons. The most common cause is an underpowered transformer rated below 16V or under 30VA. Other causes include loose or corroded wire connections that create voltage drop, a mechanical chime drawing too much power without a bypass module installed, or weak WiFi signal forcing the doorbell to consume extra power maintaining its connection. Check the Device Health page in the Ring app for the power rating and test transformer voltage with a multimeter to identify the specific cause.
Why is my doorbell voltage so low?
Low doorbell voltage is caused by an aging or failing transformer (common in homes built before 2000), loose or corroded wire connections at the transformer, chime, or doorbell terminals, an incorrect voltage tap setting on multi-tap transformers (wires connected to 8V instead of 16V terminal), long wire runs over 30 feet causing voltage drop with thin 20 AWG wire, or a mechanical chime creating resistance in the circuit. Test the transformer output directly with a multimeter to isolate where the voltage loss occurs.
Why is my hardwired Ring doorbell not getting power?
A hardwired Ring doorbell may not get power because of six common issues: 1) The transformer is faulty, dead, or set to the wrong voltage tap on a multi-tap unit. 2) The circuit breaker for the doorbell transformer has tripped. 3) Wire connections at the transformer, chime, or doorbell are loose or corroded. 4) The mechanical chime is causing a voltage drop that starves the doorbell. 5) The wire gauge is too thin for the distance from transformer to doorbell. 6) The doorbell’s internal power circuit has failed and the unit needs replacement. Start by checking the breaker, then test transformer voltage with a multimeter.
Conclusion
Fixing a wired video doorbell that isn’t getting enough power comes down to a systematic approach: check the breaker, test the transformer voltage with a multimeter, inspect wiring connections, install a chime bypass if needed, and replace the transformer if it’s underpowered. The vast majority of power problems stem from a transformer rated below 16V or 30VA, especially in homes built before 2010. A 16V 30VA replacement transformer costing under $25 resolves most issues.
If you’ve worked through this guide and your doorbell still shows power warnings, don’t hesitate to call a licensed electrician. Some problems, like damaged in-wall wiring or overloaded shared circuits, require professional tools and expertise. For everything else, the steps above will get your video doorbell back to full power and keep it running reliably for years.