
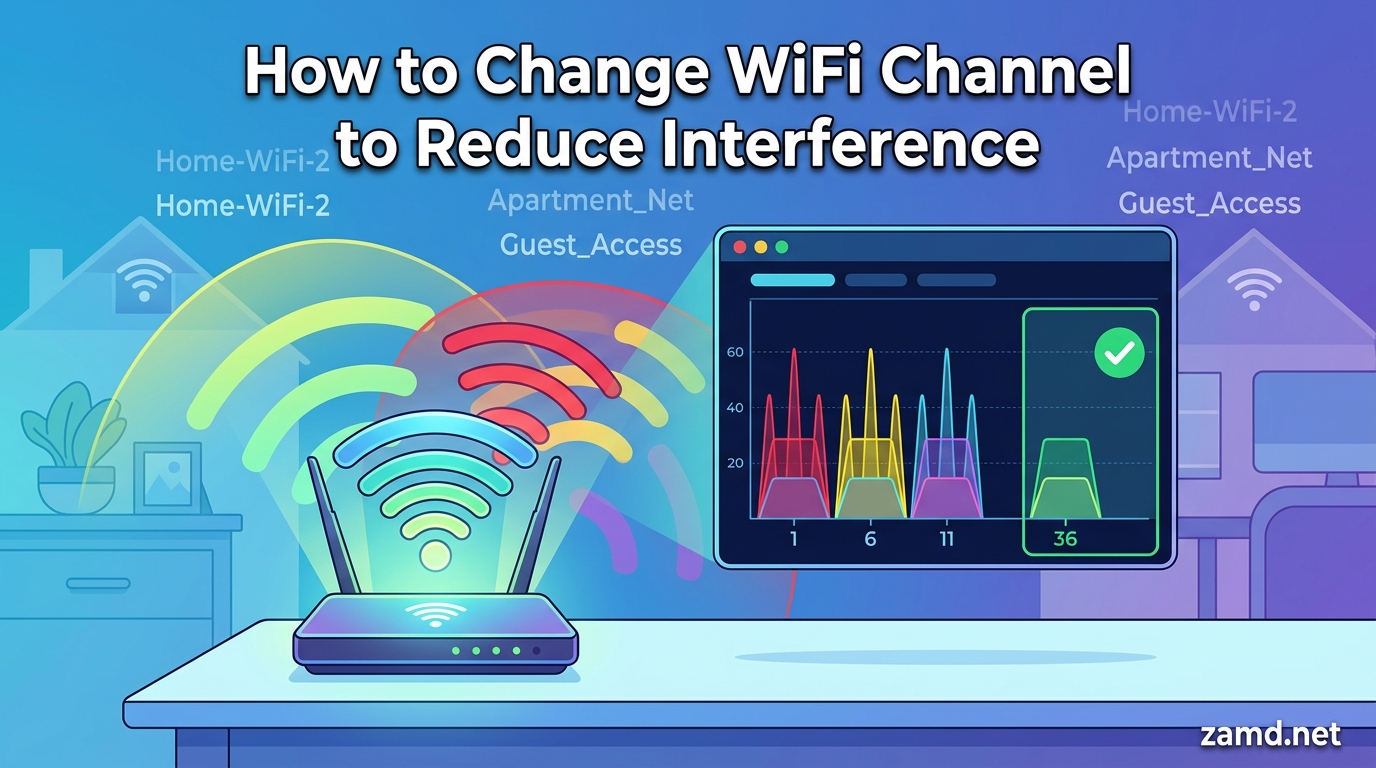
If your WiFi keeps dropping, streaming buffers constantly, and video calls freeze at the worst possible moments, the problem might not be your internet speed. It could be WiFi channel congestion. When multiple routers in your area broadcast on the same frequency, they interfere with each other and drag down everyone’s performance. Learning how to change your router’s Wi-Fi channel to reduce interference is one of the simplest and most effective WiFi optimizations you can perform.
I have helped friends, family members, and small business owners troubleshoot sluggish wireless networks for years. In nearly every case, the router was sitting on a crowded default channel while a dozen neighboring networks fought for the same airspace. A five-minute channel change often delivered a noticeable speed boost without spending a single dollar on new hardware.
This guide walks you through everything you need to know about WiFi channels in 2026. I will explain what channels are, which ones work best for 2.4 GHz and 5 GHz bands, how to scan your environment with free tools, and how to log into your router and switch channels step by step. Whether you live in a crowded apartment building or a suburban home with a few neighbors, these techniques will help you get the most out of your wireless network.
Table of Contents
Quick Answer: The Best WiFi Channels to Reduce Interference
On the 2.4 GHz band, the best channels are 1, 6, and 11 because they are the only three non-overlapping channels available. Use a WiFi analyzer app to find the least congested of these three options and set your router to that channel manually. On the 5 GHz band, channels 36, 40, 44, and 48 are reliable choices, while DFS channels like 100, 104, 108, and 112 are typically even less crowded. To change your channel, log into your router’s admin page (usually 192.168.1.1 or 192.168.0.1), navigate to wireless settings, select your preferred channel, save, and restart the router.
What Are WiFi Channels and How Do They Work?
A WiFi channel is a specific slice of radio frequency within a larger frequency band that your router uses to transmit and receive data wirelessly. Think of channels like lanes on a highway. If too many cars (routers) cram into the same lane, traffic slows to a crawl. But if you switch to an empty lane, traffic flows freely and everyone reaches their destination faster.
Your router operates on either the 2.4 GHz band, the 5 GHz band, or both (if you have a dual-band router). Each band is divided into numbered channels. The 2.4 GHz band contains 11 channels in North America (numbered 1 through 11), while the 5 GHz band offers over 20 usable channels depending on your region and router capabilities.
Each channel represents a slightly different frequency measured in megahertz (MHz). For example, channel 1 on the 2.4 GHz band operates at 2.412 GHz, channel 6 operates at 2.437 GHz, and channel 11 operates at 2.462 GHz. The spacing between channels matters because the signal from each channel bleeds into adjacent ones, creating overlap that causes interference.
When you change your WiFi channel, you are telling your router to broadcast on a different frequency within the same band. This simple switch can dramatically reduce interference if neighboring networks are crowding your current channel. The goal is to find a channel that the fewest nearby routers are using.
Understanding 2.4 GHz vs 5 GHz WiFi Bands
Most modern routers are dual-band, meaning they broadcast on both 2.4 GHz and 5 GHz simultaneously. Each band has distinct characteristics that affect performance, range, and susceptibility to interference.
The 2.4 GHz band offers longer range and penetrates walls and solid objects more effectively than 5 GHz. This makes it the better choice for devices far from the router or separated by multiple walls. However, 2.4 GHz has a major drawback: it only has three non-overlapping channels (1, 6, and 11), which means it gets crowded quickly in areas with many neighboring networks. It is also more prone to interference from household devices like microwave ovens, Bluetooth devices, baby monitors, and cordless phones that share the same frequency.
The 5 GHz band provides significantly faster data rates and has far more available channels, which means less congestion and interference in most environments. The trade-off is shorter range and weaker wall penetration. Devices on 5 GHz need to be relatively close to the router with fewer physical obstacles in between. For gaming, streaming 4K video, and video conferencing, 5 GHz is almost always the better choice when it is available.
Some newer routers also support the 6 GHz band introduced with WiFi 6E and WiFi 7. This band offers even more channels and virtually no interference from older devices, but you need both a compatible router and client devices to take advantage of it. As of 2026, 6 GHz adoption is growing but still not universal.
For most people, the best strategy is to use 5 GHz for bandwidth-heavy devices like laptops, phones, and streaming devices, and reserve 2.4 GHz for smart home devices, IoT sensors, and older equipment that only supports the older standard.
Best WiFi Channels for 2.4 GHz (Channels 1, 6, 11)
On the 2.4 GHz band, channels 1, 6, and 11 are the only non-overlapping channels available in North America. These three channels are spaced far enough apart that their signals do not bleed into each other. Every other channel (2, 3, 4, 5, 7, 8, 9, 10) overlaps with at least one of these three.
Here is why this matters. If your neighbor uses channel 6 and you choose channel 5, your signals partially overlap. This overlap creates constant interference that degrades performance for both networks. But if you pick channel 1 or channel 11 instead, your signal stays completely clear of the channel 6 traffic. This is why network engineers and the WiFi community universally recommend sticking to channels 1, 6, and 11.
To pick the best of the three, use a WiFi analyzer app to scan your area. The app will show you how many networks are broadcasting on each channel and how strong their signals are. Choose whichever of the three channels has the fewest networks or the weakest competing signals.
Here is a quick reference for the 2.4 GHz channel frequencies:
- Channel 1: 2.412 GHz
- Channel 2: 2.417 GHz (overlaps with 1)
- Channel 3: 2.422 GHz (overlaps with 1 and 6)
- Channel 4: 2.427 GHz (overlaps with 1 and 6)
- Channel 5: 2.432 GHz (overlaps with 6)
- Channel 6: 2.437 GHz
- Channel 7: 2.442 GHz (overlaps with 6)
- Channel 8: 2.447 GHz (overlaps with 6 and 11)
- Channel 9: 2.452 GHz (overlaps with 6 and 11)
- Channel 10: 2.457 GHz (overlaps with 11)
- Channel 11: 2.462 GHz
Many routers default to channel 6 out of the box. If you live in an apartment or dense neighborhood, chances are several neighbors also have routers on channel 6. Moving to channel 1 or channel 11 can provide immediate relief from co-channel interference.
Best WiFi Channels for 5 GHz
The 5 GHz band offers significantly more channels than 2.4 GHz, which means less congestion and more room to find a clear frequency. These channels are grouped into UNII (Unlicensed National Information Infrastructure) bands, each with different rules and characteristics.
UNII-1 (Channels 36, 40, 44, 48): These are the most commonly used 5 GHz channels and are available on virtually every 5 GHz router. They are reliable and do not require DFS (Dynamic Frequency Selection). However, because they are so widely available, they can get crowded in dense environments like apartment buildings. If your area is not heavily congested, these channels work well.
UNII-2 and UNII-2 Extended (Channels 52 through 144): These are DFS channels, which means your router must scan for radar signals (like weather radar at airports) and automatically switch channels if it detects them. Because of this requirement, many routers avoid DFS channels by default, which means they are often the least congested option available. Channels 100, 104, 108, and 112 are frequently recommended by networking professionals as excellent choices for avoiding interference.
UNII-3 (Channels 149, 153, 157, 161): These channels do not require DFS and are available in most regions. They tend to be less crowded than UNII-1 channels because not all routers support them. If your router offers these channels, they are worth trying.
Here is a quick comparison of the 5 GHz UNII band groups:
- UNII-1 (36-48): No DFS required, widely supported, can be moderately congested
- UNII-2 / UNII-2 Extended (52-144): DFS required, often the least crowded, best for dense areas
- UNII-3 (149-161): No DFS required, less common support, good alternative to UNII-1
For most home users, I recommend starting with channels 36, 40, 44, or 48. If you live in a crowded area and those are congested, try the DFS channels around 100-112. Use your WiFi analyzer to confirm which channels are clear in your specific location.
How Channel Overlap Causes Interference
WiFi interference comes in two main forms, and understanding both helps you make smarter channel decisions. The first is co-channel interference, which happens when two or more routers operate on the exact same channel. Your devices have to take turns transmitting data, which slows everything down as the network manages traffic. Think of it like multiple people trying to talk at the same time on a conference call.
The second type is adjacent channel interference, which is actually worse. This occurs when routers operate on neighboring channels that partially overlap in frequency. The overlapping signals create noise that corrupts data packets, forcing devices to retransmit them. This is more damaging than co-channel interference because the interference is constant rather than managed through time-sharing.
This is why channels 1, 6, and 11 are so important on the 2.4 GHz band. They are the only channels that completely avoid overlap with each other. Using channel 4, for example, might seem clever because it is between channels 1 and 6, but it actually interferes with both. You end up creating more problems than you solve.
On the 5 GHz band, channel spacing is wider, so adjacent channel interference is much less of a problem. The channels are designed with enough separation that they generally do not overlap, especially when you use standard 20 MHz or 40 MHz channel widths.
Distance from neighboring networks also matters. A strong signal from a nearby router on your channel is far more disruptive than a weak signal from a distant router on the same channel. This is why apartment buildings, where routers are separated by just a wall or two, experience the worst interference problems.
WiFi Analyzer Tools: How to Scan for the Best Channel
Before changing your router’s channel, you need to know which channels are congested in your area. Several free and low-cost tools can scan your wireless environment and show you exactly which channels neighboring networks are using.
WiFi Analyzer (Android): This is the most frequently recommended tool in Reddit’s HomeNetworking community. It displays a visual graph of all nearby networks, their signal strengths, and which channels they occupy. The app even suggests which channel is best for your router based on the scan results. It is free, lightweight, and works on any Android device.
inSSIDer (Windows and Mac): This is a popular desktop WiFi scanner that shows detailed information about every network in range, including signal strength (measured in dBm or RSSI), channel, security type, and network type. The free version provides everything you need for channel selection. The paid version adds more advanced features for professional network planning.
Built-in operating system tools: You do not necessarily need a third-party app. On Windows, you can open Command Prompt and type netsh wlan show all to see a list of nearby networks and their channels. On Mac, hold the Option key and click the WiFi icon in your menu bar to see detailed network information. On Android, some versions show channel information in the WiFi settings menu.
iOS limitations: Apple restricts third-party apps from accessing WiFi scanning data, so there is no direct WiFi Analyzer equivalent on iPhone. However, the AirPort Utility app (free from Apple) has a hidden WiFi scanner feature you can enable in settings. It provides similar channel scanning functionality.
When you run your scan, look for channels that have the fewest networks or where competing signals are weak. A channel with one weak signal from a distant router is fine. A channel with three strong signals from nearby routers will cause problems. Focus on RSSI values: signals stronger than -60 dBm are close enough to cause interference, while signals weaker than -80 dBm are generally not a concern.
How to Change Your Router’s Wi-Fi Channel to Reduce Interference: Step-by-Step Guide
This is the core process. Follow these steps to log into your router, find the wireless settings, and switch to a better channel. The exact menus vary by manufacturer, but the general process is the same across all routers.
Step 1: Find Your Router’s IP Address
Most routers use either 192.168.1.1 or 192.168.0.1 as their default admin IP address. You can find the exact address by checking your operating system’s network settings. On Windows, open Command Prompt and type ipconfig. Look for the Default Gateway entry under your WiFi adapter. That number is your router’s IP address. On Mac, go to System Settings, click Network, select your WiFi connection, and click Details. The Router field shows the IP address.
Alternatively, check the sticker on the bottom or back of your router. Most manufacturers print the default IP address, username, and password on a label. Common addresses include 192.168.1.1 (Linksys, TP-Link, ASUS), 192.168.0.1 (Netgear, D-Link), and 10.0.0.1 (Xfinity, some ISPs).
Step 2: Log Into the Router Admin Interface
Open a web browser and type your router’s IP address into the address bar. Press Enter and you should see a login page. Enter your admin username and password. If you never changed the defaults, common combinations are admin/admin, admin/password, or admin/(blank). The router’s label or manual should list the default credentials.
If you changed the password and cannot remember it, you may need to factory reset the router by holding the reset button for 10-15 seconds. Be aware that this erases all custom settings including your WiFi network name and password, so you will need to set everything up again.
Step 3: Navigate to Wireless Settings
Once logged in, look for a section called Wireless, WiFi, Wireless Settings, or WLAN. The exact name depends on the manufacturer. You may need to look under an Advanced or Settings menu. Most routers separate 2.4 GHz and 5 GHz settings, so make sure you are editing the correct band.
Within the wireless settings, look for a dropdown menu labeled Channel. It may currently be set to Auto. You will also likely see settings for Channel Width, Security Mode, and Mode (such as 802.11b/g/n mixed or 802.11ac).
Step 4: Select the New Channel
Change the Channel dropdown from Auto to the channel number you identified using your WiFi analyzer. For 2.4 GHz, choose 1, 6, or 11 based on your scan results. For 5 GHz, choose 36, 40, 44, 48, or a DFS channel like 100, 104, 108, or 112 if your router supports it.
Avoid choosing channels that your scan showed as congested. If all three non-overlapping 2.4 GHz channels are busy, pick the one with the weakest competing signals. In very dense environments, some overlap is unavoidable, and you simply aim for the least-bad option.
Step 5: Save and Restart
Click Save or Apply to confirm the channel change. Your router will likely restart or briefly drop the WiFi connection while it applies the new settings. Most routers handle this automatically, but some may require a manual reboot. Wait about 60 seconds for the router to fully restart and for your devices to reconnect.
Once your devices have reconnected, run another WiFi analyzer scan to confirm your router is now on the new channel. Then test your internet speed using a site like Speedtest.net to see if performance has improved.
Brand-Specific Quick Guides
Netgear: Go to 192.168.1.1 or routerlogin.net. Enter admin as username and your password. Click Wireless under the Setup menu. Change the Channel dropdown for each band. Click Apply.
TP-Link: Go to 192.168.0.1 or 192.168.1.1. Enter your credentials (default: admin/admin). Click Wireless or Advanced, then Wireless. Change the channel for 2.4 GHz and 5 GHz separately. Click Save.
ASUS: Go to router.asus.com or 192.168.1.1. Log in with your username and password. Click Wireless under General settings. Select the band (2.4 GHz or 5 GHz), then change the Control Channel dropdown. Click Apply.
Eero (mesh systems): Open the Eero app on your phone. Tap Settings, then Advanced, then Softwares and Compatibility. Note that Eero does not allow manual channel selection for 2.4 GHz. It automatically manages channels and uses band steering. For 5 GHz, some Eero models allow limited channel preferences in advanced settings.
Xfinity xFi: Open the Xfinity app or go to 10.0.0.1. Navigate to Connect, then WiFi, then Edit. Xfinity routers have limited channel control. Some models lock channel selection and only allow changes through the admin portal if you use your own router in bridge mode.
Channel Width Explained: 20MHz vs 40MHz vs 80MHz
Channel width controls how much of the frequency spectrum your router uses for data transmission. A wider channel can carry more data at once, but it also takes up more space and is more likely to overlap with neighboring networks. Think of it as choosing between a narrow road with less traffic and a wide highway that might be congested.
On the 2.4 GHz band, the recommended channel width is 20 MHz. Using 40 MHz on 2.4 GHz consumes two-thirds of the entire available band, leaving almost no room for neighbors and dramatically increasing interference. Stick with 20 MHz to keep your signal clean and coexist peacefully with nearby networks.
On the 5 GHz band, 40 MHz or 80 MHz channel widths are generally fine because there are plenty of channels available. 80 MHz width provides faster throughput for activities like streaming and large file transfers. If you live in a dense area, dropping to 40 MHz can reduce interference while still providing excellent performance.
160 MHz channel width is available on some WiFi 5 and WiFi 6 routers, but it is rarely practical in real-world environments. It consumes a massive portion of the 5 GHz spectrum and almost guarantees overlap with neighbors. I recommend avoiding 160 MHz unless you are in a very isolated environment with no nearby networks.
Here is a quick summary for channel width settings:
- 2.4 GHz: Always use 20 MHz
- 5 GHz (low congestion): 80 MHz for maximum speed
- 5 GHz (high congestion): 40 MHz to reduce overlap
- Avoid: 160 MHz unless you have no neighbors nearby
Auto Channel vs Manual Channel Selection
Most routers default to Auto channel selection, which lets the router pick a channel based on its own scan of the environment. This sounds ideal in theory, but it does not always work well in practice. Forum users on Reddit and SuperUser frequently debate whether auto or manual selection is better.
Auto selection works reasonably well if you have a quality router from a reputable manufacturer and you live in a moderately congested area. The router periodically scans and adjusts to avoid the busiest channels. However, many budget routers and ISP-provided gateways have poor auto-selection algorithms that pick suboptimal channels or rarely re-evaluate their choice.
Manual channel selection is generally better in dense environments like apartment buildings, where every channel has some traffic. By scanning with a dedicated WiFi analyzer and picking the best channel yourself, you can often outperform the router’s automatic selection. The downside is that you need to periodically re-scan and adjust as neighbors change their own channels.
I recommend starting with a manual channel selection after running a WiFi analyzer scan. Check back in a week to see if performance is still good. If your environment is stable, you may not need to change anything for months. If neighbors frequently add or change networks, re-scan every few months to stay ahead of congestion.
One common complaint from apartment dwellers is that auto channel selection seems to reset after every router reboot. If your router keeps reverting to a congested channel, switch to manual selection to lock in your preferred channel permanently.
Troubleshooting Common Problems After Changing Channels
Changing your WiFi channel is usually straightforward, but sometimes things go wrong. Here are the most common issues people encounter and how to fix them.
Forgot router admin password: If you cannot log into your router because you forgot the password, look for a small reset button (usually a pinhole) on the back or bottom of the device. Use a paperclip to press and hold it for 10-15 seconds while the router is powered on. This restores factory defaults, including the default admin credentials printed on the router’s label. You will need to reconfigure your WiFi network name and password afterward.
Cannot access 192.168.1.1: First, verify the IP address using ipconfig (Windows) or network settings (Mac). Make sure your computer is connected to the router via WiFi or Ethernet. Try a different browser or clear your browser cache. Some routers also accept a friendly URL like routerlogin.net (Netgear) or router.asus.com (ASUS). If none of these work, your router may have a different IP range, such as 10.0.0.1 for Xfinity or 10.0.1.1 for some Apple setups.
Devices will not reconnect after channel change: Sometimes devices struggle to reconnect after a channel switch, especially older smart home devices. Try forgetting the WiFi network on each device and reconnecting with your password. Restart the devices. If problems persist, restart your router and wait two minutes for it to fully boot. Some older 2.4 GHz-only devices may need you to temporarily switch back to a channel they support better.
ISP-locked router settings: Many internet service providers lock down their rental routers and do not allow channel changes through the standard interface. Xfinity, Spectrum, and AT&T are common culprits. If your ISP portal shows channel settings as greyed out or read-only, you have two options. First, try accessing the router through the manufacturer’s portal (like 10.0.0.1 for Xfinity instead of the app). If that does not work, consider purchasing your own router or modem-router combo and returning the ISP equipment to avoid monthly rental fees and gain full control over your network settings.
No improvement after changing channels: If changing channels did not help, the bottleneck may be elsewhere. Your internet plan speed, the distance between your router and devices, physical obstacles like thick walls, or older hardware could all be limiting factors. Run a speed test while standing next to the router to see if you get your full plan speed. If you do, the issue is range or interference, not your internet connection. Consider a mesh WiFi system or WiFi extender for larger homes.
What to Expect After Changing Your WiFi Channel
Setting realistic expectations is important. Changing your WiFi channel is not a magic fix for every network problem, but it can deliver meaningful improvements in the right situations.
Before making any changes, run a speed test using Speedtest.net or Fast.com. Note your download speed, upload speed, and ping. After changing the channel, wait for all devices to reconnect and run the same test again from the same location. Compare the results to see if performance improved.
In typical scenarios, you can expect the following improvements when switching from a congested channel to a clear one. Download and upload speeds may increase by 10-50 percent, depending on how badly your original channel was congested. Ping and latency typically decrease, which is especially noticeable in online gaming and video calls. Streaming buffering should reduce or disappear. Connection drops and random disconnections should become less frequent.
However, changing channels will not help if your internet plan itself is slow, if your router is outdated, or if physical barriers like concrete walls are blocking your signal. In those cases, upgrading your router, switching to a mesh system, or repositioning your router will deliver better results than channel optimization alone.
It is also important to recognize that WiFi environments are not static. Neighbors move in and out, they buy new routers, and they change their own settings. A channel that is clear today might be congested in three months. I recommend re-running a WiFi analyzer scan every few months, or whenever you notice performance degrading again.
How Often Should You Re-Check Your WiFi Channel?
WiFi environments change constantly. New neighbors move in with their own routers, existing neighbors upgrade their equipment, and some routers automatically change channels. A channel that was optimal when you set it up may become congested over time.
For most home users, checking your WiFi channel every three to six months is sufficient. Run a quick WiFi analyzer scan, and if your channel is still one of the least congested options, leave it alone. If a new network has appeared on your channel, consider switching to a clearer alternative.
If you live in a high-density environment like an apartment building, dormitory, or condo, you may want to check more frequently. Dense environments change faster because there are more networks that can shift around. Some users in these environments benefit from checking monthly, especially if they notice periodic performance dips.
Set a calendar reminder to re-scan your WiFi environment every few months. It takes less than five minutes and can prevent the gradual performance degradation that happens as neighbors change their setups.
FAQ’s
How do I change my Wi-Fi channel and avoid neighbor interference?
To change your WiFi channel and avoid neighbor interference, log into your router admin page (usually 192.168.1.1 or 192.168.0.1), navigate to wireless settings, and change the channel dropdown from Auto to a specific channel. On 2.4 GHz, use channels 1, 6, or 11. On 5 GHz, use channels 36, 40, 44, or 48. Use a WiFi analyzer app first to find the least congested channel in your area. Save the settings and restart your router.
Which channel width is better: 20 or 40 MHz or auto?
For the 2.4 GHz band, always use 20 MHz channel width. Using 40 MHz on 2.4 GHz consumes too much spectrum and causes interference with neighboring networks. For the 5 GHz band, 40 MHz or 80 MHz is generally fine because there are plenty of available channels. Auto channel width can work on 5 GHz, but manual 40 MHz is safer in congested areas to avoid unnecessary overlap.
What 5GHz channels avoid interference?
The best 5 GHz channels to avoid interference are channels 36, 40, 44, and 48 (UNII-1 band) for general use. For even less congestion, DFS channels like 100, 104, 108, and 112 are often the clearest because many routers avoid them due to radar detection requirements. UNII-3 channels (149, 153, 157, 161) are also good choices if your router supports them. Use a WiFi analyzer to confirm which specific channels are clear in your location.
How do I change my Wi-Fi channel due to interference?
To change your WiFi channel due to interference, first use a WiFi analyzer app to scan your area and identify which channels are congested. Then log into your router by typing its IP address (192.168.1.1 or 192.168.0.1) into a browser. Enter your admin credentials, navigate to wireless settings, change the channel from Auto to your chosen channel number, click Save, and wait for the router to restart.
Does changing WiFi channel actually improve speed?
Yes, changing your WiFi channel can improve speed when your current channel is congested by neighboring networks. In congested areas like apartment buildings, switching from a crowded channel to a clear one can deliver 10 to 50 percent speed improvements, lower latency, and fewer dropped connections. However, if your internet plan speed is the bottleneck or your router is outdated, changing channels alone will not solve the problem.
How often should I change my WiFi channel?
You should re-check your WiFi channel every three to six months by running a WiFi analyzer scan. In high-density environments like apartment buildings, check more frequently, such as monthly. If your current channel is still among the least congested, leave it alone. Only change it when a new network appears on your channel and causes noticeable congestion. WiFi environments change as neighbors move, upgrade equipment, or switch settings.
Conclusion
Knowing how to change your router’s Wi-Fi channel to reduce interference is a valuable skill that costs nothing but can significantly improve your wireless network performance. The process is straightforward: scan your environment with a WiFi analyzer, identify the least congested channel, log into your router, and switch to that channel in the wireless settings menu.
Remember the key takeaways. On 2.4 GHz, stick to channels 1, 6, or 11 and use 20 MHz channel width. On 5 GHz, channels 36 through 48 and DFS channels around 100 to 112 are your best bets. Re-scan every few months to stay ahead of changing conditions. And if changing channels does not solve your speed issues, the bottleneck may be elsewhere in your network setup.
Take five minutes today to run a WiFi analyzer scan and see how congested your current channel really is. You might be surprised by what you find, and a simple channel change could be the difference between constant buffering and smooth streaming.