
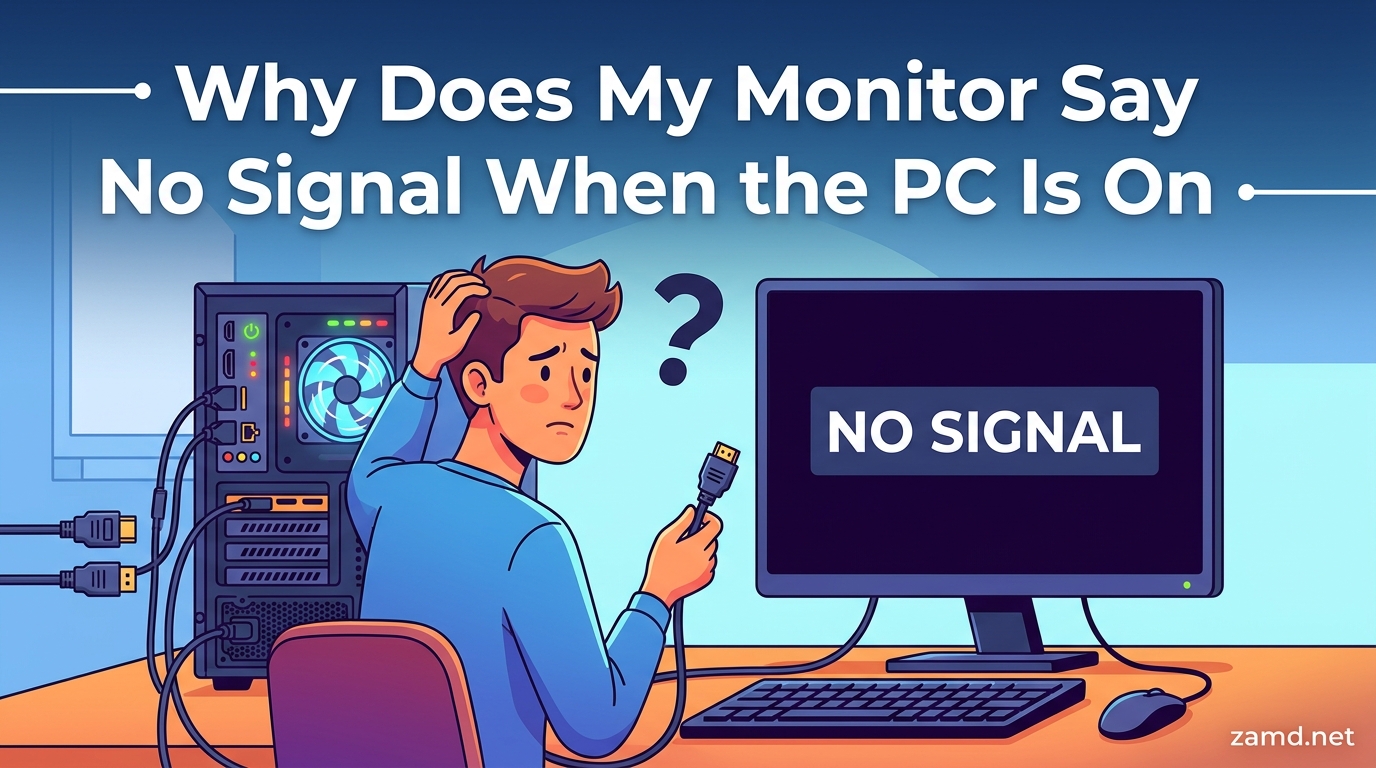
You press the power button, your PC fans spin up, the lights come on, but your monitor just stares back with those two dreaded words: “No Signal.” If you are wondering why your monitor says no signal when the PC is on, you are dealing with one of the most common and frustrating PC problems out there.
A “No Signal” message means your monitor is powered on and working, but it is not receiving any video output from your computer. The monitor is essentially saying, “I am ready, but nobody is talking to me.” The break in communication can happen anywhere along the chain: from your graphics card, through the cable, to the monitor itself.
In most cases, the fix is surprisingly simple. A loose cable, the wrong input source, or plugging into the wrong port on your computer accounts for the majority of no signal issues. I have helped dozens of people troubleshoot this exact problem, and I would estimate that 70 percent of cases are resolved in under five minutes.
That said, no signal can also point to hardware failures like a dying graphics card, bad RAM, or an insufficient power supply. This guide walks you through every possible cause, starting with the quick fixes that take minutes and progressing to advanced troubleshooting for stubborn cases. Whether you are a first-time PC builder staring at a black screen or a long-time user whose setup suddenly stopped working, you will find your solution here.
Table of Contents
Quick Fixes: The 5-Minute No Signal Checklist
Before diving into complex diagnostics, try these quick fixes. They resolve the majority of no signal problems and take less than five minutes each. Work through them in order, since the first few are the most common culprits.
1. Check Your Monitor Input Source
Press the menu or input button on your monitor (usually on the side or bottom bezel). Cycle through the available inputs: HDMI, DisplayPort, VGA, DVI. Make sure the selected input matches the cable you are using. If your monitor has multiple ports, it may be looking at the wrong one.
This sounds obvious, but I have seen people spend hours swapping cables only to realize the monitor was set to HDMI 2 while their cable was plugged into HDMI 1. Monitors with auto-detect sometimes fail to switch automatically, especially after a power outage or cable change.
2. Reseat the Video Cable at Both Ends
Unplug the video cable from both the monitor end and the PC end. Inspect the connectors for bent pins, dust, or damage. Plug them back in firmly, making sure the connection is snug. For DisplayPort cables, listen for the spring-loaded lock to click into place.
A cable that looks connected might not be fully seated. Vibrations, dust accumulation, and even temperature changes can loosen a connection over time. This is especially common after moving your PC or desk.
3. Try a Different Video Cable
Cables fail more often than people expect. An HDMI or DisplayPort cable can develop internal breaks without any visible damage on the outside. Swap in a cable you know works, ideally from another device. If the signal returns, you have found your problem.
Using a spare cable is the fastest way to rule out a faulty cable. I keep a known-good HDMI cable in my desk drawer specifically for this purpose. Cheap cables that come bundled with monitors tend to fail first.
4. Power Cycle Everything
Shut down your PC completely. Turn off the monitor. Unplug both from the wall for 30 seconds. Plug them back in, turn on the monitor first, then boot the PC. This clears residual charge in components and forces a fresh handshake between the GPU and monitor.
A proper power cycle is different from a restart. The key is removing power entirely so all capacitors discharge. This alone fixes a surprising number of cases, especially after power surges or sleep-related issues.
5. Make Sure You Are Plugged Into the GPU, Not the Motherboard
If you have a dedicated graphics card, the video ports on your motherboard are disabled by default. Plugging your monitor into the motherboard port instead of the GPU port is the single most common cause of no signal, especially for new PC builds. Check the back of your PC and make sure your cable connects to the horizontal ports lower down (the GPU), not the vertical ports near the USB slots (the motherboard).
I cover this in more detail in the GPU vs Motherboard section below, because it deserves a full explanation. If you just finished building a PC and have no signal, start there.
What Causes a Monitor to Say No Signal?
Understanding why your monitor says no signal when the PC is on requires knowing how the video signal chain works. Your graphics card generates the image, sends it through a cable, and your monitor displays it. If any link in that chain breaks, you get no signal.
The causes fall into three categories: connection issues, hardware failures, and software problems. Connection issues are by far the most common. Hardware failures are less frequent but more serious. Software problems typically appear after updates or configuration changes.
Connection Causes (Most Common)
Connection problems account for the majority of no signal cases. These include loose or damaged cables, incorrect monitor input source, dusty or damaged ports, and using the wrong video port on the PC. They are also the easiest and cheapest to fix.
A loose HDMI cable, a DisplayPort connector that did not click in fully, or a monitor stuck on the wrong input can all produce the no signal message. Even a slightly bent pin inside a VGA or DVI connector can break the signal entirely.
Hardware Causes
Hardware failures are less common but require component replacement. A failing graphics card can stop sending output while the rest of the PC runs fine. Bad or improperly seated RAM prevents the system from completing POST (Power-On Self-Test), which means no video output. An insufficient or failing power supply might spin fans but not deliver enough power to the GPU for display output.
A dead CMOS battery can corrupt BIOS settings, causing the motherboard to lose track of which video output to use. CPU issues are rare but possible. Motherboard failures can knock out specific ports or the entire video subsystem.
Software Causes
Software problems usually appear after a specific trigger: a Windows update, a driver crash, or a resolution change. Setting a resolution or refresh rate that exceeds your monitor or cable capabilities causes the display to go dark. Windows Fast Startup can interfere with the GPU driver initialization on boot. Corrupted graphics drivers can crash silently, cutting output while the PC continues running.
These are generally fixable through Safe Mode, which loads with basic display drivers and safe resolution settings, bypassing whatever configuration is causing the problem.
Check Your Cables and Connections
Cables are the physical bridge between your GPU and monitor. They are also the weakest link in the signal chain. A thorough cable check should be your first deep diagnostic step after the quick fixes.
Start by examining the full length of your cable. Look for kinks, sharp bends, crushing damage where the cable runs behind a desk, and signs of pet chewing if you have animals. Internal wire damage is invisible from the outside but can interrupt the signal completely.
HDMI vs DisplayPort vs VGA Reliability
Not all cables are created equal. HDMI and DisplayPort are the modern standards, but they behave differently. DisplayPort cables use a mechanical locking mechanism that keeps them securely attached. This makes accidental disconnection nearly impossible, but it also means a partially locked cable can cause intermittent signal issues that are hard to diagnose.
HDMI cables simply friction-fit into the port. They can work themselves loose over time, especially if the cable is heavy or tension is pulling on it. VGA cables, found on older systems, use screws for a secure connection but are analog, meaning signal degradation shows up as visual artifacts before complete signal loss.
If you are using a DisplayPort cable and experiencing intermittent no signal, try pressing the release button and fully reinserting. For HDMI, consider using a cable with a thicker connector shroud that grips more tightly.
Cable Quality Matters
The cheap cable that came free with your monitor is not always reliable for long-term use. Low-quality HDMI cables may not support the bandwidth needed for high resolutions or refresh rates. A cable rated for 1080p might fail when you upgrade to a 4K monitor, producing a no signal message even though the cable technically works.
Check your cable specifications against your monitor requirements. For 4K at 60Hz, you need at least HDMI 2.0 or DisplayPort 1.2. For 4K at 144Hz, you need HDMI 2.1 or DisplayPort 1.4. Using an under-rated cable can cause intermittent signal loss or complete failure.
Port Dust and Physical Damage
Dust buildup inside video ports can prevent a clean electrical connection. Shine a flashlight into both the monitor and PC ports. If you see dust bunnies or debris, use compressed air to clean them out. Never insert metal objects into ports.
Physical port damage is harder to fix. If the port feels loose when you plug in a cable, the internal connector may be worn or bent. In this case, try a different port on the same device. Most GPUs and monitors have multiple outputs.
Verify Your Monitor Input Source
Your monitor can receive input from multiple sources, and it needs to know which one to display. If it is listening on the wrong channel, you get no signal even when everything is connected properly.
Most monitors have an Input, Source, or Menu button. Press it repeatedly to cycle through inputs: HDMI 1, HDMI 2, DisplayPort, USB-C, VGA. Match the input name to the port where your cable is actually plugged in.
Auto-Detect vs Manual Input
Many modern monitors auto-detect which port has an active signal and switch automatically. This feature is convenient but unreliable. After a power outage, a driver update, or a cable swap, the auto-detect can fail to find the right source.
If your monitor has auto-detect, turn it off and set the input manually. This forces the monitor to look only at the correct port. Check your monitor manual for how to disable auto-detect, as it is often buried in the on-screen display settings.
Multi-Monitor Input Confusion
If you have two or more monitors, input confusion multiplies. A monitor that was previously your secondary display might now be the primary, and vice versa. Windows can also rearrange display positions when it detects a change, sending the signal to the wrong screen.
Disconnect all monitors except one. Get a signal working on that single display. Then reconnect the others one at a time, letting Windows detect each before adding the next. This isolates which monitor or cable is causing the problem.
GPU vs Motherboard Port: The #1 Mistake
This is the most common reason for no signal on a new PC build, and it catches people off guard because the fix is so simple. If you have a dedicated graphics card installed in your PC, the video ports on your motherboard are usually disabled.
Your motherboard has its own video outputs (HDMI, DisplayPort, or VGA) located near the USB ports and Ethernet jack. These connect to the integrated graphics built into your CPU. But when you install a dedicated GPU in a PCI-E slot, the motherboard typically disables its own outputs and routes all video through the graphics card instead.
How to Tell Which Port to Use
Look at the back of your PC case. The motherboard video ports are in a cluster near the top, arranged vertically alongside USB ports, Ethernet, and audio jacks. The GPU video ports are lower on the case, arranged horizontally on a separate metal bracket.
If you see two sets of video ports, always plug your monitor into the lower set (the GPU). The upper set (motherboard) will not work as long as a dedicated GPU is installed. This is true even if the motherboard ports look identical to the GPU ports.
Testing With Onboard Graphics
If you suspect your GPU might be failing, you can test using onboard graphics. Power down the PC, remove the dedicated GPU entirely, and plug your monitor into the motherboard video port. If you get a signal, your GPU is likely the problem.
This test also works in reverse. If you normally use motherboard graphics and suddenly get no signal, try installing a dedicated GPU or testing the CPU integrated graphics. Some CPUs do not have integrated graphics at all (Intel CPUs without a “G” in the model number, AMD CPUs without a “G”), meaning the motherboard video ports will never work without a dedicated GPU.
Safe Mode and Resolution Fixes
Sometimes the no signal problem is not physical but digital. Your PC boots fine but sends a resolution or refresh rate that your monitor cannot handle, causing it to display no signal instead of a scrambled image.
This commonly happens after changing display settings, installing new drivers, or connecting a different monitor. The fix is to boot into Safe Mode, which uses basic display drivers at a safe resolution.
How to Boot Into Safe Mode When You Have No Display
This is the tricky part. If your monitor shows no signal, you cannot see anything to navigate menus. Here is the workaround.
Force-restart your PC three times in a row. Hold the power button down for 10 seconds to shut down, then power on. When Windows begins to load, hold the power button again to force shutdown. Repeat this two more times. On the fourth boot, Windows will enter the Automatic Repair environment.
From there, navigate using keyboard shortcuts: press Enter, then wait, then press Enter again to select “Restart” from the startup settings screen. Press 4 or F4 to boot into Safe Mode. Once in Safe Mode, Windows uses generic display drivers at 800×600 or 1024×768, which any monitor can display.
Fix Resolution and Refresh Rate Mismatches
Once you have display output in Safe Mode, right-click the desktop and open Display Settings. Lower the resolution to 1920×1080 and the refresh rate to 60Hz. These are universally supported settings. Apply the changes, then restart normally.
If the signal returns after reboot, the problem was a resolution or refresh rate mismatch. You can then gradually increase the resolution and refresh rate to find the maximum stable setting for your monitor and cable combination.
I have seen high refresh rate monitors like the Samsung Odyssey G7 refuse to display at boot when set to 240Hz. Lowering the refresh rate to 144Hz or 120Hz solved the issue completely. This is a known issue with some DisplayPort cables that cannot handle the bandwidth at boot time.
Check Windows Projection Settings
Press the Windows key + P to open the projection menu. This controls how Windows sends output to displays. The options are: PC screen only, Duplicate, Extend, and Second screen only.
If your PC is set to “Second screen only” but no second screen is connected, your primary monitor will show no signal. Use the arrow keys to select “PC screen only” or “Duplicate” and press Enter. This is a surprisingly common cause that is easy to overlook.
Advanced Troubleshooting: RAM, PSU, and BIOS
If you have tried all the quick fixes and cable checks without success, the problem likely lies deeper in your hardware. These advanced steps require opening your PC case and handling internal components. Always power down and unplug your PC before touching anything inside.
Reseat and Test Your RAM
Bad or improperly seated RAM is one of the most overlooked causes of no signal. When RAM fails, the system cannot complete POST (Power-On Self-Test). Without a successful POST, the motherboard never initializes the graphics card, and you get no video output.
To fix this, remove all RAM sticks, clean the gold contacts with a microfiber cloth or isopropyl alcohol, and reinsert them firmly until the retention clips click. Make sure each stick is fully seated in the slot.
If reseating does not help, test each stick individually. Remove all RAM, insert one stick in the first slot, and boot. If you get a signal, that stick and slot are good. Power down, add the next stick, and repeat. This process identifies whether a specific stick or slot is defective.
The iFixit community has confirmed this fix countless times. Users report that RAM sticks loosen over time, especially after moving the PC, shipping it, or from thermal cycling (repeated heating and cooling expands and contracts the contacts).
Check Your Power Supply (PSU)
Your power supply might be the hidden culprit. A failing PSU can spin fans and light up LEDs but fail to deliver enough power to the GPU for display output. This is particularly common with older PSUs or units that are underpowered for the system.
Check that the PCIe power connectors from the PSU are firmly plugged into your GPU. Most modern GPUs require one or two 6-pin or 8-pin power connectors. If any are loose or missing, the GPU will not produce output.
Temperature-related PSU failure is a specific pattern to watch for. If your PC works fine when cold but loses signal after warming up, the PSU may be overheating and failing to deliver stable power. Replacing the PSU with a quality unit fixes this, as confirmed by multiple Reddit users who traced intermittent no signal issues to a dying power supply.
Reset CMOS / BIOS
A corrupted BIOS configuration can prevent your system from outputting video. Resetting the CMOS (Complementary Metal-Oxide-Semiconductor) clears all BIOS settings back to defaults, which can restore video output.
There are two ways to reset CMOS. The first method uses a jumper on the motherboard: power down, unplug, locate the CMOS jumper (usually two or three pins near the battery), move the jumper from pins 1-2 to pins 2-3 for 10 seconds, then move it back. The second method is simpler: remove the coin-sized CMOS battery from the motherboard, wait 5 minutes, then reinsert it.
A dead CMOS battery can cause this problem repeatedly. If your PC loses BIOS settings every time you unplug it, the battery needs replacing. These CR2032 batteries cost a few dollars and last 5 to 10 years.
Disable Windows Fast Startup
Windows Fast Startup is a feature that saves system state to speed up boot times. It can interfere with GPU driver initialization, causing the monitor to show no signal after what appears to be a normal boot.
Since you may not have display output, you will need to boot into Safe Mode first (using the force-restart method described earlier). Once in Windows, press the Windows key, type “Control Panel,” and navigate to Power Options. Click “Choose what the power buttons do,” then “Change settings that are currently unavailable.” Uncheck “Turn on fast startup” and save changes.
This fix has been confirmed by numerous iFixit and Reddit users who spent days troubleshooting no signal issues. One user reported that disabling Fast Startup solved a problem that persisted through multiple cable swaps, GPU reseats, and driver reinstalls. Fast Startup is particularly problematic with certain GPU and motherboard combinations, and disabling it has zero negative impact on performance for most users.
Specific No Signal Scenarios
Different situations call for different troubleshooting approaches. Here are targeted solutions for the most common no signal scenarios that the basic fixes do not address.
No Signal After Sleep or Hibernate
Waking from sleep to a no signal screen is a widespread complaint on both Windows 10 and Windows 11. The system appears to wake (fans spin, lights on), but the GPU fails to reinitialize the display connection.
The most effective fix is disabling Fast Startup as described above. Beyond that, updating your GPU drivers to the latest version often resolves sleep-related no signal. Some users report that disabling “Link State Power Management” in the PCI Express power settings prevents the GPU from powering down too aggressively during sleep.
As a workaround, avoid sleep mode entirely by setting your PC to hibernate or shut down instead. Hibernate saves your session to disk and powers off completely, avoiding the GPU reinitialization problem entirely.
Intermittent No Signal (Comes and Goes)
If your signal drops randomly and comes back on its own, or works some days and not others, you are dealing with an intermittent issue. These are harder to diagnose because the problem is not always present.
The most common causes of intermittent no signal are: a cable with internal damage that loses connection when bent or moved, a GPU that overheats under load and cuts output, a PSU that struggles to deliver consistent power, and a DisplayPort cable with a weak locking mechanism.
Start by replacing the cable, since this is cheapest and easiest. Monitor your GPU temperatures using software like HWMonitor or MSI Afterburner. If the GPU exceeds 85 degrees Celsius before signal loss, thermal throttling may be causing the shutdown. Clean dust from the GPU heatsink and fans, and consider reapplying thermal paste if the card is several years old.
New PC Build No Signal
First-time builders face no signal more than any other group. The excitement of a completed build turns to panic when the screen stays black. In nearly every case, the issue is one of three things.
First, check that you plugged into the GPU and not the motherboard (described earlier). Second, verify that the CPU has integrated graphics if you are using motherboard ports. AMD CPUs without a “G” suffix and Intel CPUs without integrated graphics will not produce output without a dedicated GPU. Third, ensure the monitor input source is set correctly.
If all three check out, reseat your RAM sticks. New motherboards can have tight DIMM slots, and RAM that looks seated might not be making full contact. Press firmly until both clips engage with a clear click. The Reddit buildapc community has confirmed this single fix resolves the majority of first-build no signal posts.
No Signal After a Windows Update
Windows updates can break GPU drivers, causing no signal after what should be a routine update. The update may install an incompatible driver version or conflict with your existing GPU software.
Boot into Safe Mode using the force-restart method. Open Device Manager, expand Display Adapters, right-click your GPU, and select “Uninstall device.” Check the box to remove the driver software if prompted. Restart normally, and Windows will install a fresh generic driver. You can then download and install the latest driver directly from AMD, NVIDIA, or Intel.
This clean driver installation resolves most post-update no signal issues. Avoid using third-party driver update tools, as they can install incorrect or modified drivers that cause further problems.
When to Call a Professional
If you have worked through every troubleshooting step in this guide and still have no signal, you may be facing a hardware failure that requires professional diagnosis. Here is how to know when you have reached that point.
If your GPU produces no output in any port, with any cable, on any monitor, and reseating it in a different PCI-E slot does not help, the GPU is likely dead. A professional can test it in a known-working system to confirm. Similarly, if your system fails to POST even with known-good RAM and a cleared CMOS, the motherboard or CPU may be faulty.
Before paying for professional repair, consider the cost. A diagnostic fee at a repair shop typically runs $50 to $100, and that cost can often be applied toward the repair. If your GPU or motherboard needs replacement, compare the repair cost against buying a new component. For older systems, upgrading may be more cost-effective than repairing.
If your data is important and you cannot access it because of no signal, remove the storage drive and connect it to another PC using an external enclosure or adapter. This lets you recover files while you deal with the hardware problem separately.
FAQ’s
Why is my PC turning on but no display on monitor?
Your PC turns on but shows no display because the monitor is not receiving a video signal from the graphics card. The most common causes are a loose or faulty video cable, incorrect monitor input source setting, plugging the cable into the motherboard port instead of the GPU, improperly seated RAM preventing POST, or a failing power supply that cannot deliver enough power to the GPU.
Why is my monitor suddenly saying no signal?
A monitor that suddenly says no signal usually has a loose cable, a changed input source, or a driver crash. It can also happen after a Windows update, a power surge, or when a GPU overheats. Check the cable connections, verify the input source, power cycle both devices, and try a different cable to isolate the cause.
How to turn on PC when it says no signal?
To get your PC working when it says no signal, first power cycle everything: shut down the PC, unplug both PC and monitor for 30 seconds, then reconnect and reboot. Check that the monitor input matches your cable, ensure you are plugged into the GPU not the motherboard, try a different cable, reseat your RAM sticks, and reset the CMOS battery if the problem persists.
How to fix a screen that says no signal?
Fix a no signal screen by following these steps in order: check and reseat the video cable at both ends, switch the monitor to the correct input source, plug the cable into the GPU port instead of the motherboard, try a different cable, power cycle both devices, reseat RAM and GPU, boot into Safe Mode to fix resolution issues, disable Windows Fast Startup, and reset CMOS if needed.
Conclusion
Figuring out why your monitor says no signal when the PC is on can feel overwhelming, but the solution is usually straightforward. Start with the basics: check your cable connections, verify the monitor input source, and make sure you are plugged into the GPU port. These three steps alone fix the vast majority of cases.
If the quick fixes do not work, move systematically through the advanced steps: reseat RAM, test the PSU, reset CMOS, and try Safe Mode for software issues. Most users find their answer well before reaching the professional repair stage. Stay patient, test one thing at a time, and you will get your display back.