
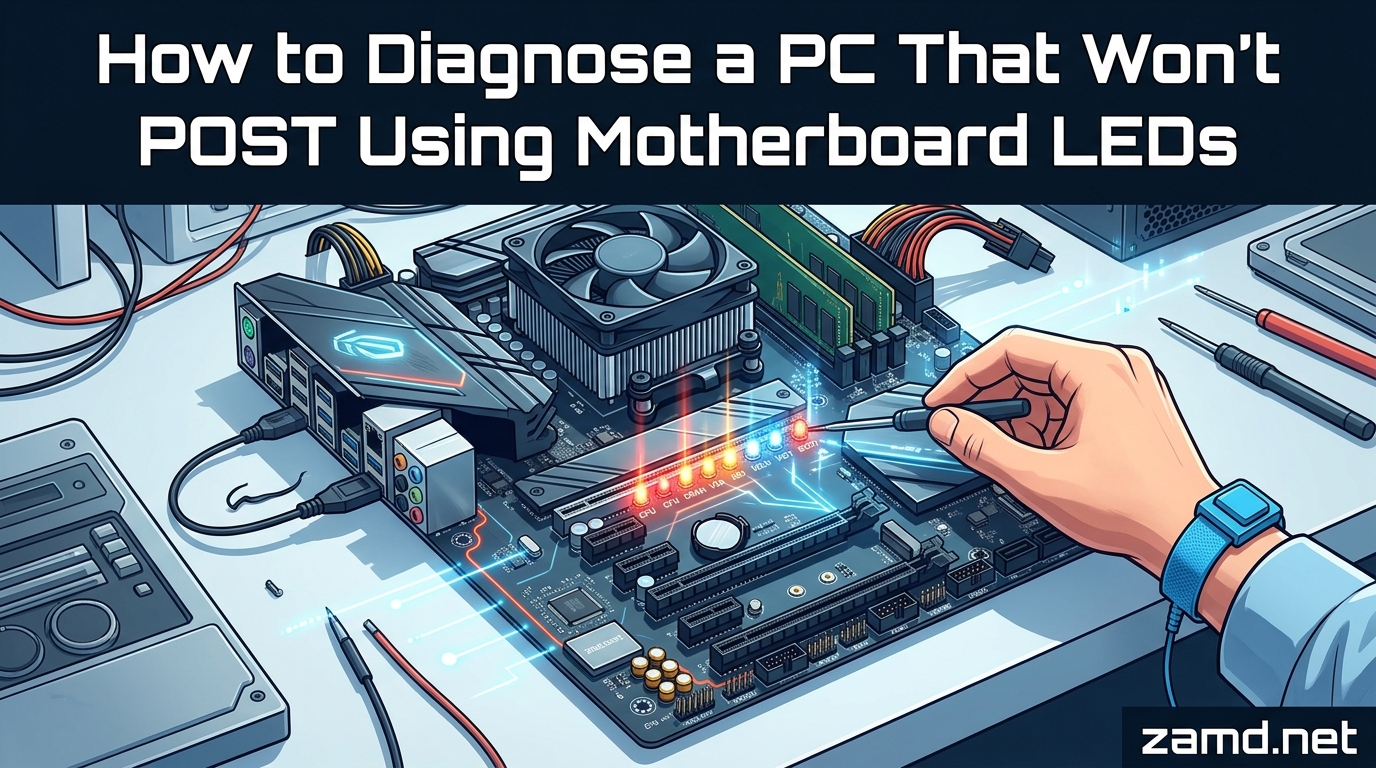
Pressing the power button and getting nothing on screen is one of the most stressful moments for any PC builder. Whether you just finished a fresh build or your system worked fine yesterday and suddenly stopped, the silence from your monitor is frustrating. Learning how to diagnose a PC that won’t POST using motherboard LEDs turns that helpless feeling into a systematic, logical process.
Most modern motherboards include small diagnostic LEDs that light up in sequence as the system checks each component. When one of those LEDs stays lit, it tells you exactly which part is failing. This guide walks you through reading those LEDs, interpreting what they mean, and fixing the underlying problem step by step.
I have built and troubleshot dozens of PCs over the years, and the four little lights on a motherboard have saved me from countless hours of guesswork. By the end of this article, you will know exactly what each LED means, how to respond to it, and what to do when no LEDs light up at all.
Table of Contents
What Is POST and Why Motherboard LEDs Matter
POST stands for Power-On Self-Test, and it is the diagnostic routine your computer runs every time you press the power button. The motherboard checks the CPU, memory, graphics card, storage, and other core components before handing control over to the operating system. If any of those components fail the check, the system halts and refuses to boot.
In the early days of computing, motherboards used beep codes from a tiny speaker to signal POST errors. One long beep and two short beeps meant a graphics problem. Three long beeps pointed to memory. You had to look up the pattern in your motherboard manual to decipher it. It worked, but it was clunky and required a working motherboard speaker.
Modern motherboards replaced beep codes with diagnostic LED systems. ASUS calls theirs Q-LED. MSI uses EZ Debug LED. Gigabyte and ASRock have their own variants. These systems display a small light next to a label (CPU, DRAM, VGA, BOOT) that stays illuminated when that specific component fails POST. The result is faster, clearer, and more accessible troubleshooting for everyone.
Understanding the Difference: No Power vs No POST vs No Display
One of the biggest sources of confusion I see in troubleshooting forums is mixing up three entirely different problems. People say “my PC won’t boot” when they actually mean three very different things. Getting this distinction right is the first step in any diagnosis.
No power means the system is completely dead. No fans spin, no lights turn on, and nothing happens when you press the power button. This is usually a power supply, power cable, wall outlet, or motherboard issue. Diagnostic LEDs will not help here because the motherboard is not receiving power to run them.
No POST means the system powers on (fans spin, lights come on) but never completes the Power-On Self-Test. The diagnostic LEDs are your best friend here. A persistent LED on CPU, DRAM, VGA, or BOOT tells you which component is blocking the sequence.
No display means the system passes POST successfully (all LEDs turn off in sequence) but nothing appears on the monitor. This is typically a display cable, monitor, or GPU output issue, not a POST failure. The diagnostic LEDs will have all turned off, confirming POST completed.
Before doing anything else, figure out which of these three categories your problem falls into. It determines which troubleshooting path you should follow.
Motherboard Diagnostic LED Systems by Brand
Different motherboard manufacturers use different names for their diagnostic LED systems, but the underlying logic is nearly identical across all of them. Each system uses four LEDs that light up one at a time during POST and turn off as each component passes.
ASUS Q-LED uses four LEDs labeled CPU, DRAM, VGA, and BOOT on the motherboard surface near the edge or around the CPU socket. When one stays lit, that component failed. ASUS boards may also feature a Q-Code display showing two-digit hexadecimal POST codes for more detailed diagnostics on higher-end models.
MSI EZ Debug LED works the same way with four labeled LEDs for CPU, DRAM, VGA, and BOOT. MSI places these along the edge of the motherboard, typically near the 24-pin ATX connector. The LEDs are clearly labeled directly on the PCB.
Gigabyte Debug LED appears on select Gigabyte boards, though many Gigabyte models use a two-digit debug code display instead. Check your manual to confirm which system your board uses. Some budget Gigabyte boards have neither, relying on beep codes through an optional speaker.
ASRock POST Status Checker uses the same four-LED approach (CPU, DRAM, VGA, BOOT) on many of their boards. ASRock also includes debug code displays on mid-range and higher-end models.
No matter which brand you own, the sequence is always the same: CPU is checked first, then DRAM, then VGA, then BOOT. The LED that stays lit tells you where the sequence stopped.
Quick LED Diagnostic Reference
Here is a quick reference for what each motherboard LED means and the most common cause for each one staying lit. Use this as a fast lookup table when you are staring at your board trying to figure out the next step.
CPU LED stays on: The motherboard cannot initialize the processor. Common causes include the 8-pin EPS power cable not connected, bent CPU socket pins, an incompatible CPU that needs a BIOS update, or a dead CPU. Check the power cable first, then inspect the socket.
DRAM LED stays on: The system failed memory initialization. The most common fix is reseating your RAM sticks. Other causes include RAM not on the motherboard’s QVL, mismatched memory kits, dirty DIMM slot contacts, or a dead stick. Try one stick at a time in different slots.
VGA LED stays on: The graphics card failed to initialize. Check that the GPU is fully seated in the PCIe slot and that all PCIe power connectors are attached. If your CPU has integrated graphics, remove the discrete GPU and test the video output from the motherboard directly.
BOOT LED stays on: POST completed successfully, but the system cannot find a bootable drive. Check that your SSD or HDD is connected properly, that the boot drive has an operating system installed, and that the boot order in BIOS is correct.
How to Diagnose a PC That Won’t POST Using Motherboard LEDs: Step by Step
The process below works regardless of your motherboard brand. Follow the steps in order, starting with the LED that is currently staying lit on your board. Each step addresses one component and tells you exactly what to check and in what order.
Before you start, power off the system, unplug the power cable, and wait 30 seconds for capacitors to discharge. Touch a grounded metal surface to discharge static electricity from your body. Static damage to components is real, and you do not want to add a second problem while fixing the first.
Step 1: Check Power Supply Connections
This is the most common cause of POST failures, and it is the easiest to fix. Your motherboard needs two power connections to function: the 24-pin ATX connector and the 8-pin EPS connector for the CPU.
The 24-pin ATX connector is the large rectangular plug on the right side of the motherboard. Make sure it is fully inserted and the locking tab clicks into place. A partially connected 24-pin cable can cause the CPU LED to stay lit because the motherboard cannot deliver stable power to the processor.
The 8-pin EPS connector (sometimes called EATX 12V) sits near the top-left of the motherboard, close to the CPU. Without it, the CPU receives no power and the CPU LED will stay on permanently. This connector is the single most common thing people forget during a new build.
If your power supply is modular, verify that the cables are seated firmly in the PSU end as well. Never mix cables from a different power supply, even if they look identical. The pinouts can differ between manufacturers, and using the wrong cable can destroy components. I have seen forum users ruin motherboards by reusing old PSU cables with a new unit.
For GPUs that require PCIe power, check those connectors too. A GPU missing its power cable can cause the VGA LED to trigger.
Step 2: Address the CPU LED
If the CPU LED stays lit after confirming both power cables are connected, the issue is likely with the processor itself or its installation. Start by checking CPU compatibility with your motherboard.
Every motherboard has a CPU compatibility list (called the QVL or support list) on the manufacturer’s website. If your CPU was released after the motherboard, it may require a BIOS update to be recognized. This is a common scenario when buying the latest generation CPU with an older motherboard from warehouse stock.
If compatibility is fine, remove the CPU cooler and CPU to inspect the socket pins. On Intel motherboards (LGA sockets), the pins are on the motherboard itself. A single bent pin can prevent POST. Examine the socket under bright light from multiple angles. If you see bent pins, the motherboard needs professional repair or replacement.
On AMD AM4 and AM5 platforms, the pins are on the CPU. Inspect them the same way. A dropped CPU can bend pins easily. Gentle straightening with a mechanical pencil tip or credit card edge sometimes works, but it is delicate work.
Check that the CPU is oriented correctly. There is a small triangle or notch on one corner of the CPU that must align with the corresponding mark on the socket. Forcing the CPU in the wrong orientation bends pins instantly.
Make sure the CPU cooler is not over-tightened. Uneven mounting pressure can cause the CPU to lose contact with socket pins. Tighten cooler screws in a cross pattern, going half a turn at a time on each.
One Reddit user shared a story where the CPU LED stayed on after replacing both the PSU and motherboard. The actual culprit was a defective AMD 9800X3D. If you have confirmed power, socket pins, compatibility, and cooler mounting, the CPU itself may be dead. Test it in another system or request an RMA.
Step 3: Address the DRAM LED
The DRAM LED is one of the most common LEDs to trigger, and reseating RAM fixes it more often than any other single action. Start by removing all RAM sticks, then reinstalling them firmly until the retention clips snap closed.
RAM needs more downward pressure than most people expect. The sticks should click into place audibly on both ends. If only one side clicks, the stick is not fully seated and the DRAM LED will stay on. Forum experts frequently mention that beginners do not push hard enough during installation.
If reseating does not fix it, test each stick individually in slot 2 (the second slot from the CPU, typically the primary recommended slot). Power on with one stick installed. If it boots, add the second stick and test again. This isolates whether you have a dead stick or a dead slot.
Check your motherboard manual for the correct RAM slot configuration. Most motherboards want you to populate slots 2 and 4 for dual-channel operation before slots 1 and 3. Installing RAM in the wrong slots can trigger the DRAM LED or cause unstable memory training.
Verify that your RAM is on the motherboard’s QVL. RAM that is not validated may work fine, but it can also cause POST failures, especially at advertised XMP speeds. Try booting at default JEDEC speeds (no XMP profile) to see if the system POSTs before enabling overclocking.
On AM5 platforms, memory training can take up to 40 minutes on the first boot or after a BIOS update. The DRAM LED may stay lit during this entire process. Do not power off the system during memory training, or you will have to start over. This is a known AM5 behavior that catches many people off guard.
Clean the DIMM slot contacts and RAM stick gold contacts with 99% isopropyl alcohol if you suspect contamination. Dust, thermal paste, or even fingerprints can interfere with the connection.
Step 4: Address the VGA LED
The VGA LED means the system cannot initialize a graphics output device. Start by confirming the GPU is fully seated in the top PCIe x16 slot. Remove it and reinstall it, making sure the retention clip at the back of the slot locks into place.
Check that all PCIe power connectors from the PSU are connected to the GPU. High-end cards may require two or three separate power cables. Using daisy-chained cables (one cable split into two connectors) can cause instability on power-hungry GPUs.
If the VGA LED persists, try removing the discrete GPU entirely and connecting your monitor to the motherboard’s video output. This only works if your CPU has integrated graphics. If the system POSTs without the discrete GPU, the graphics card is likely the problem.
Inspect the GPU for physical damage. One real-world case from a troubleshooting forum involved a GPU with visible burn marks and corrosion from past condensation damage. The motherboard received power but could not initialize the damaged card. Physical inspection can reveal issues that no software tool will detect.
Try the GPU in a different PCIe slot if your motherboard has a secondary x16 slot. This rules out a damaged primary slot. Also try the GPU in another system if possible to confirm whether the card itself is functional.
Step 5: Address the BOOT LED
If the BOOT LED stays lit, the system completed POST but cannot find a bootable operating system. This is actually good news, because it means your CPU, RAM, and GPU all passed. The problem is with storage.
Check that your SSD or HDD is properly connected. For NVMe drives, confirm the M.2 slot screw is securing the drive flat against the slot. For SATA drives, check both the data cable and the power cable on both ends.
Enter BIOS by pressing the appropriate key (usually Delete or F2) and verify the drive appears in the storage list. If the drive is not detected, try a different SATA cable or M.2 slot. If it is detected but not booting, check the boot order settings.
On a brand new build with a fresh drive, the BOOT LED staying on is normal because there is no operating system installed yet. You need to install an OS from a USB drive before the system can boot from the SSD.
What to Do When No LEDs Light Up at All
If no diagnostic LEDs light up when you press the power button, you are dealing with a different category of problem. The motherboard is not running its POST sequence, which means either it is not receiving power or it has failed entirely.
First, verify the wall outlet works by plugging in a lamp or phone charger. Then check the power cable running from the wall to the PSU, and flip the PSU’s physical power switch to the ON position (the line symbol, not the circle). These sound obvious, but I have seen people spend hours debugging when the PSU switch was simply off.
Check the front panel power switch connector on the motherboard. This small two-pin header connects your case power button to the motherboard. If it is loose or on the wrong pins, pressing the power button does nothing. To bypass this entirely, briefly touch the two power switch pins with a metal screwdriver tip to short them. This simulates pressing the power button. If the system starts, your case power button or its wiring is faulty.
Test the power supply itself using the paperclip test. With the PSU unplugged from the wall, disconnect all cables from components. Bend a paperclip into a U shape and insert one end into the green wire pin and the other into any black wire pin on the 24-pin connector. Plug the PSU into the wall and flip the switch on. If the PSU fan spins, the PSU is at least partially functional. If it does nothing, the PSU is likely dead.
If the PSU works and the power switch works but the motherboard still shows no signs of life, the motherboard may be dead. Remove it from the case and test it on a non-conductive surface (the box it came in works well). This is called breadboard testing, and it rules out short circuits caused by a misplaced motherboard standoff touching the back of the board.
A dead motherboard with no LED activity, no fan spin, and no response to any input is what people mean when they say a computer is “bricked.” At this point, RMA the motherboard if it is under warranty.
LED Blink Patterns vs Solid Lights
Most diagnostic LEDs are either solid or off. A solid LED that stays illuminated means that component failed the check. The light stays on until you power off the system. This is the standard behavior for Q-LED, EZ Debug, and most other consumer diagnostic systems.
Some motherboards use blinking patterns for additional information. A rapidly blinking DRAM LED during AM5 memory training is normal and indicates the system is actively testing memory timings. Do not interrupt it. A blinking VGA LED can indicate a loose PCIe connection that intermittently drops signal.
If all four LEDs light up simultaneously and stay on, this usually indicates a severe motherboard fault rather than a specific component failure. The motherboard cannot begin its POST sequence at all. This is different from a single LED staying on, which points to one specific component.
LEDs that briefly flash and then all turn off indicate a successful POST. If your system still shows no display after all LEDs turn off, the problem is downstream (display cable, monitor, or GPU output configuration), not a POST failure.
Common Beginner Mistakes to Avoid
After reading hundreds of troubleshooting threads, the same mistakes appear over and over. Avoiding these will save you hours of frustration and potentially hundreds of dollars in unnecessary replacements.
Forgetting the 8-pin EPS connector. The 24-pin ATX powers the motherboard, but the 8-pin EPS powers the CPU. Without it, the CPU LED stays on and people wrongly assume their CPU is dead. Always check both power connectors before anything else.
Not pushing RAM in firmly enough. RAM requires surprisingly strong pressure to seat properly. Both retention clips must click closed. If the clips will not close, the stick is in the wrong orientation (check the notch position) or not pressed down enough.
Using old PSU cables with a new power supply. Modular PSU cables look similar across brands, but the pinouts can be completely different. Using cables from a different PSU can fry your motherboard, GPU, and storage instantly. Always use the cables that came in the box with your current PSU.
Interrupting AM5 memory training. On AMD AM5 platforms, the first boot after assembly or a BIOS update can take up to 40 minutes. The DRAM LED stays lit the entire time. Powering off during this process restarts training from scratch. Be patient and let it finish.
Confusing no display with no POST. If all diagnostic LEDs turn off in sequence, your system POSTed successfully. A black screen after that is a display issue, not a POST failure. Check your monitor, display cable, and which output port you are using before blaming the motherboard.
Plugging the monitor into the motherboard with a discrete GPU installed. If you have a dedicated graphics card, your monitor must connect to the GPU’s output ports, not the motherboard’s video ports. Plugging into the motherboard with a discrete GPU installed gives you a black screen even when everything else is working perfectly.
Over-tightening the CPU cooler. Uneven or excessive mounting pressure can prevent the CPU from making proper contact with socket pins. Tighten in a cross pattern, half a turn at a time. The cooler should be snug, not cranked down.
Advanced: Clear CMOS, BIOS Flashback, and Breadboard Testing
When the basic steps do not resolve the issue, these three advanced techniques address deeper problems. They are safe to try and often fix issues that seem impossible to diagnose.
Clearing CMOS resets the motherboard’s BIOS settings to factory defaults. This fixes POST failures caused by unstable overclocks, incorrect memory settings, or corrupted BIOS data. To clear CMOS, power off and unplug the system, then remove the round CR2032 coin-cell battery from the motherboard for five minutes. Reinsert it and power on. Some boards have a dedicated Clear CMOS button or a two-pin header you can short with a screwdriver for a few seconds instead of removing the battery.
Always clear CMOS after a hardware change (new CPU, new RAM kit) if the system will not POST. Stale BIOS settings from the previous configuration are a frequent cause of boot failures.
BIOS Flashback lets you update the motherboard BIOS without a CPU or RAM installed. This is essential when your CPU is newer than the motherboard and requires a BIOS update to be recognized. Most ASUS boards call this USB BIOS Flashback, while MSI calls it Flash BIOS Button.
To use BIOS Flashback, download the correct BIOS file from the manufacturer’s website, rename it according to the manual’s instructions (usually something like MSI.ROM or similar), and place it on a FAT32-formatted USB stick. Insert the USB into the dedicated BIOS Flashback USB port (clearly marked on the board), press the Flashback button, and wait for the LED to stop blinking. The process takes 5 to 10 minutes.
If the Flashback LED illuminates and completes successfully, the motherboard is at least partially functional. One forum user confirmed that successful BIOS Flashback means the motherboard can receive power and process firmware, but it does not guarantee the CPU or RAM work. If the system still does not POST after a successful Flashback, the problem lies with the CPU, RAM, or another component.
Breadboard testing means removing the motherboard from the case entirely and assembling it on a non-conductive surface like its cardboard box. This eliminates short circuits caused by extra motherboard standoffs, case metal touching the board, or cable routing problems.
Place the motherboard on the box with only the CPU, one RAM stick, the CPU cooler, and the PSU connected. Connect the monitor to the appropriate video output. Short the power pins to start the system. If it POSTs outside the case but not inside, you have a shorting issue. Reinstall carefully, checking that every standoff lines up with a mounting hole and no extra standoffs touch the board.
When to RMA vs Replace Components
If you have worked through all the steps above and the system still will not POST, you are likely dealing with a dead component. The question becomes whether to return it under warranty (RMA) or buy a replacement.
Most PC components come with a manufacturer warranty of one to three years. CPUs and motherboards from reputable brands typically carry three-year warranties. RAM often has a lifetime warranty. Check your purchase date and the manufacturer’s warranty terms before buying a replacement.
If you have tested a component in a known-good system and confirmed it is dead, RMA is the right path. Be prepared to describe the troubleshooting steps you took, as manufacturers may ask for this information. Keep your original packaging and proof of purchase.
If a component is out of warranty, weigh the cost of professional repair against replacement. For motherboards and GPUs, replacement is usually more cost-effective. For CPUs, there is rarely a repair option. If a power supply is more than five years old, replace it rather than repairing it, as aging components in PSUs can damage the rest of your system.
FAQ’s
How to diagnose a PC that won’t POST?
Check the motherboard diagnostic LEDs. A solid CPU LED means a processor issue, DRAM LED means a memory problem, VGA LED means a graphics card problem, and BOOT LED means the system cannot find a bootable drive. Start by verifying the 24-pin ATX and 8-pin EPS power cables are connected, then reseat the component indicated by the lit LED.
How to troubleshoot a motherboard not posting?
First confirm the motherboard is receiving power by checking that fans spin and RGB lights turn on. Then identify which diagnostic LED stays lit. Reseat the corresponding component, check all power connections, try a minimal boot configuration with one RAM stick, clear CMOS, and test outside the case (breadboard) to rule out short circuits.
How to tell if a computer is bricked?
A computer is bricked when the motherboard shows no signs of life: no diagnostic LEDs, no fan spin, and no response to the power button even after confirming the wall outlet, PSU switch, and power cable all work. Test the PSU with a paperclip test and try shorting the power switch pins. If neither produces a response, the motherboard is likely dead.
Why won’t my PC turn on but the motherboard lights up?
If motherboard RGB or standby lights are on but the system does not start when you press the power button, the issue is likely the front panel power switch connector, the power button itself, or a short circuit. Try shorting the two power switch pins on the motherboard with a screwdriver. If the system starts, replace the case power button wiring.
Can a PC POST without RAM installed?
No, a PC cannot complete POST without RAM. The DRAM LED will stay illuminated and the system will halt. Some motherboards will spin fans briefly without RAM, while others will not spin fans at all. This depends on the motherboard model and is normal behavior.
How long does AM5 memory training take?
AM5 memory training can take up to 40 minutes on the first boot after assembly or a BIOS update. The DRAM LED stays lit during this entire process. Do not power off the system during memory training, or the process restarts from the beginning.
Conclusion
Learning how to diagnose a PC that won’t POST using motherboard LEDs gives you a systematic approach to what feels like an impossible problem. The four diagnostic LEDs (CPU, DRAM, VGA, BOOT) each point to a specific component, eliminating guesswork and saving you from replacing parts blindly.
Always start with power connections, because the 24-pin ATX and 8-pin EPS cables cause more POST failures than any other single issue. Then follow the LED trail: reseat the indicated component, test with minimal hardware, clear CMOS, and breadboard outside the case if needed. For systems with no LEDs at all, the problem is power delivery or a dead motherboard.
Take your time, follow the steps in order, and do not skip the basics. The most expensive debugging mistake is replacing a $300 component when the real fix is pushing a cable in another quarter inch.