
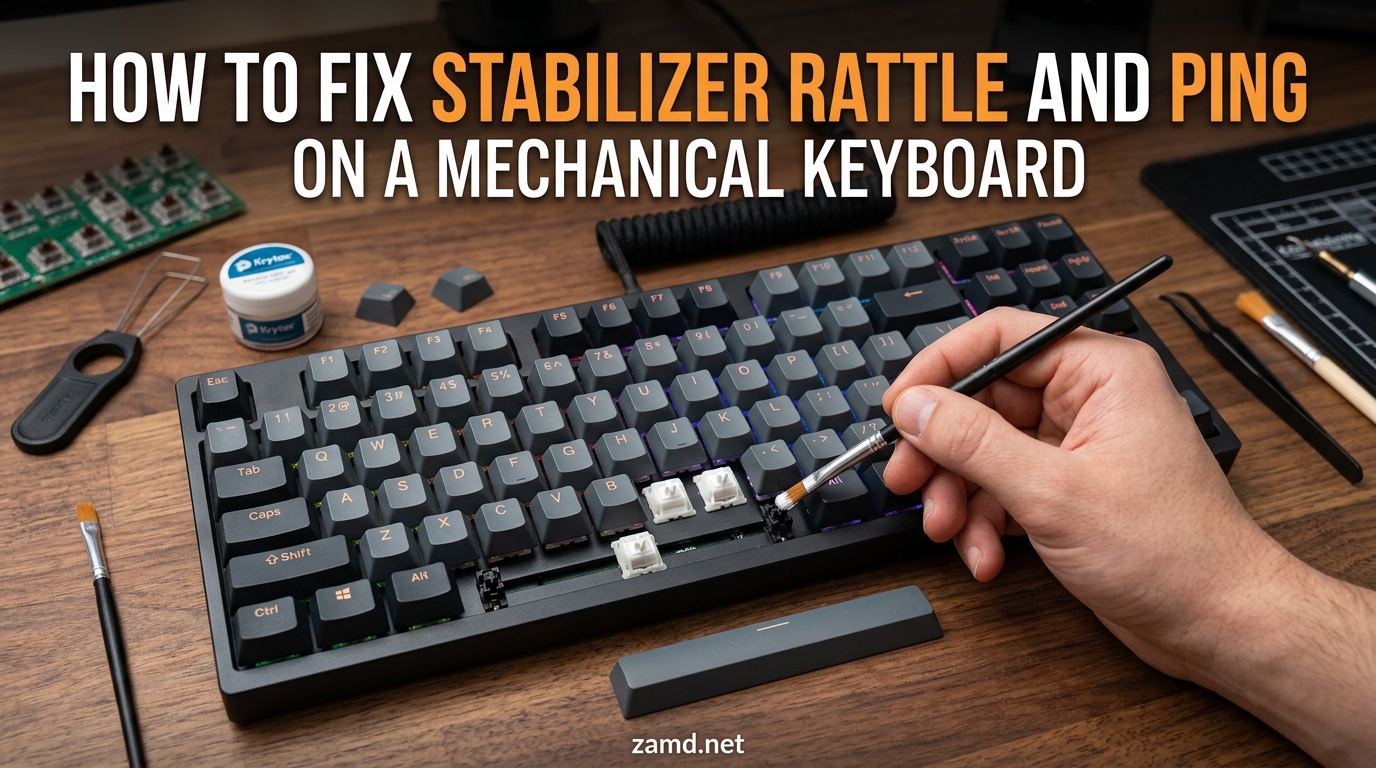
Stabilizer rattle and ping on a mechanical keyboard is caused by excess play between the stabilizer wire, housing, and stem — the metal wire vibrates against the plastic housing every time you press a large key. The result is a cheap, hollow sound that makes even an expensive keyboard feel low-quality. Learning how to fix stabilizer rattle and ping on a mechanical keyboard transforms your typing experience, and most of the fixes take under an hour with tools that cost less than a new keycap set.
I have modded stabilizers on dozens of keyboards over the past several years — from budget pre-builts to custom builds costing hundreds of dollars. The same five methods work every time, and I will walk you through each one in the priority order you should try them. You do not need to be an expert. You just need patience, the right lubricant, and a willingness to open up your keyboard.
Here is what this guide covers: what actually causes stabilizer noise (it is not always what you think), a diagnostic method to identify your specific rattle type, five proven fixes ranked by priority, quick no-disassembly tricks for hotswap and plate-mounted boards, and a maintenance schedule to keep the rattle from coming back.
Table of Contents
Quick Fixes Overview: 5 Methods at a Glance
Before diving into the details, here is the priority order I recommend for fixing stabilizer rattle. Start at the top and work your way down only if the rattle persists.
1. Lubrication — Apply Krytox 205g0 to the stabilizer stems and dielectric grease to the wires. This is the foundation fix and resolves roughly 60 percent of rattle cases on its own. Difficulty: Easy. Effectiveness: High.
2. Wire Balancing — Check and straighten the stabilizer wire using the tap test. Many users report this alone solved their rattle when lubing did not. Difficulty: Medium. Effectiveness: Very High.
3. The Clip Mod — Clip the two small plastic feet on each stabilizer stem to eliminate secondary impact rattle. Difficulty: Easy but irreversible. Effectiveness: High.
4. The Band-Aid Mod — Place fabric bandage strips on the PCB under each stabilizer insert to dampen impact noise. Difficulty: Medium. Effectiveness: Medium-High.
5. The Holee Mod — Wrap the stabilizer wire in fabric tape or stabilizer foam stickers before inserting it into the housing. Difficulty: Advanced. Effectiveness: Very High.
If you have a hotswap keyboard or do not want to open your board, jump to the section on stabilizer rattle fixes without disassembly near the bottom of this guide.
Understanding the Problem: What Causes Stabilizer Noise?
Keyboard stabilizer rattle is caused by excess play between moving parts inside the keyboard — specifically between the stabilizer wire and its plastic housing. When these components are not tightly fitted or properly tuned, they vibrate against each other during actuation, producing that signature hollow clacking sound.
To understand the fix, you need to understand the parts. A stabilizer has three main components: the wire (a bent metal bar that runs parallel to the key), the housing (the plastic body that holds the wire in place), and the stem (the part that inserts into your keycap). Each of these can produce a different type of noise when something goes wrong.
Rattle is the most common complaint. It sounds like loose plastic shaking inside the keyboard — a rapid, hollow clatter on keys like the spacebar, shift, enter, and backspace. Rattle comes from the wire bouncing inside its housing or the stem feet slapping against the housing bottom.
Ping is a metallic ringing sound, almost like a tiny tuning fork going off inside your keyboard. Stabilizer ping comes from the wire itself vibrating at an audible frequency after the key bottoms out. It is the same physics as a guitar string — a taut metal wire under tension produces a musical tone.
Squeak is less common but equally annoying. It is a high-pitched friction sound caused by unlubricated plastic-on-plastic contact inside the stabilizer housing. Squeak usually disappears entirely with proper lubrication.
Not all stabilizers are equally prone to these issues. The three mounting types behave differently.
Plate-mounted stabilizers snap into the metal plate of the keyboard. They are the easiest to install but the most prone to rattle because they are held in place by friction alone. If the plate holes are even slightly too large, the stabilizer housing shifts during typing. This is why pre-built and budget keyboards almost always rattle — they use plate-mounted stabilizers with minimal factory tuning.
PCB-mounted stabilizers snap directly into the printed circuit board. They are more stable than plate-mounted stabilizers because the PCB provides a firmer anchor point. However, they still allow some wire movement inside the housing.
Screw-in stabilizers are a subtype of PCB-mounted stabilizers that are secured with a nut and bolt from the back of the PCB. They are the most stable and the least prone to rattle. Multiple users on the GeekHack forum report that switching to screw-in stabilizers completely eliminated their rattle. If you are building a custom keyboard, always choose screw-in stabilizers.
Diagnostic Guide: Identify Your Rattle Type First
One of the biggest mistakes I see is people blindly applying lubricant without diagnosing the actual problem. Lube will not fix a bent wire. A band-aid mod will not fix stem rattle. You need to identify your noise type before choosing a fix.
The best diagnostic method is what the community calls the Tap Test, popularized by stabilizer tuning guides. Here is how to do it.
Step 1: Remove the keycap from the noisy stabilizer using a keycap puller. You should now see the bare stabilizer stem and wire.
Step 2: Gently tap the stabilizer stem straight down, as if pressing the key. Listen carefully to the sound it makes.
Step 3: Now tap the stabilizer wire itself from the side — push it gently left and right within the housing.
Step 4: Compare the sounds. If tapping the stem down produces a click, you have stem rattle (fix with the clip mod). If moving the wire sideways produces a rattle or ping, you have wire rattle (fix with lubrication and wire balancing). If both produce noise, you need multiple fixes.
Many people confuse stabilizer ping with switch ping. They sound similar but come from completely different sources, and the fixes are entirely different.
Stabilizer ping comes from larger keys (spacebar, shift, enter, backspace) and produces a metallic ringing that sustains for a fraction of a second after the key bottoms out. It originates from the stabilizer wire vibrating.
Switch ping can come from any key, including smaller keys with no stabilizer. It originates from the metal spring or the metal leaf inside the switch itself. If you hear ping from keys that do not have stabilizers, you are dealing with switch ping, not stabilizer ping.
Spring ping specifically comes from the switch spring. You can fix it by lubing the switch springs with a thin lubricant like Krytox 105 oil, or by switching to factory-lubed switches. Switch leaf ping comes from the metal contact leaf vibrating against the switch housing. A tiny dab of Krytox 205g0 on the leaf usually resolves it.
If the ping only happens on stabilizer keys and not on regular keys, proceed with the stabilizer fixes below.
Tools and Materials You Will Need
Gather everything before you start. Opening a keyboard and then realizing you are missing a tool is frustrating. Here is the complete checklist.
1. Flush cutters — for the clip mod. You need cutters with a flat cutting surface that can trim small plastic nubs cleanly.
2. Dielectric grease — a thick lubricant for the stabilizer wires. Super Lube Dielectric Grease is the community favorite and costs under ten dollars for a tube that will last years.
3. Krytox 205g0 — a thinner lubricant for the stabilizer stems and housing walls. This is the same lube used for switches and is the consensus choice across Reddit, GeekHack, and keyboard builder communities.
4. Small lube brush — a fine-tipped paint brush (size 0 or smaller) for applying Krytox precisely. Some builders use a syringe for dielectric grease.
5. Keycap puller — for removing keycaps without damaging the stems.
6. Precision screwdriver set — for opening keyboard cases and removing PCB-mounted stabilizers.
7. Fabric bandages or stabilizer foam stickers — for the band-aid mod and Holee mod. Use fabric bandages, not plastic ones, and cut them into small strips.
8. Isopropyl alcohol (90 percent or higher) and a microfiber cloth — for cleaning old lube and debris off stabilizer parts before applying new lube.
9. Tweezers — for positioning small band-aid strips and foam stickers.
Which lubricant goes where? This is one of the most common questions I see on forums, and getting it wrong leads to mushy-feeling keys. Use Krytox 205g0 on the plastic parts — the stem feet, the inside walls of the housing, and the stem insert points. Use dielectric grease on the metal wire, specifically inside the holes where the wire inserts into the housing. The thick dielectric grease fills the gap between wire and housing, eliminating the vibration that causes ping.
Some builders also use TriboSys 3203 as an alternative to Krytox 205g0. It works well and has a slightly lighter feel. Either is fine for stabilizers — do not overthink this choice.
Method 1: Lubrication (The Foundation Fix)
Lubrication is the first fix you should try, and for many keyboards, it is the only fix you will need. It addresses wire rattle, housing friction, and squeak all at once. I have seen lubing alone resolve stabilizer noise on roughly 60 percent of keyboards I have worked on.
Step 1: Disassemble the stabilizer. Remove the keycap with your puller. If you have PCB-mounted or screw-in stabilizers, unscrew or unclip the housing from the board and remove the entire stabilizer assembly. For plate-mounted stabilizers, you can sometimes remove the stabilizer insert without fully disassembling the plate, but for thorough lubing, removing the whole unit is better.
Step 2: Clean everything. Wipe down the wire, housing interior, and stem with isopropyl alcohol and a microfiber cloth. Old lube, factory grease, and dust will prevent the new lubricant from adhering properly. Let everything dry completely.
Step 3: Lube the stabilizer wire. Take your dielectric grease and apply a generous amount inside both holes of the stabilizer housing where the wire inserts. The community consensus from GeekHack is to nearly fill the hole — you want thick lube surrounding the wire on all sides. As one user put it: do not just lightly brush the walls. This thick grease is what eliminates wire ping.
Step 4: Lube the housing walls. Using your small brush and Krytox 205g0, apply a thin layer to the inside walls of the stabilizer housing where the stem slides up and down. Do not overdo it — a thin, even coat is all you need. Too much lube here makes the key feel sluggish.
Step 5: Lube the stem. Apply a small amount of Krytox 205g0 to the stem feet (the two small plastic nubs on the bottom of the stem) and to the sides of the stem where it contacts the housing. If you have not yet done the clip mod, do the lubing first, then move to the clip mod section.
Step 6: Reassemble and test. Snap the wire back into the housing, reinstall the stabilizer, and replace the keycap. Type on the key for about thirty seconds to let the lube settle. Listen for any remaining rattle.
Warning: Over-lubrication is a real problem. If you use too much dielectric grease, the stabilizer wire can get stuck and the key will feel mushy or slow to return. If this happens, open the stabilizer and wipe off some of the excess grease with alcohol. Start with less than you think you need and add more if the ping persists.
Method 2: The Clip Mod (Eliminate Stem Rattle)
If lubing reduced the rattle but did not eliminate it entirely, the clip mod is your next step. This mod targets the secondary rattle caused by the stabilizer stem’s two small plastic feet hitting the bottom of the housing each time you press the key.
Most stabilizer stems have four small feet — two primary feet that guide the stem’s travel and two secondary feet that serve no purpose other than causing noise. The clip mod removes those two secondary feet.
Step 1: Remove the stabilizer stems. Pop the stems out of the housing. They should slide out with gentle pressure. If they are tight, use tweezers to grip the stem and pull straight up.
Step 2: Identify the secondary feet. Look at the bottom of the stem. You will see four small plastic nubs. The two outer feet (the larger ones) are the primary feet — leave these alone. The two inner feet (smaller, closer to the center) are the ones you need to clip.
Step 3: Clip with flush cutters. Position your flush cutters flat against the stem base and snip the two secondary feet cleanly. Cut as close to the base as possible so no stub remains. A rough cut will leave a jagged edge that can catch on the housing.
Step 4: Smooth the cut. If the cut is rough, use a fine nail file or sandpaper to smooth the surface. This prevents the remaining stub from scraping against the housing wall.
Step 5: Apply lube and reassemble. Apply Krytox 205g0 to the remaining primary feet and reinsert the stem into the housing. Test the travel — the stem should slide smoothly with no catching.
Important warning: The clip mod is irreversible. Once you cut those feet off, you cannot put them back. If you are nervous about this, some modern stabilizers come pre-clipped from the factory. Durock V2 stabilizers, for example, ship without the secondary feet. However, as several Reddit users have pointed out, even pre-clipped stabilizers can still rattle if the wire is not balanced — so do not assume pre-clipped means rattle-free.
Method 3: The Band-Aid Mod (Dampen Impact Noise)
The band-aid mod addresses impact noise — the thud and rattle that happens when the stabilizer wire bottoms out against the PCB. It is simple, cheap, and surprisingly effective, especially on keyboards with PCB-mounted or screw-in stabilizers.
The concept is straightforward: you place a layer of soft fabric material between the stabilizer insert and the PCB to absorb the impact energy that would otherwise become noise.
Step 1: Remove the stabilizers from the PCB. Unscrew or unclip each stabilizer assembly and set it aside. You need access to the contact points on the PCB.
Step 2: Cut band-aid strips. Take a fabric bandage (the cloth kind, not the plastic waterproof kind) and cut the padded center section into small rectangles. Each rectangle should be roughly the size of the stabilizer insert footprint on the PCB — about 10mm by 15mm. Cut one strip per stabilizer insert.
Step 3: Remove the adhesive backing and press each fabric strip onto the PCB at the exact spot where the stabilizer insert makes contact. The fabric side should face up (toward the stabilizer). Press firmly to ensure good adhesion.
Step 4: Reinstall the stabilizers. Screw or clip each stabilizer back into position. The stabilizer insert should now rest on the fabric strip instead of bare PCB.
Step 5: Test the sound. Replace the keycap and type on the key. You should notice a softer, dampened bottom-out sound with significantly less rattle and echo.
Thickness warning: Do not stack multiple band-aid layers or use excessively thick padding. If the fabric is too thick, it will raise the stabilizer slightly, causing uneven key height and potential binding. One layer of standard fabric bandage padding is ideal.
If you do not want to use bandages, stabilizer foam stickers serve the same purpose. They are pre-cut to the right size and have adhesive backing. They cost a few dollars for a pack and eliminate the guesswork of cutting your own strips.
Method 4: Wire Balancing (The Overlooked Fix)
Wire balancing is the most overlooked stabilizer fix, and it might be the most important one. Multiple users across Reddit and GeekHack report that wire balancing alone solved their rattle when lubrication and clipping did not. If your stabilizer still rattles after lubing and the clip mod, a bent wire is almost certainly the culprit.
Here is the problem: stabilizer wires are thin metal bars that can bend during manufacturing, shipping, or installation. Even a slight bend — as little as one millimeter of deviation — causes one side of the stabilizer to actuate slightly before the other. This asymmetry produces rattle because the wire shifts inside the housing with every press.
The fix is to check the wire for balance and straighten it if needed. This is done using the tap and listen technique.
Step 1: Remove the keycap and expose the bare stabilizer stem and wire.
Step 2: Perform the tap test. Press the stem down at the exact center. The wire should move symmetrically — both ends should enter their housings at the same time with the same depth. If one end moves first or further than the other, the wire is unbalanced.
Step 3: Remove the wire from the stabilizer. Gently pull the wire out of both housing inserts. Be careful not to bend it further during removal.
Step 4: Check for balance. Place the wire on a completely flat surface (a glass table or granite countertop works well). Look at the wire from the side. Both bent ends should touch the surface evenly. If one end lifts off the surface, the wire is bent and needs adjustment.
Step 5: Gently bend the wire back. Using your fingers or pliers with a soft grip, apply gentle, gradual pressure to straighten the wire. Make tiny adjustments — less than you think you need. Check the flat surface again after each adjustment. Repeat until both ends sit flush.
Step 6: Reinstall and test. Snap the balanced wire back into the housing inserts. Perform the tap test again. Both ends should now move in perfect sync.
The spacebar is particularly sensitive to wire balance. If your spacebar rattles on one side only, a bent wire is the cause nine times out of ten. I have seen this specific complaint posted dozens of times on r/MechanicalKeyboards, and the answer is almost always the same: check the wire balance before trying anything else.
If the wire is permanently deformed — kinked, corroded, or bent beyond what gentle straightening can fix — replace it. Replacement stabilizer wires are inexpensive and available for most popular stabilizer models.
Method 5: The Holee Mod (Advanced Silencing)
The Holee mod is the most aggressive stabilizer silencing technique. It eliminates virtually all wire rattle and ping by wrapping the stabilizer wire in a layer of soft material before inserting it into the housing. The material fills any remaining gap between wire and housing, leaving zero room for vibration.
The Holee mod was developed by a community member and has since become one of the most popular advanced stabilizer modifications. You can perform it using either fabric tape (like PTFE tape or specialized stabilizer cloth) or pre-made stabilizer foam stickers.
Step 1: Disassemble the stabilizer completely. Remove the wire, stems, and housing from the keyboard. Clean all parts with isopropyl alcohol.
Step 2: Prepare the wrapping material. If using fabric tape, cut a thin strip roughly 5mm wide and long enough to wrap around the bent ends of the wire two to three times. If using stabilizer foam stickers, peel one sticker per wire end.
Step 3: Wrap the wire ends. Wrap the fabric tape tightly around each bent end of the wire where it inserts into the housing. You want enough material to create a snug fit inside the housing hole, but not so much that the wire cannot slide freely. Two to three wraps is usually right.
Step 4: Apply dielectric grease over the wrapping. A thin layer of dielectric grease on top of the fabric or foam helps the wire slide smoothly and adds additional sound dampening.
Step 5: Reassemble the stabilizer. Insert the wrapped wire ends into the housing. You should feel slight resistance — that means the wrapping is filling the gap properly. If the wire will not go in, you have wrapped too much material. Unwrap one layer and try again.
Step 6: Lube the stems and housing walls with Krytox 205g0 as described in Method 1, then reassemble everything and test.
Holee mod vs band-aid mod: These two mods serve different purposes and work well together. The band-aid mod dampens impact noise on the PCB. The Holee mod eliminates wire rattle inside the housing. For the quietest possible stabilizer, do both. The band-aid mod goes on the PCB, and the Holee mod wraps the wire.
Mushiness warning: Several users warn that the Holee mod can make stabilizers feel mushy if the wrapping material is too thick. The key feels soft and slow to return. If this happens, reduce the number of wraps or switch to a thinner material like stabilizer foam stickers instead of fabric tape.
Quick Fix: Stabilizer Rattle Without Disassembly
Not everyone wants to open their keyboard. If you have a hotswap board, a keyboard you cannot easily disassemble, or you just want a temporary fix, there are two community-tested tricks that reduce rattle without taking anything apart.
The paper or plastic shim trick. This is the famous Reddit five-minute fix. Take a small piece of thin plastic (a piece of a zip-top bag works well) or a folded piece of paper. Slide it between the stabilizer wire and the plate, right where the wire enters the housing. The shim adds just enough pressure to reduce wire movement and dampen the rattle. It is not a permanent fix, but it noticeably reduces noise and takes under five minutes.
The cling wrap trick. Popularized by KineticLabs, this addresses rattle caused by a loose fit between the keycap and the stabilizer stem. Remove the keycap, place a small piece of plastic cling wrap over the stabilizer stem opening on the bottom of the keycap, and replace the keycap. The cling wrap fills the micro-gap between the stem and keycap, eliminating stem wobble and the associated rattle. This works particularly well on keycaps with loose stabilizer stem tolerances.
Both of these fixes are temporary. They reduce noise but do not address the root cause. For a permanent solution, you will eventually need to disassemble the stabilizer and apply the methods described above.
Troubleshooting: What If Rattle Still Persists?
You lubed the stabilizers, clipped the stems, applied the band-aid mod, balanced the wires, and maybe even did the Holee mod — and the keyboard still rattles. This is frustrating but not uncommon. Here are the most common reasons and their solutions.
Stabilizer rattle after lubing. If you applied lube and the rattle is still there, the most likely causes are: you did not use enough dielectric grease in the wire holes, the wire is bent (wire balancing issue), or you applied lube to dirty parts that were not cleaned with alcohol first. Re-open the stabilizer, clean thoroughly, apply more dielectric grease generously in the wire holes, and check the wire balance.
Stabilizer rattle even after replacing them. Users on the Linus Tech Tips forum report that even brand-new replacement stabilizers can rattle if the wires are not balanced. New does not mean balanced — factory wires can be bent during packaging. Always perform the tap test and wire balancing on new stabilizers before installing them. Also verify that your new stabilizers are compatible with your keyboard’s mounting style.
Pre-clipped stabilizers still rattle. Pre-clipped stabilizers eliminate stem rattle but do nothing for wire rattle. If your pre-clipped stabilizers still make noise, the problem is almost certainly the wire. Apply dielectric grease and check wire balance.
Plate-mounted stabilizer rattle that will not go away. Plate-mounted stabilizers are held by friction, and if the plate holes are worn or oversized, the entire housing can shift during typing. This produces a rattle that no amount of internal lubing will fix. Solutions include: adding a small piece of tape around the outside of the stabilizer housing to create a tighter fit in the plate, or upgrading to PCB-mounted or screw-in stabilizers if your keyboard supports them.
Hotswap keyboard stabilizer rattle. Hotswap keyboards limit your modification options because the hotswap sockets and PCB layout may not support screw-in stabilizers. However, you can still lube, clip, band-aid mod, and Holee mod on most hotswap boards. The key limitation is that some hotswap boards have plate-mounted stabilizers that are harder to remove. Check your keyboard’s documentation for stabilizer removal instructions before forcing anything.
When to replace your stabilizers entirely. If you have tried all five methods and the rattle persists, your stabilizers may be damaged beyond repair. Signs it is time to replace them: the wire is permanently kinked and cannot be straightened, the plastic housing is cracked or warped, the stems are worn down from years of use, or the stabilizer insert points on the PCB or plate are damaged. Replacing stabilizers with a quality set of screw-in stabilizers (Durock V2, Staebies, or equivalent) costs between fifteen and thirty dollars and provides the best foundation for a rattle-free keyboard.
Environmental factors. Few guides discuss this, but temperature and humidity can affect stabilizer performance. Extreme cold can make lubricants thicker and cause sluggish key return. High humidity can cause metal stabilizer wires to corrode slightly, increasing friction over time. If you live in a very humid climate, consider re-lubing your stabilizers more frequently and storing your keyboard in a dry environment.
Maintenance Tips to Prevent Future Rattle
One of the biggest content gaps I found across competing guides is maintenance. Stabilizer rattle is not a one-time fix — it can return over time as lubricant migrates, settles, or dries out. Here is a simple maintenance schedule to keep your stabilizers quiet for years.
How often should you re-lube stabilizers? For most users, every 12 to 18 months is sufficient. If you type heavily (over six hours per day) or live in a hot, humid climate, consider re-lubing every 8 to 12 months. Signs that your stabilizers need fresh lube include the gradual return of a slight rattle, a dry or scratchy sound, or keys that feel less smooth than they used to.
Safe keycap removal. Always use a wire keycap puller rather than a plastic ring puller. Wire pullers distribute force evenly across the keycap and reduce stress on the stabilizer stem. Pull straight up — never at an angle. Angled removal can bend the stabilizer wire or crack the stem. If a keycap is stuck, wiggle it gently side to side while pulling up, rather than forcing it.
Cleaning schedule. Every few months, use compressed air or a keyboard vacuum to remove dust and debris from around the stabilizer area. Dust that works its way into the housing can mix with lubricant and create a gritty paste that increases friction and noise. If you notice grittiness, remove the stabilizer, clean with isopropyl alcohol, and reapply fresh lube.
Store your keyboard properly. Avoid leaving your keyboard in direct sunlight or in a car during extreme temperatures. Heat can soften lubricants and cause them to migrate away from critical contact points. Cold can thicken lubricants and make keys feel sluggish. A desk mat or keyboard cover when not in use helps keep dust out of the stabilizer mechanisms.
Frequently Asked Questions
How to fix rattly stabilizers on keyboard?
To fix rattly stabilizers: (1) Apply dielectric grease generously inside the stabilizer housing wire holes and Krytox 205g0 on the stems and housing walls, (2) Balance the stabilizer wire using the tap test to ensure both sides actuate evenly, (3) Clip the secondary stem feet with flush cutters, (4) Apply the band-aid mod to the PCB for impact dampening. Start with lubrication and wire balancing first, as these two fixes resolve most rattle cases.
How to get rid of mechanical keyboard ping?
Mechanical keyboard ping can come from three sources: stabilizer wires (fix with dielectric grease in the wire holes and wire balancing), switch springs (fix with Krytox 105 oil on the springs or switching to factory-lubed switches), or switch leaves (fix with a small amount of Krytox 205g0 on the metal leaf). Identify the source by testing keys with and without stabilizers — if only large keys ping, it is the stabilizer.
Why is my keyboard rattling?
Keyboard rattle is caused by excess play between moving parts inside the keyboard, such as the stabilizer wire, housing, stem, and keycap. When these components are not tightly fitted or properly lubricated, they vibrate against each other during actuation. The most common cause is a loose or unbalanced stabilizer wire rattling inside its housing on larger keys like the spacebar, shift, and enter.
How to fix a broken stabilizer keyboard?
If stabilizer rattle persists after lubing, clipping, the band-aid mod, and wire balancing, your stabilizers may be damaged. Replace bent or kinked wires, upgrade from plate-mounted to screw-in stabilizers for better stability, or consider POM material stabilizers for smoother operation. Quality screw-in stabilizers like Durock V2 or AEBoards Staebies cost 15 to 30 dollars and provide an excellent foundation for a rattle-free build.
Can I fix stabilizer rattle without taking my keyboard apart?
Yes, two quick fixes work without disassembly. The paper or plastic shim trick involves sliding a thin piece of plastic between the stabilizer wire and plate to reduce movement. The cling wrap trick involves placing plastic wrap over the stabilizer stem before replacing the keycap to fill gaps. Both are temporary fixes that reduce noise but do not address the root cause.
Is dielectric grease or Krytox better for stabilizers?
You need both, not one or the other. Use dielectric grease inside the wire holes of the stabilizer housing — its thick consistency fills gaps around the metal wire and eliminates ping. Use Krytox 205g0 on the plastic stems and housing walls where smooth sliding friction is needed. Using dielectric grease on plastic parts makes keys feel mushy, and Krytox is too thin to stop wire ping effectively.
Conclusion
Fixing stabilizer rattle and ping on a mechanical keyboard comes down to five proven methods applied in the right order: lubrication first, then wire balancing, then the clip mod, band-aid mod, and finally the Holee mod for stubborn cases. The diagnostic tap test tells you which fix your specific rattle needs, and the quick no-disassembly tricks work when you cannot open your board.
The most important takeaway I can share from years of modding stabilizers: do not skip wire balancing. Lube alone masks the problem temporarily, but a balanced wire is what creates lasting silence. Start there, and you will likely resolve most of your stabilizer noise before trying anything else.
If all five methods fail, replace your stabilizers with quality screw-in models. Fifteen to thirty dollars buys a set that will serve you for years with minimal maintenance. Your typing experience will feel completely transformed — and that annoying rattle will finally be gone for good.